How to Find Default Gateway IP Address on Windows, Android, Mac and Linux
Sometimes you’re setting up a new Wi-Fi router, connecting a printer to the network, or fixing a gaming issue, and suddenly you realize you need the IP address of your “Default Gateway”. But do you know what this ‘Default Gateway’ is and how to find its IP address?
What is the Default Gateway in a Network?
The default gateway of a router in a network is the IP address that devices (such as computers and phones) use to communicate with the Internet or other networks. This is a hidden bridge between your home’s local network and the Internet world.
If your device runs on a specific operating system like Windows, Android, Mac, or Linux and connects to a Wi-Fi network, you may need to find the router’s default gateway. Do not worry! Below, I have shared step-by-step instructions on how you can check a router’s default gateway IP address.
How to Find Your Router’s Default Gateway IP Address
1. On Windows
If you are a Windows computer or laptop user, you can check the default gateway IP address of your router by simply entering a command line in CMD. CMD, or Command Prompt, is a command-line interpreter that allows users to interact with the operating system via the command line.
To check the default gateway in Windows 11/10:
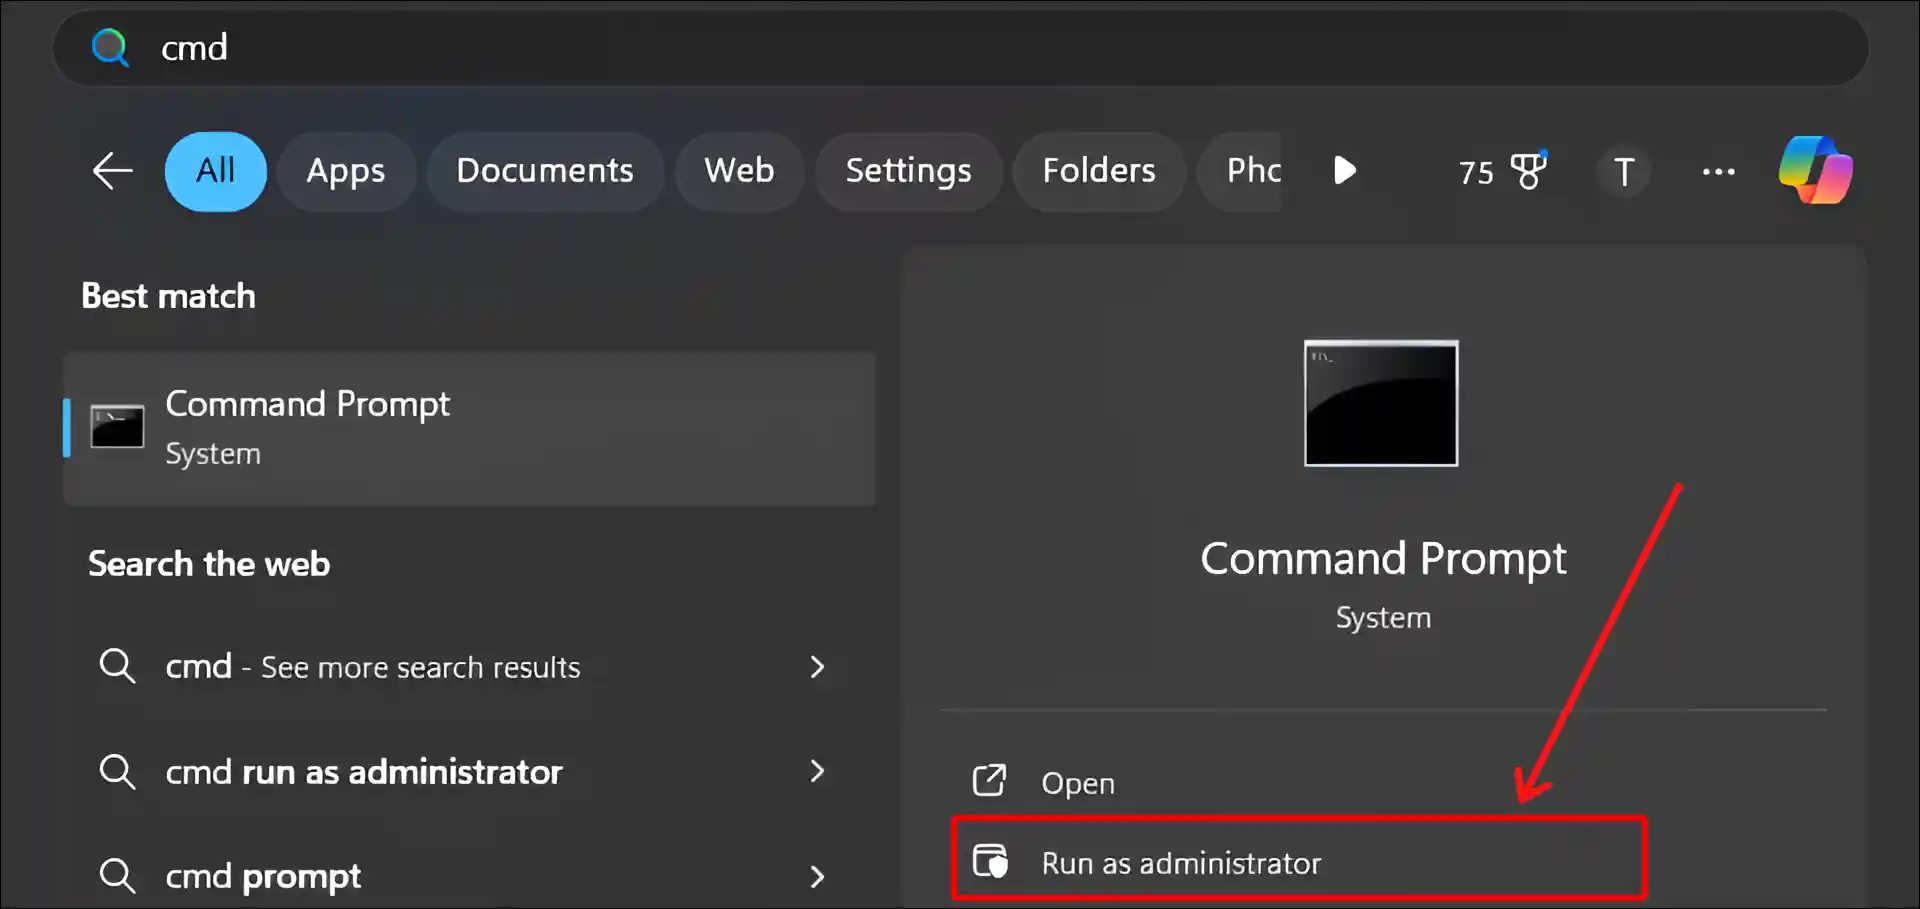
Step 1. Press Windows + S and Type “CMD” and then Run as Administrator.
A User Account Control (UAC) Prompt will Appear; Click Yes to Grant Administrative Permissions.
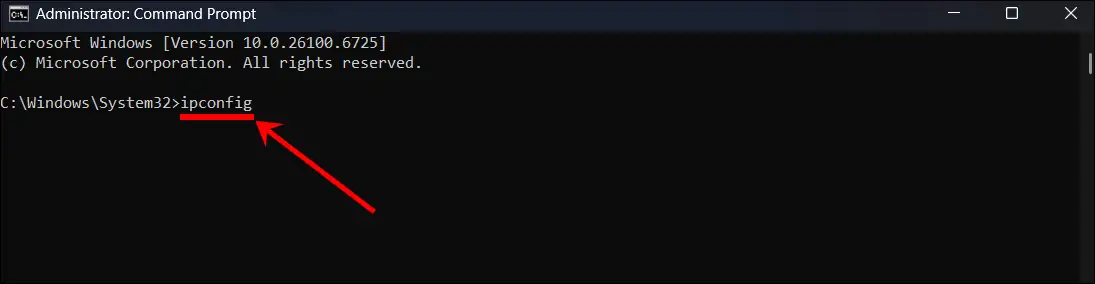
Step 2. Type ipconfig and Hit the Enter.
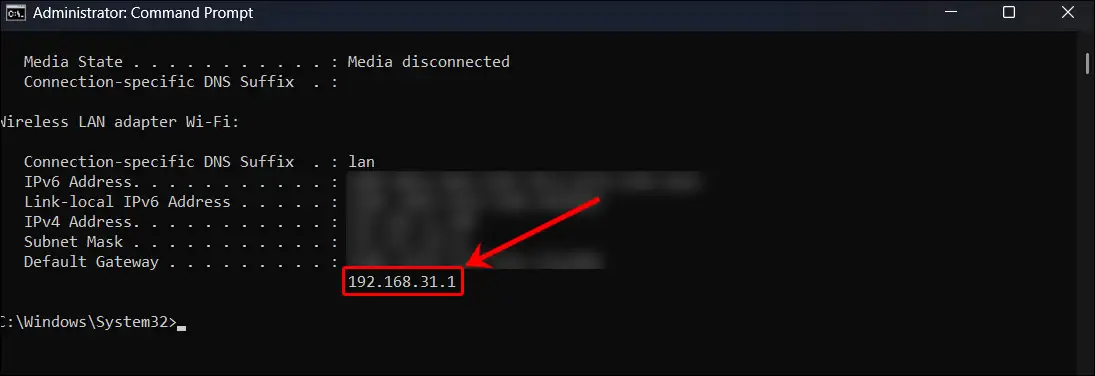
Step 3. Now, Look for the IP Address Next to Default Gateway.
2. On macOS
Just like in Windows, finding the IP address of a connected Wi-Fi router is easy in macOS. Using the macOS settings, you can do this in just a few moments. The steps are outlined below.
To check the default gateway IP address using macOS’ system settings:
Step 1. Click the Apple Icon in the Top-Left Corner and Select System Settings.
Step 2. Click on Network and Select Your Connected Network.
Step 3. Click on the Details… Button.
Step 4. Now, Go to TCP/IP Tab and the Default Gateway is Listed Next to Router.
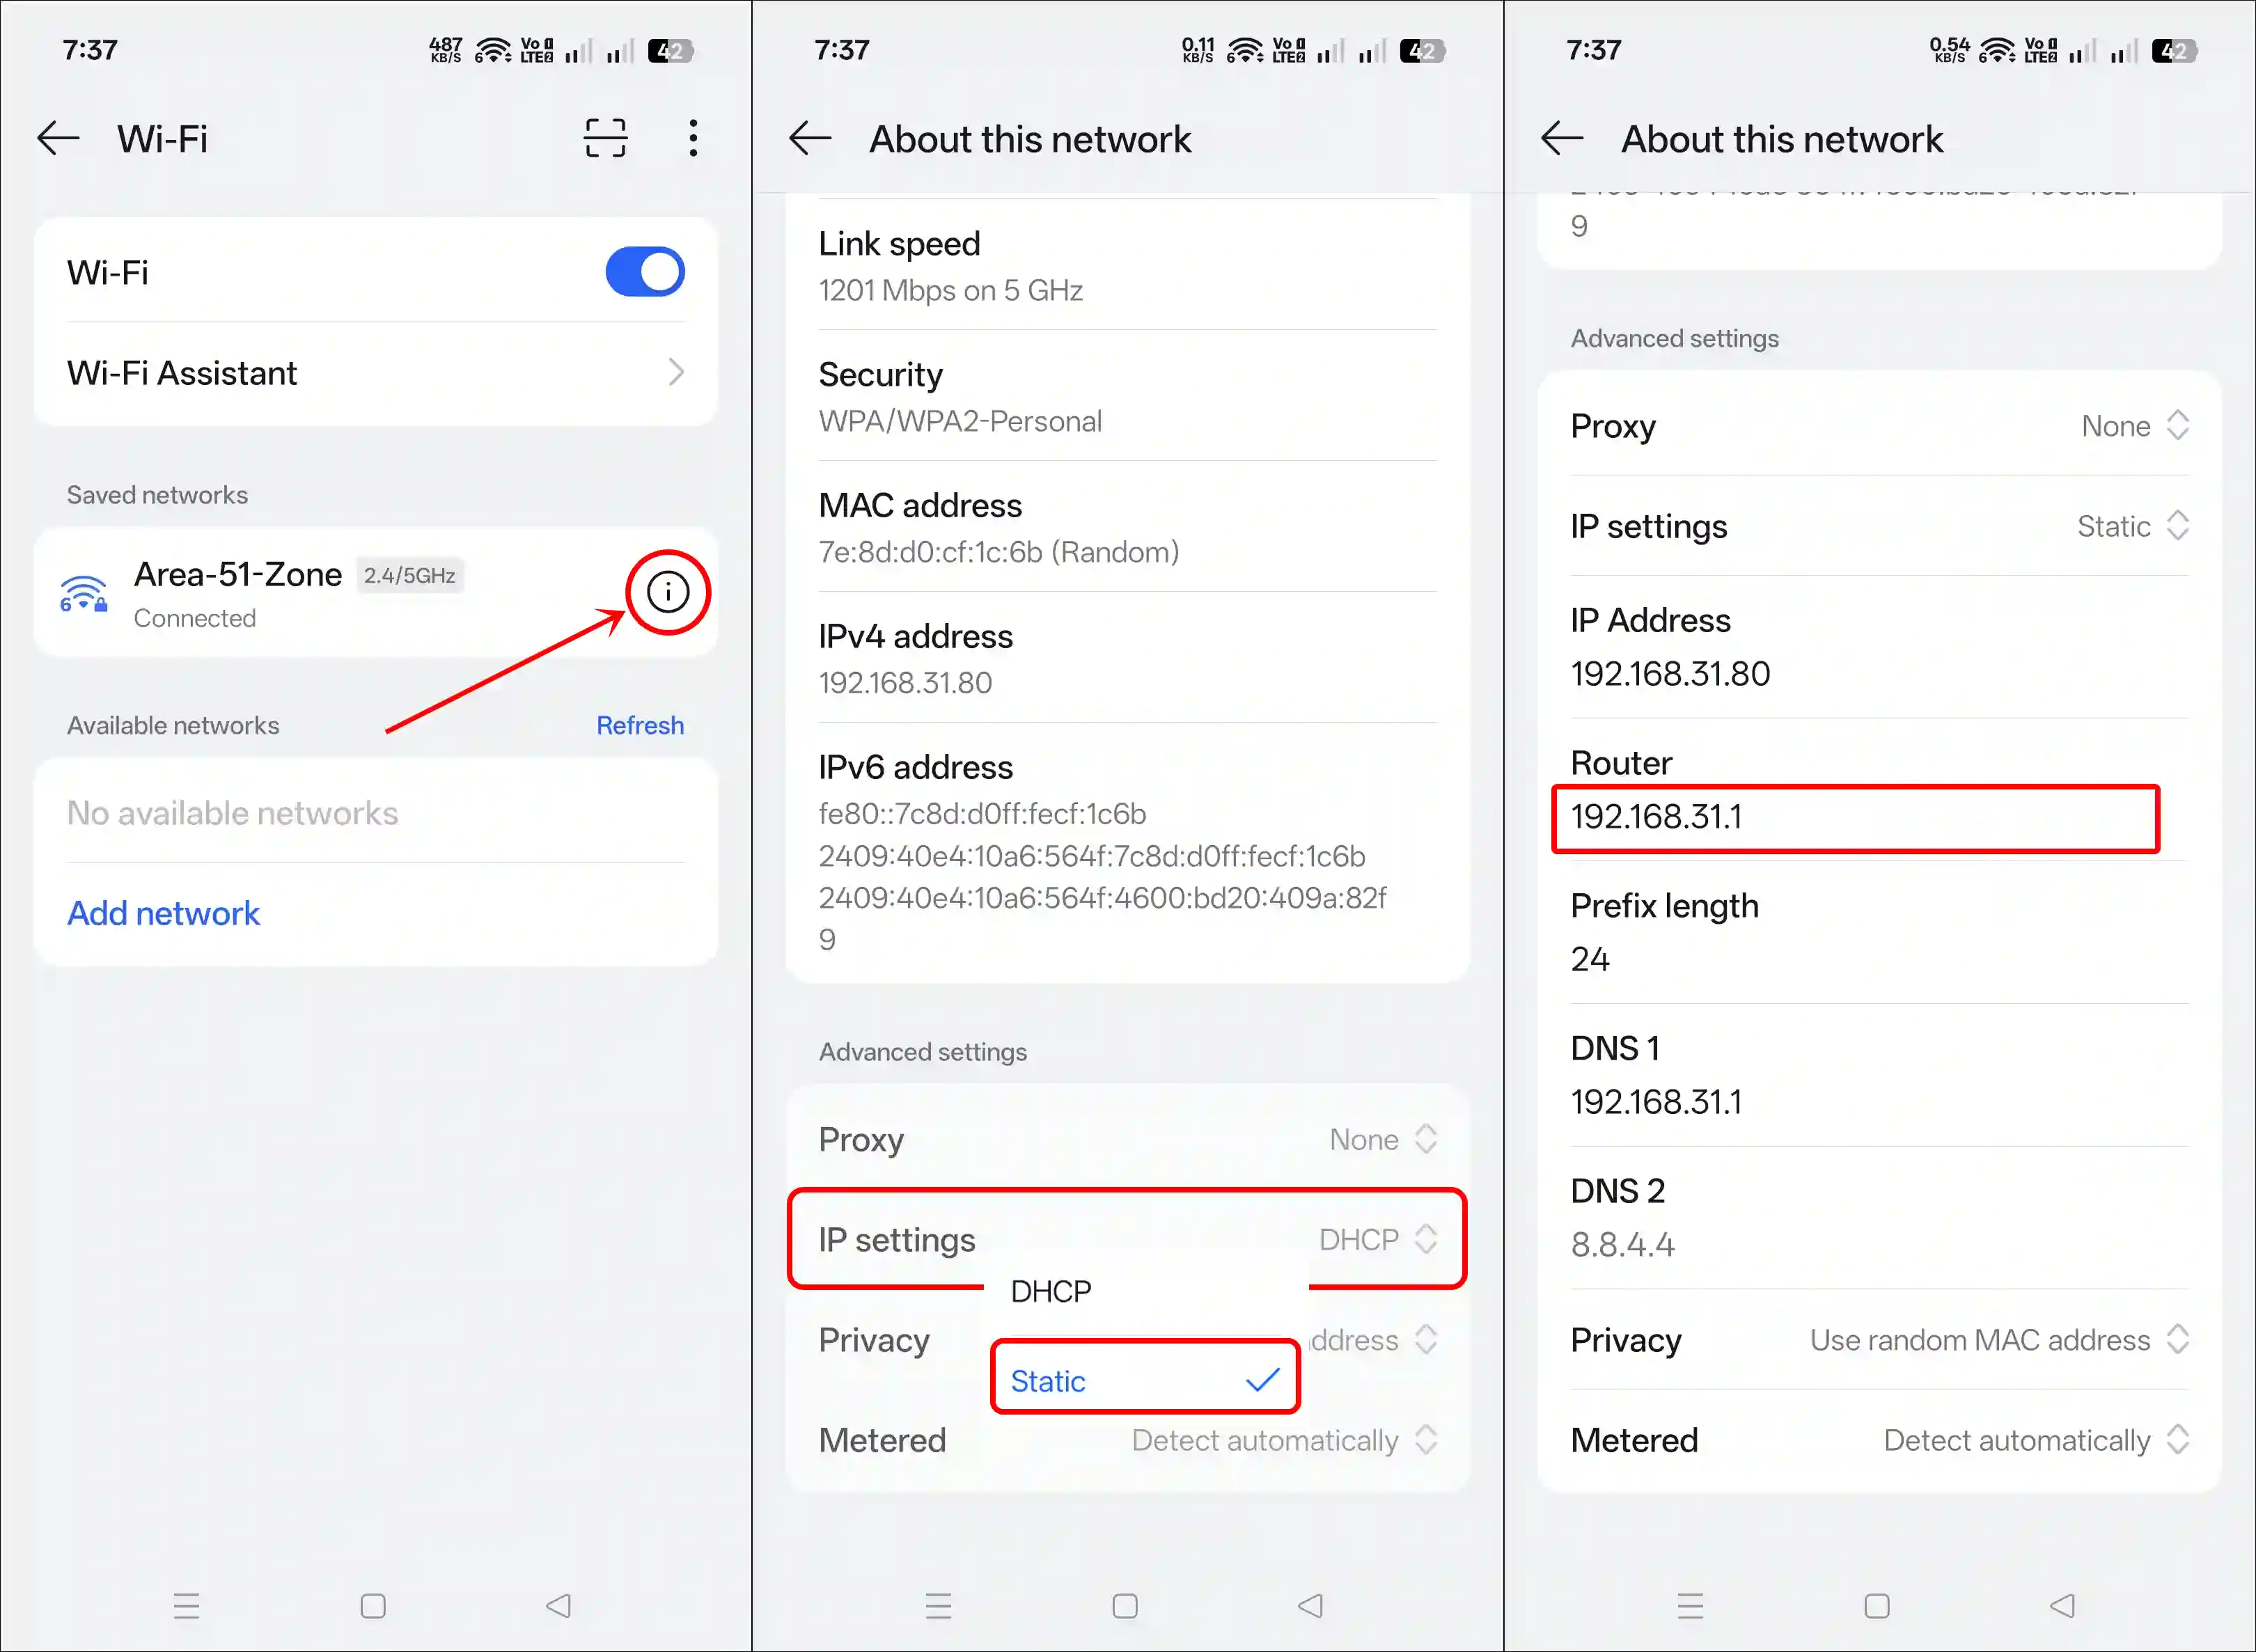
3. On Android
If you are an Android phone user, then let me tell you that there is a built-in option in the WiFi section of Android that shows the default gateway IP address of the connected WiFi router. It is hidden deep inside the settings; it is very easy to find.
To get the default gateway IP address on an Android phone:
Step 1. Open Settings App and Go to Wi-Fi.
Step 2. Tap on ⓘ Icon Next to Your Connected Network.
Step 3. Tap on IP Settings and Select Static.
Step 4. Now, You Can See Your Default Gateway IP Address Under the Router.
Also read: What is the ipconfig /displaydns Command and How to Use it on Android?
4. On Linux
Linux is an OS just like Windows and macOS. If you’re a Linux user, you can find out the default gateway of your connected network with a simple command line. To perform this action in a Linux system, you will have to use the terminal.
To find the default gateway IP address in Linux using the terminal:
Step 1. Open Your Terminal in System.
Step 2. Type ip route and press Enter.
Step 3. Find the Line that Starts with “Default Via” and Note the IP Address.
The output will show a line similar to:
default via 192.168.1.1 dev eth0 proto staticIn this example, 192.168.1.1 is the default gateway IP address.
That’s all! You’re done…
Also read: How to Stop Wi-Fi from Switching Between 2.4 GHz and 5 GHz in Windows 11
I hope this article was helpful to you, and you learned how to find the default gateway IP address on Windows, Android, Mac, and Linux. If you have any other questions about the Wi-Fi, feel free to ask in the comments below. Don’t forget to share this article.


Apn