How to Turn On Spell Check & Autocorrect in Notepad on Windows 11
If you have updated the Notepad application to the latest version, you can now use the spell check and autocorrect features. Microsoft has added built-in spelling capabilities to Notepad.
In this article, you will learn how you can enable the spell check and autocorrect features in Notepad on a Windows 11-running laptop or computer. Once enabled, Notepad will highlight and suggest misspelled words so you can easily identify and correct mistakes.
Note: Notepad’s Spell Check feature can be enabled for “.txt”, “.md”, “.srt/.ass”, “.lrc”, and “.lic”.
Turning On Spell Check & Autocorrect in Notepad on Windows 11
Before following the further procedure, make sure that your Notepad application is updated to the latest version.
To enable the spell check and autocorrect features in Notepad for Windows 11:
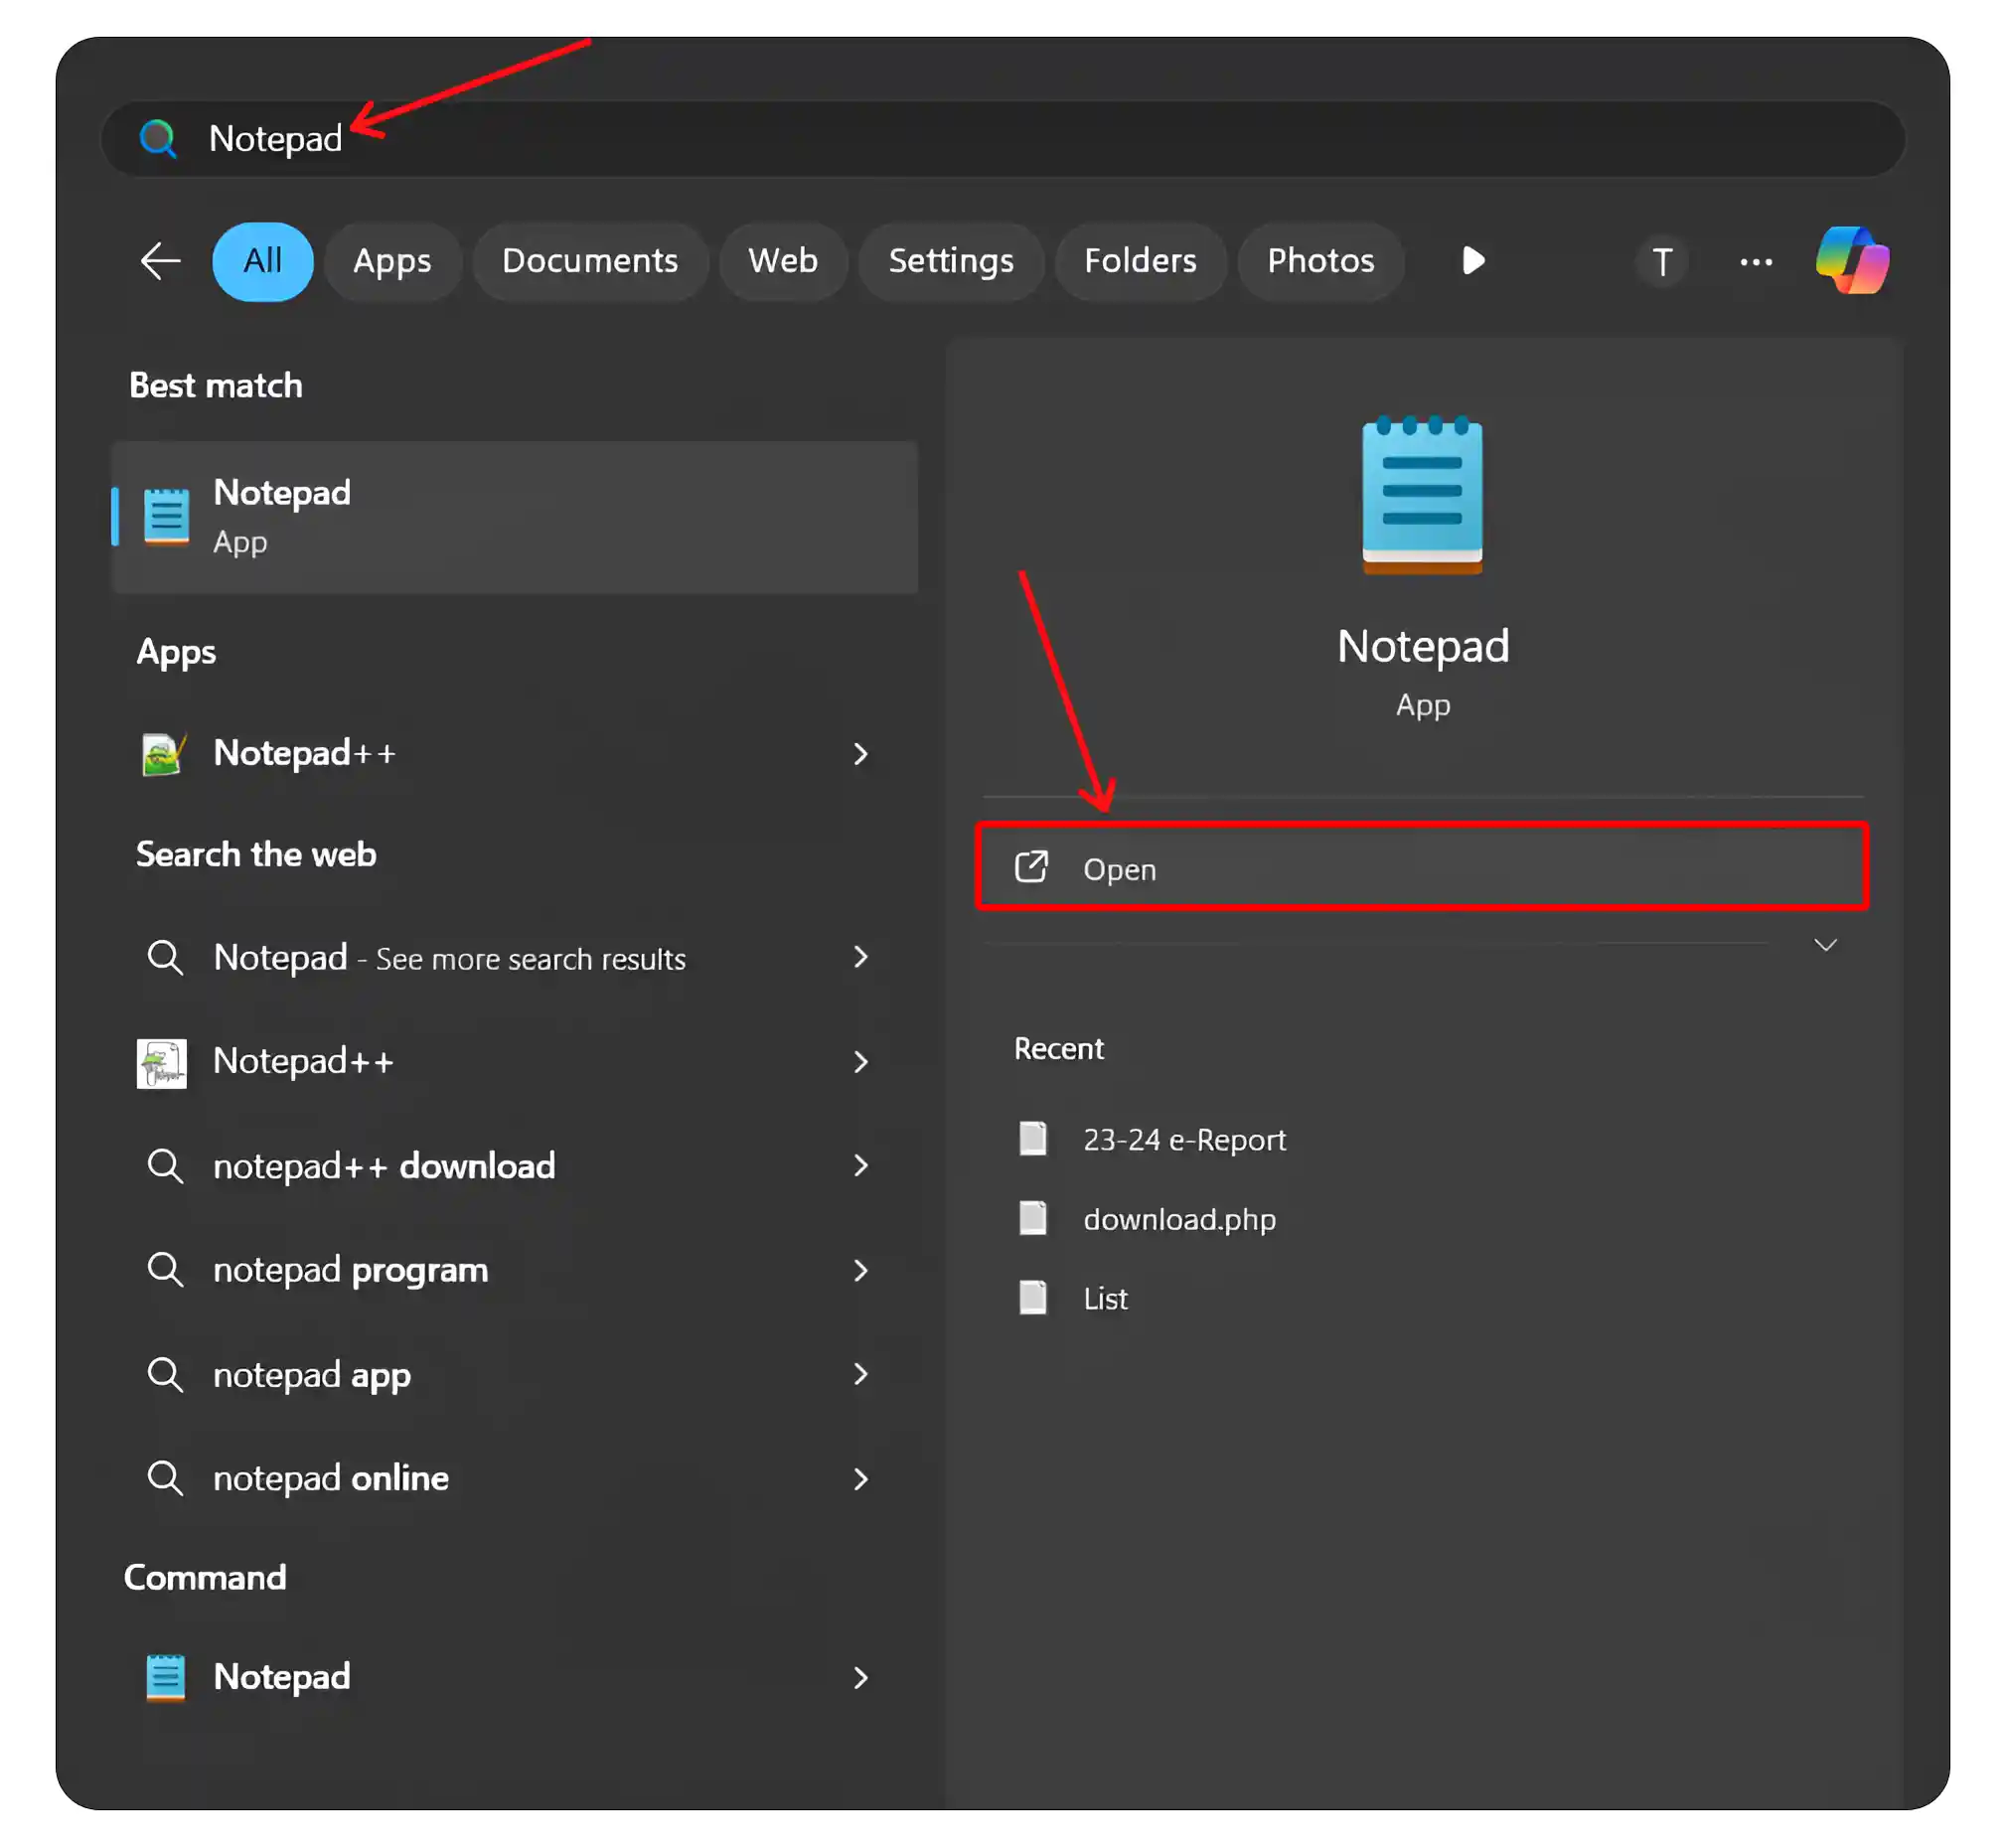
- Press Windows + S Simultaneously.
- Search for “Notepad” and Open It.
- Click on Gear Icon (⚙) at Top Right Corner.
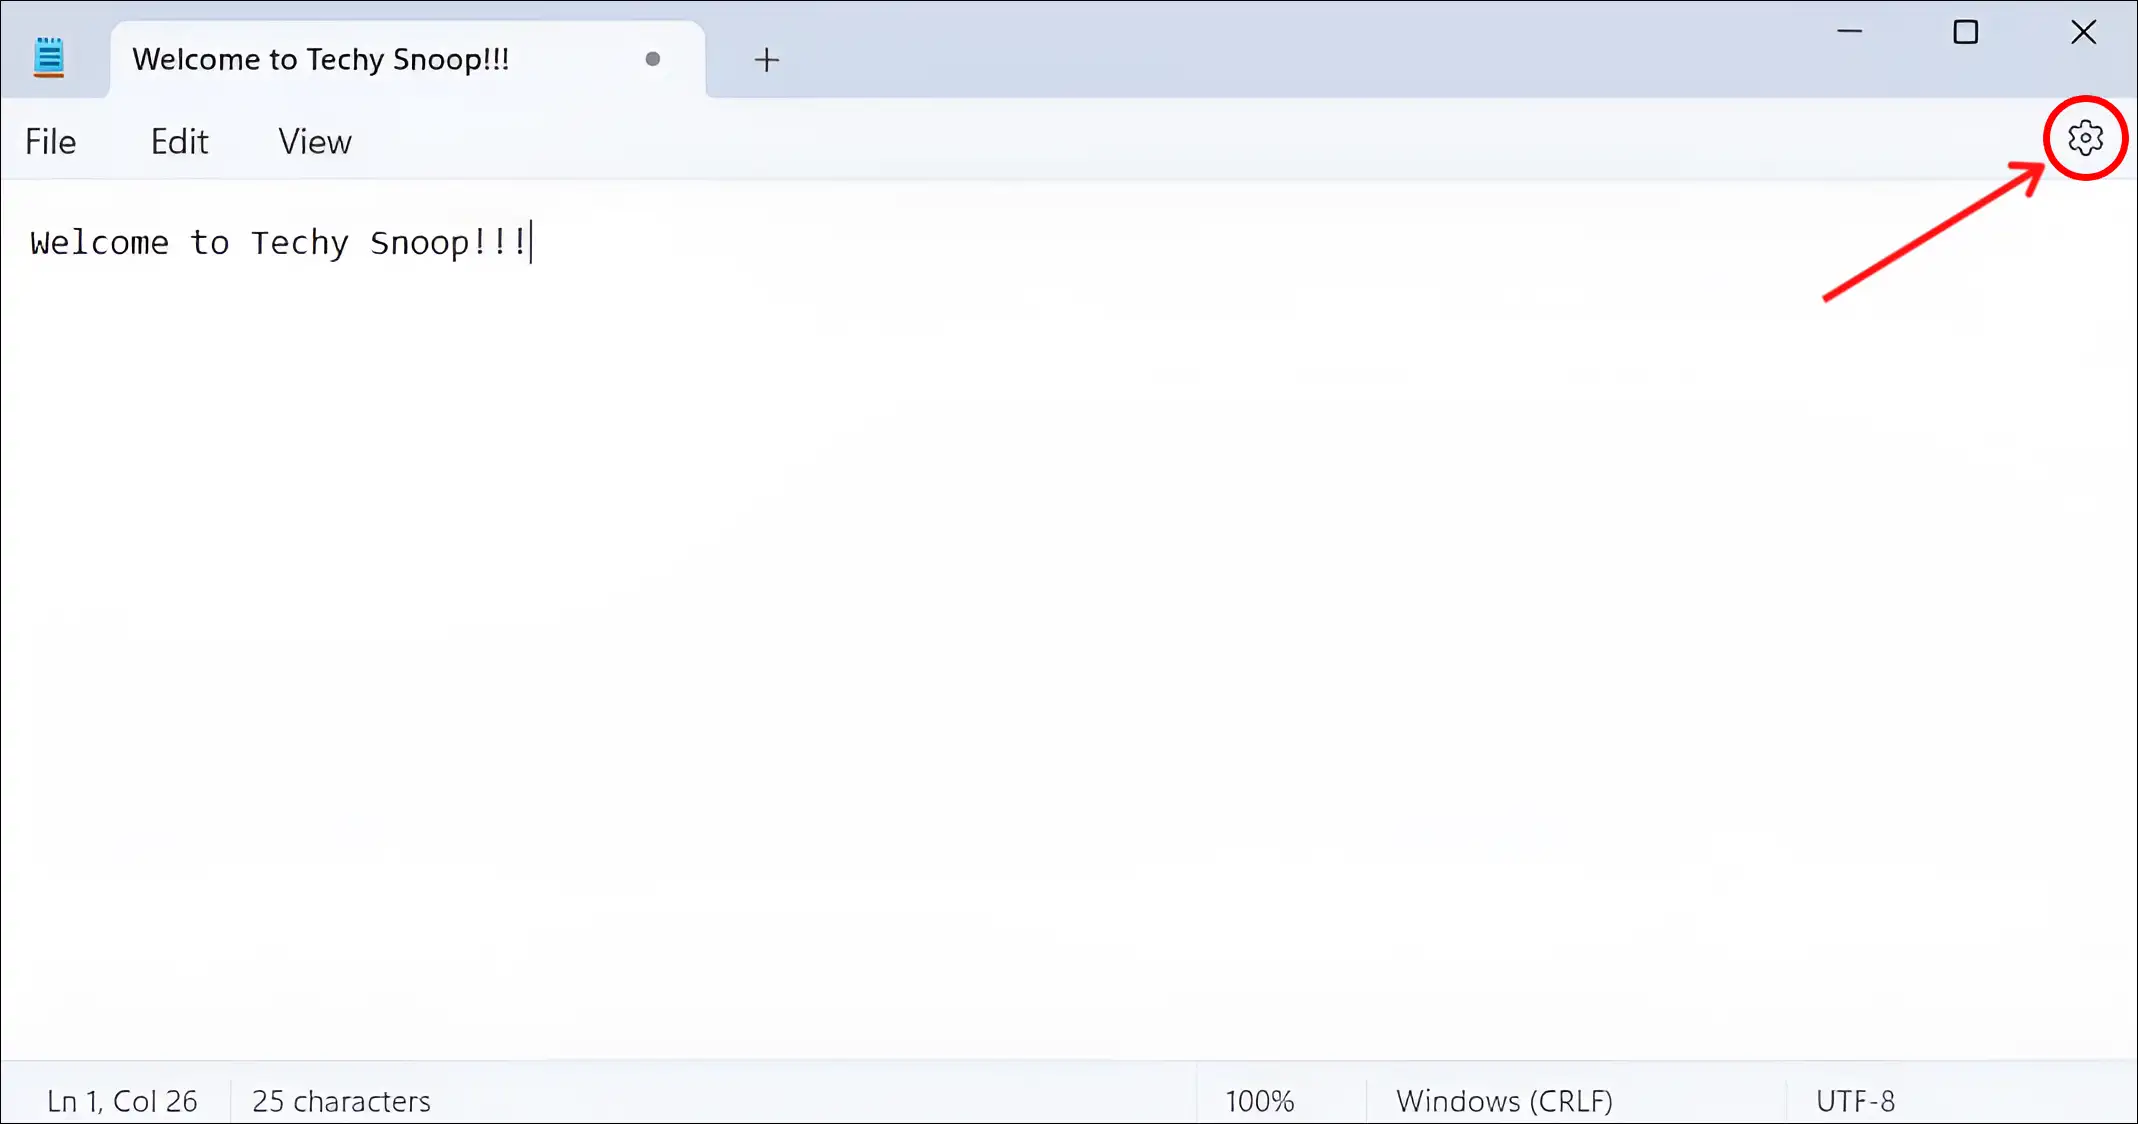
- Now, Turn On the “Spell Check” and “Autocorrect” Toggles.
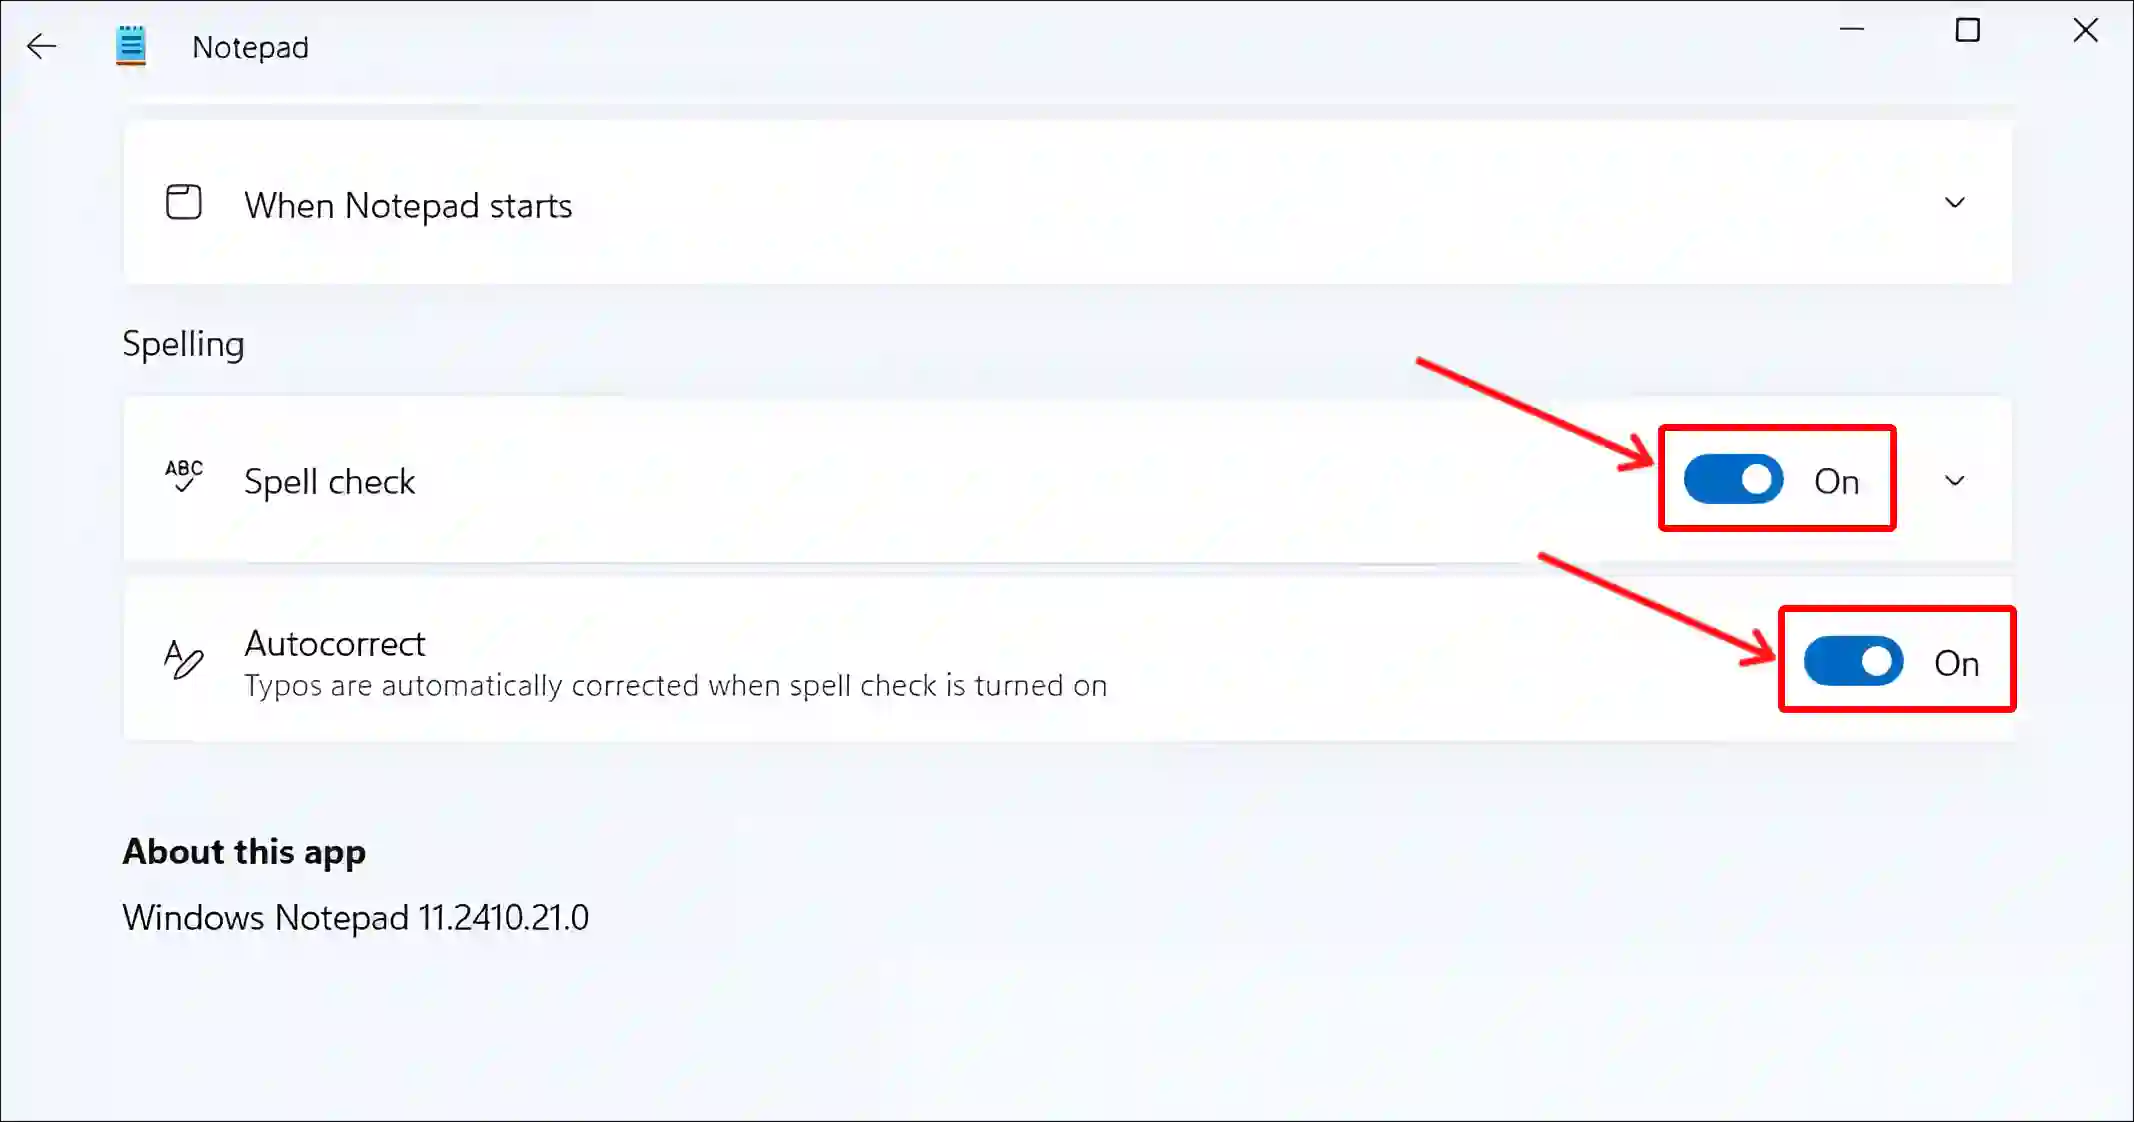
That’s all! Now, you have successfully activated spell check and autocorrect in your Notepad. If you find any grammatical errors, press the “Shift + F10” shortcut key to select the suggested corrections.
Also read: How to Enable Group Policy Editor in Windows 11 Home Edition
FAQs
Q 1. Does Notepad have spell check?
Answer – Yes! Now Notepad has a built-in spell check and autocorrect, and both features are now available for all Windows 11 users.
Q 2. What does Notepad’s spell check feature do?
Answer – Notepad’s spell check feature highlights misspelled words with red underlines, provides spelling suggestions, and includes autocorrect for common typing mistakes. This can enhance your typing experience.
I hope you found this article useful, and you learned how to turn on the Spell Check feature in Notepad. If you have any problems related to Windows, then tell us by commenting below. Please share this article.

