How to Check What Motherboard I Have (3 Ways)
If you use a laptop, Chromebook, or PC, all of these are nothing without a motherboard. Motherboards are used in all these systems, but did you know that these motherboards are made by different companies? Let’s know how to check which motherboard is installed in your laptop or computer.
What is a Motherboard and Why It is Important?
A motherboard is the backbone of your system that connects together all the components, including the CPU, RAM, GPU, and SSD storage. You can also call the motherboard a central hub that distributes power, provides expansion slots for upgrades, contains the necessary firmware for booting, and provides various ports for connectivity.

If you built a PC a long time ago or you have an old laptop (running on Windows 10/11) and you don’t remember which motherboard was used in it, So, luckily, you can easily find out which motherboard you have in your system.
How to Check What Motherboard I Have: 3 Ways
#1. Using Windows System Information
The System Information feature of Windows 10 or Windows 11 can help you find out which motherboard your PC or laptop has. This is an easy and fast way to know the system’s motherboard information. For this, follow the steps given below.
To see what motherboard you have on your pc or laptop:
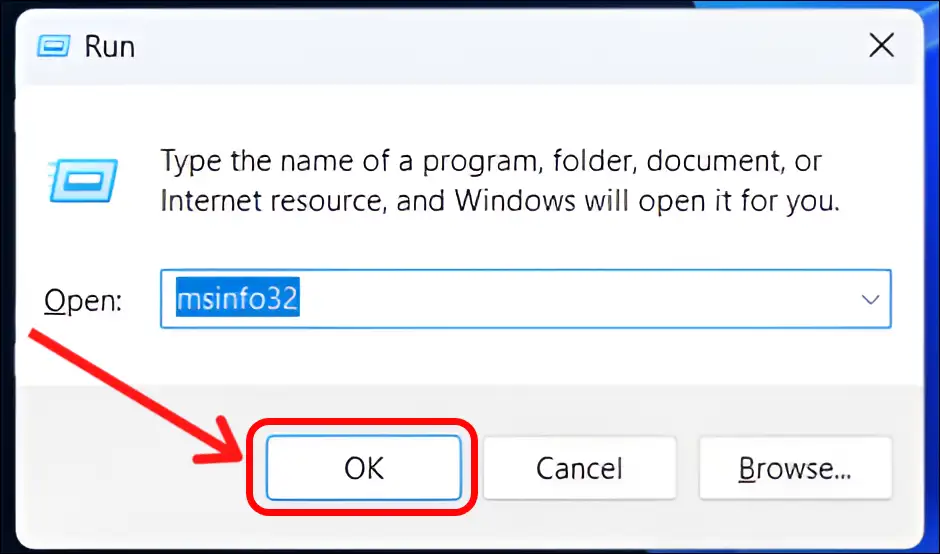
1. Press Windows + R Key to Open ‘Run’ Dialog Box.
2. Type msinfo32 in the Box and Hit OK.
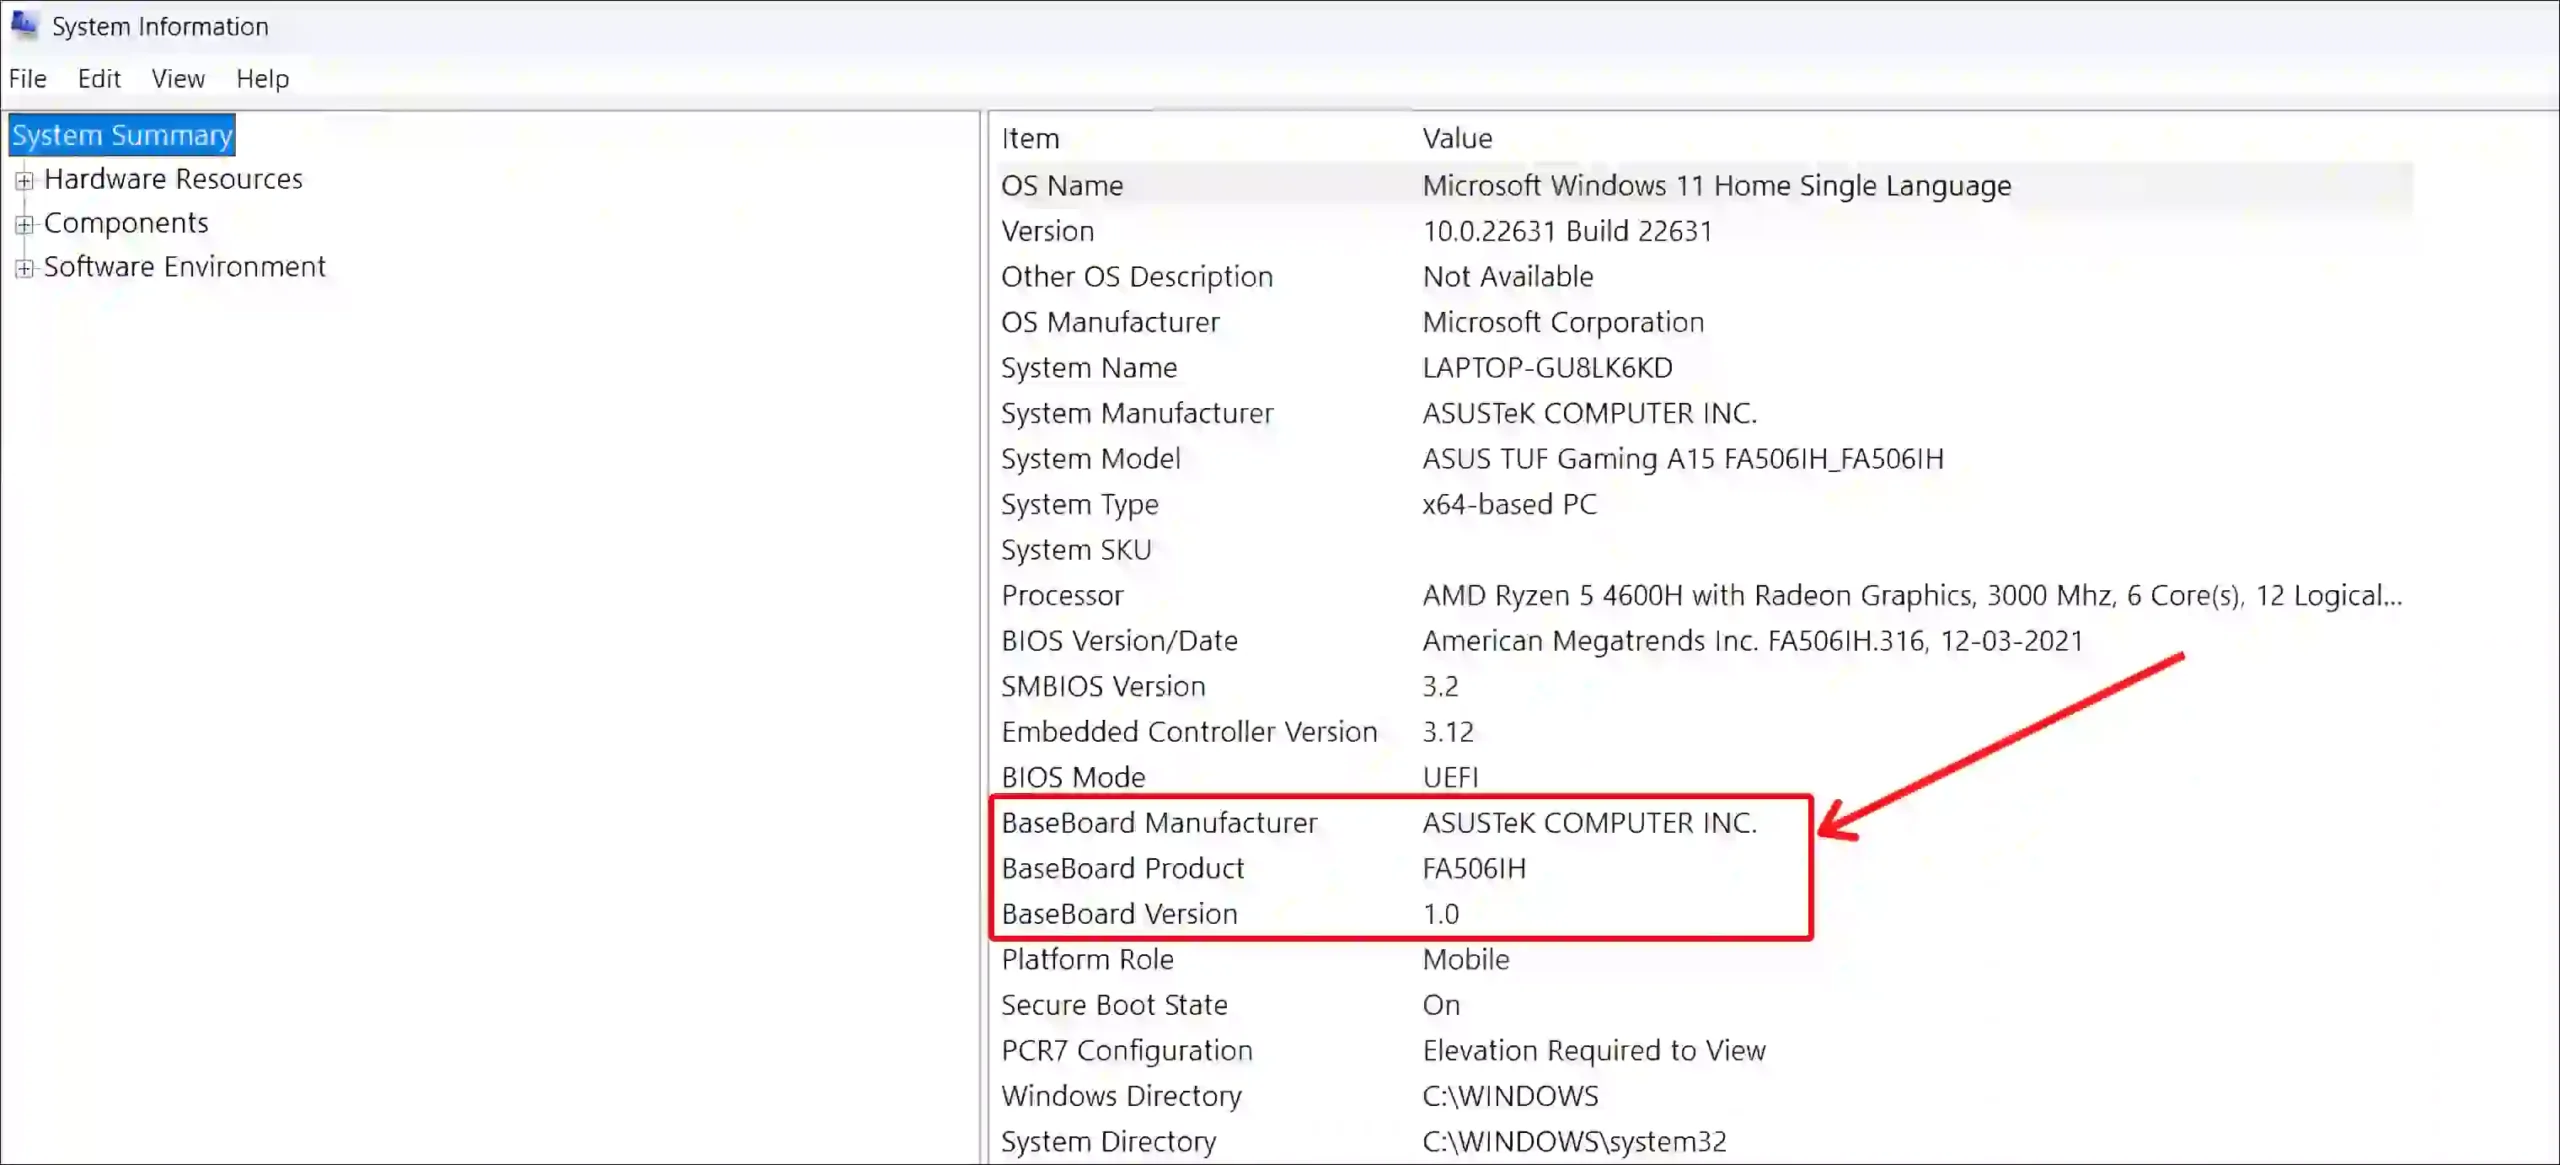
3. Now on the right side of the System Information box, Baseboard Manufacturer, Baseboard Product, and Baseboard Version show the details of your motherboard.
That’s it…
#2. Using Command Prompt
Command Prompt is a text-based interface that allows Windows users to execute commands to manage files, troubleshoot problems, and configure system settings. You can also get motherboard information using Command Prompt. For this, follow the steps given below.
To find your motherboard information using CMD:
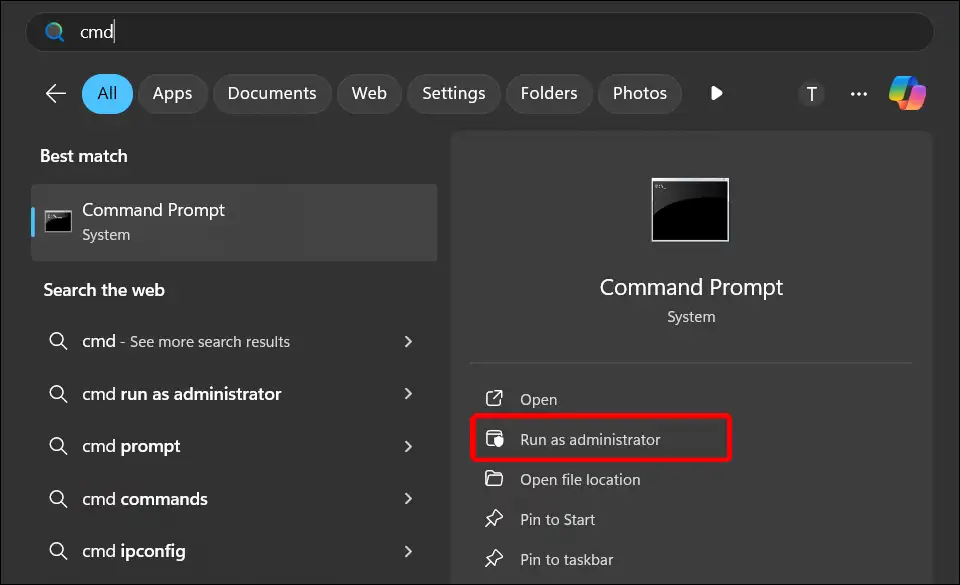
Step 1: Press Windows Key and Search “cmd”, and Click on Run as Administrator.
Step 2: Copy-Paste “wmic baseboard get product,manufacturer,version,serialnumber” and Hit Enter.

Step 3: Now You can See Your Motherboard’s Manufacturer, Product, SerialNumber and Version.

That’s It…
#3. Using PowerShell
PowerShell is a powerful command-line shell. It is also the default Windows program. You can also check motherboard information by entering the command line in PowerShell. For this, follow the steps given below.
To check your motherboard information using PowerShell:
1. Press Windows Key and Search “powershell”, and Click on Run as Administrator.
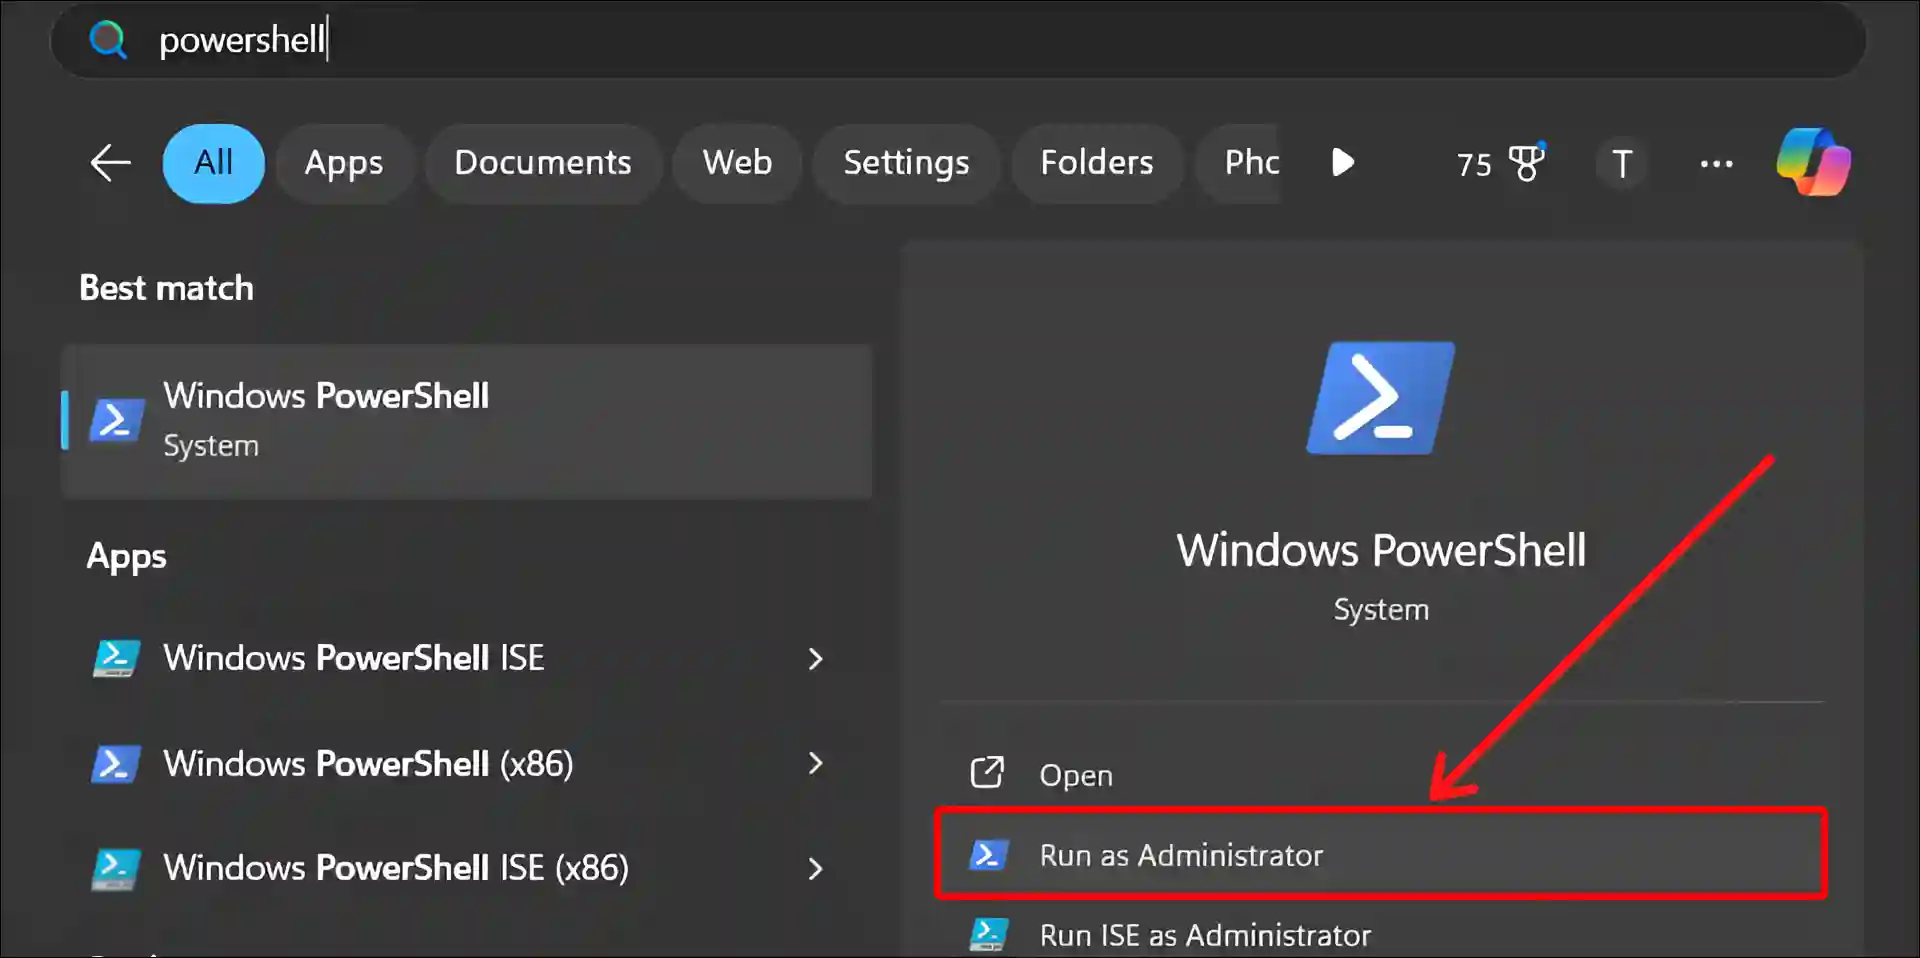
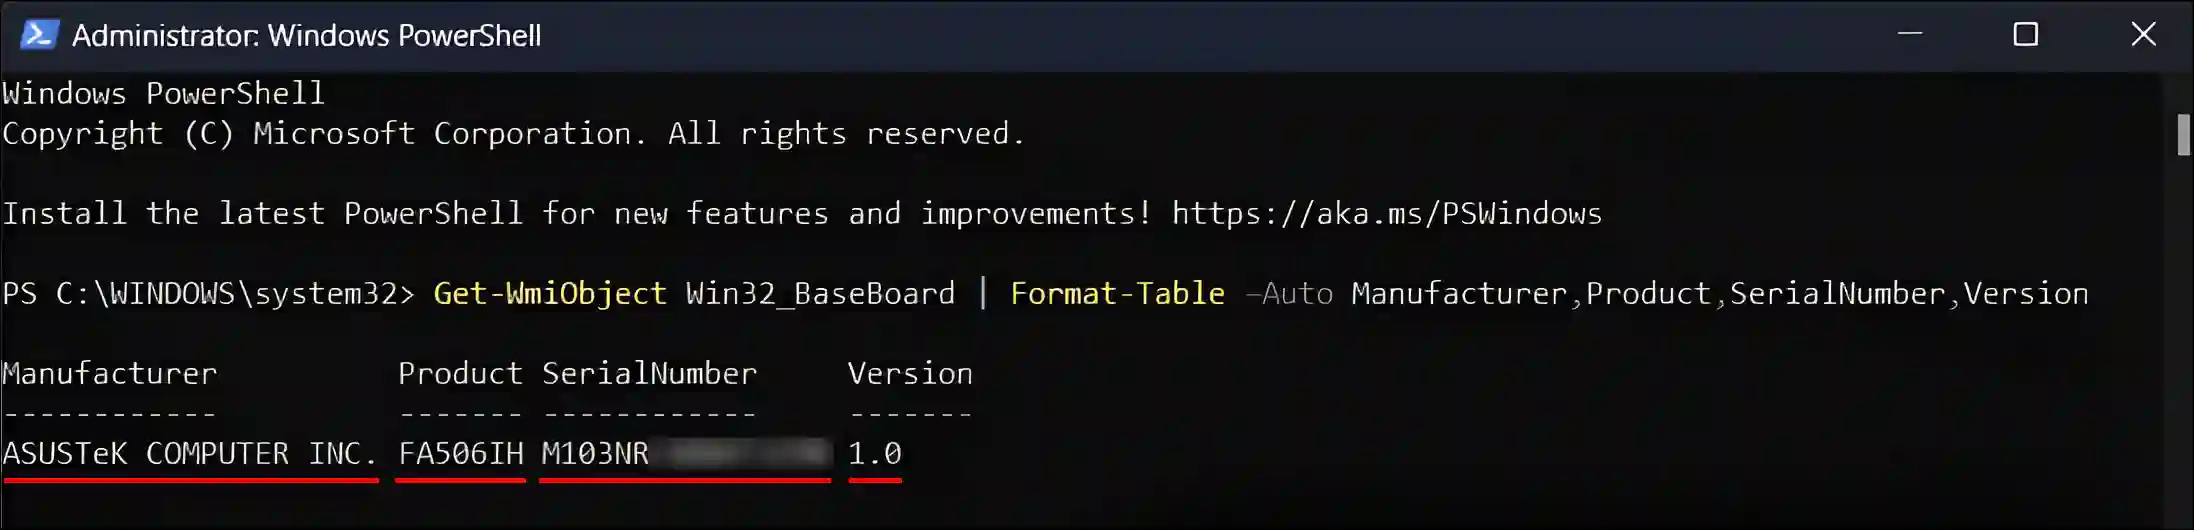
2. Copy-Paste “Get-WmiObject Win32_BaseBoard | Format-Table –Auto Manufacturer,Product,SerialNumber,Version” and Hit Enter.

3. Now You can See Your Motherboard’s Manufacturer, Product, SerialNumber and Version.
That’s it! By following any of the three methods given above, you will be able to check the details of the motherboard installed in your system.
You may also like:
- Turn On or Off Grayscale on Windows 11
- How to Disable Password After Sleep on Windows 11
- Turn Off Microsoft Defender SmartScreen on Windows 11
- How to Turn Off or On Mouse Acceleration on Windows 11
- Enable and Disable Efficiency Mode on Windows 11
- Remove Notifications Bell Icon from Taskbar on Windows 11
- 2 Ways to Disable IPv6 on Windows 11
I hope you found this article very helpful. And you have learned how to check what motherboard you have. If you have any problem or question related to Windows, please let us know by commenting. Please share this article.