2 Easy Ways to Disable Smart App Control in Windows 11
Smart App Control is a security feature in Windows 11 that protects your PC from running unknown, untrusted, or potentially dangerous applications. It uses cloud-powered AI technology to complete this. While it’s a very helpful feature, enabling it can sometimes cause problems.
Smart App Control, also known as SAC, provides malware protection for your system and blocks malicious or untrusted apps. It may even prevent you from installing third-party applications in some cases.

In such a situation, disabling Smart App Control on your Windows 11 PC or laptop is the only solution. Below, I have explained two different methods to disable it, which will be very helpful.
2 Easy Ways to Disable Smart App Control in Windows 11
1. Using Windows Security Settings (Recommended for Individual Users)
Windows 11 includes a Windows Security system from Microsoft that handles Windows’ security functions. Using this system, you can easily disable Smart App Control. All individual users can follow this method.
To turn off smart app control using Windows Security in Windows 11:
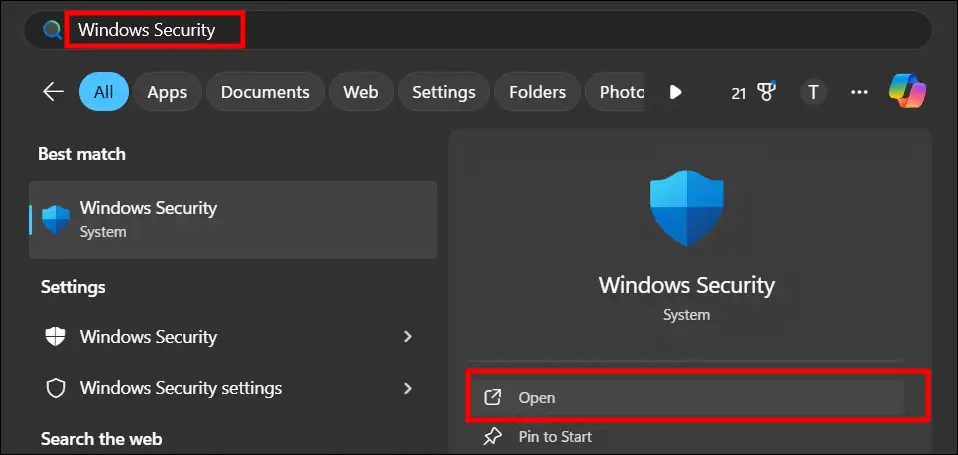
Step 1. Press Windows + S and Search “Windows Security” and Open It.
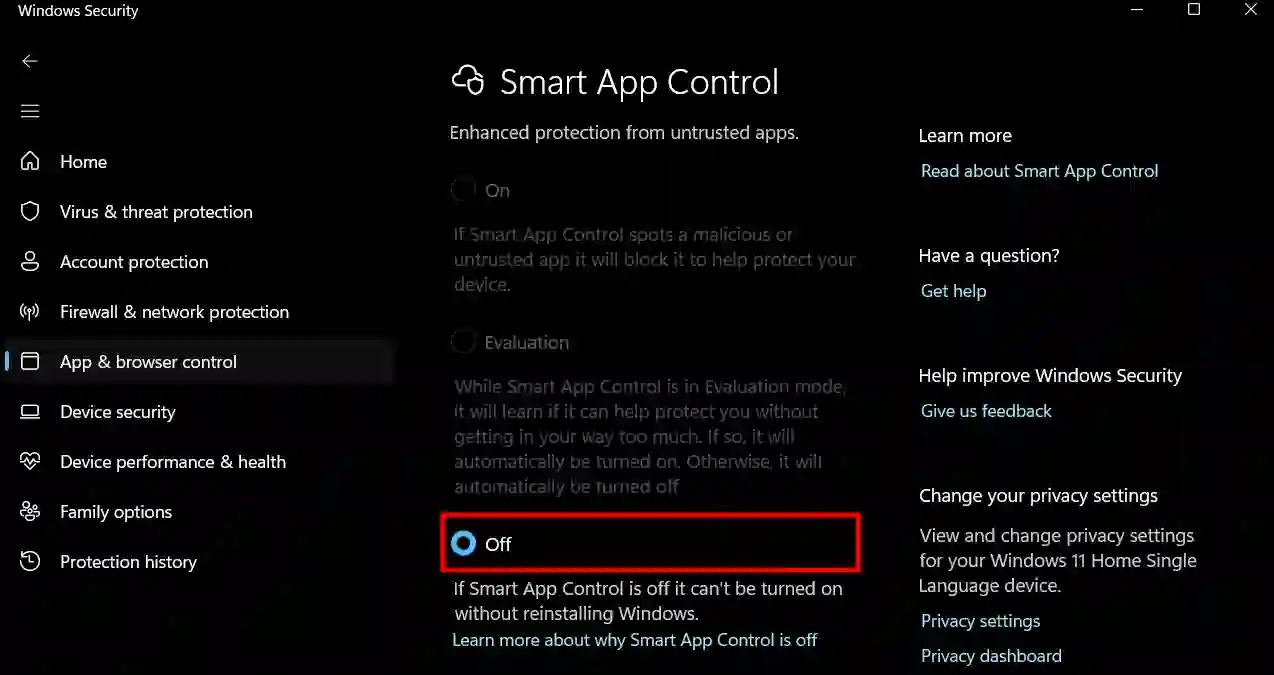
Step 2. Click on App & Browser Control > Smart App Control Settings.
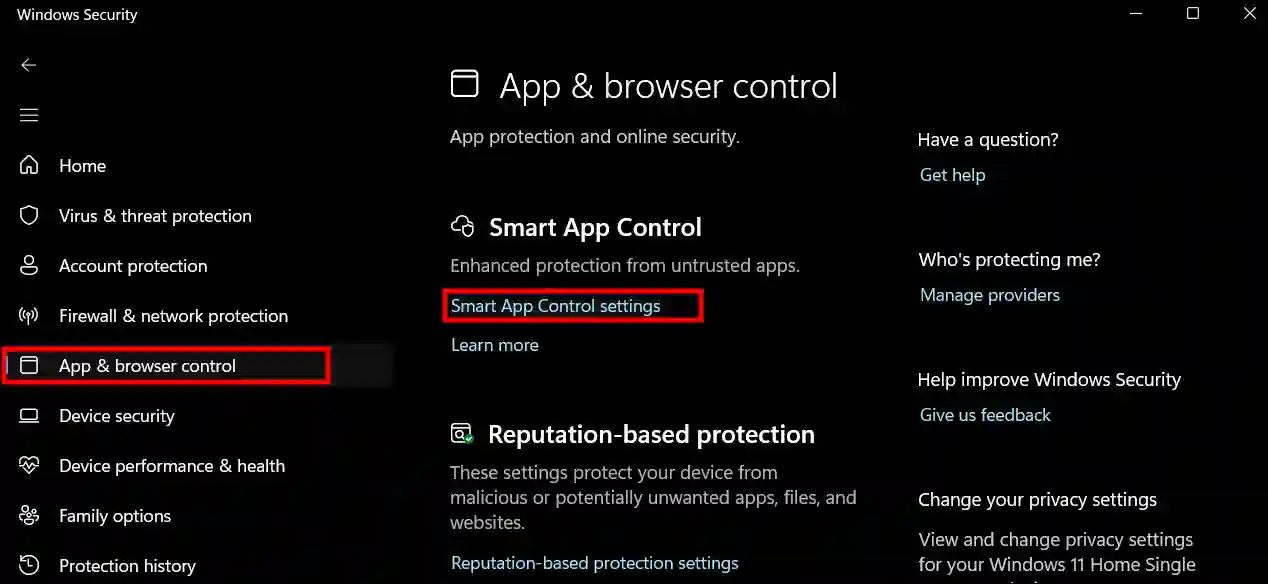
Step 3. Now, Select “Off” Option.
Also read: How to Check if BIOS Mode is UEFI (Windows 11/10)
2. Using a Registry File (Advanced Users)
We can also disable it using the Windows Registry. Since this involves somewhat complex steps, it is recommended only for advanced users such as IT administrators. Incorrect changes to the registry can cause system instability, so exercise extreme caution while following these steps.
To turn off smart app control using the registry in Windows 11:
Step 1. Open Notepad in Your Computer or Laptop.
Step 2. Now, Copy and Paste the Following Text into Notepad.
Windows Registry Editor Version 5.00

[HKEY_LOCAL_MACHINE\SYSTEM\CurrentControlSet\Control\CI\Policy]
"VerifiedAndReputablePolicyState"=dword:00000000
Step 3. Save the file with a .reg extension (e.g., Turn_OFF_Smart_App_Control.reg).
Note: Make sure “All Files” is selected in the “Save as type” dropdown.
Step 4. Double-Click the Saved .reg File to Merge It with the Windows Registry.
Step 5. When Prompted, Click Run, Yes (UAC), Yes, and OK to Approve the Merge.
Step 6. Now, Restart Your PC for the Changes to Take Effect.
That’s all! So, by following either of these two methods, you can easily disable Smart App Control in Windows 11.
Also read: [7 Ways] How to Check What Graphics Card I Have on My PC or Laptop
FAQs
Q 1. Can I temporarily turn off Smart App Control?
Answer – No! You cannot temporarily disable Smart App Control in Windows 11, although you can put it in “Evaluation” mode. Once you permanently disable it, you cannot re-enable it without reinstalling Windows.
Q 2. How do I check if Smart App Control is enabled on my system?
Answer – To do this, open the Windows Security application on your Windows PC, then go to App & Browser Control > Smart App Control Settings. If the “On” option is selected, it means it is enabled on your system.
I hope this article was helpful to you, and you learned how to disable Smart App Control in Windows 11. If you have any other questions about Windows 11, feel free to ask in the comments below. Don’t forget to share this article.