How to Schedule a Text Message on Android (Including Samsung)
Text messaging is a type of communication. And scheduling text messages on Android is super easy. If you compose a text message and want to send it later, this is now possible. Let’s know in this article how to schedule a text message on Android including Samsung step-by-step.
The new update to Google Messages lets senders schedule text messages. That means now the sender can specify the time and date to send the message, and the message will be sent automatically at that time. This scheduled text message feature is more useful for you when you are busy at a particular time and have to send the message.
On Android phones or tablets, users can schedule any text messages with the help of the Google Messages app. Did you know Apple has also rolled out the scheduled text message feature for iPhone users in the iOS 18 update?
How to Schedule a Text Message on Android
If you are an Android user and use the Google Messages app for text messaging on your phone, then you will be able to schedule text messages by following the steps given below.
To schedule a text message to send later on Android phone:
Step 1. Update Google Messages App and Open It.
Step 2. Select an Existing Conversation or Start a New Chat.
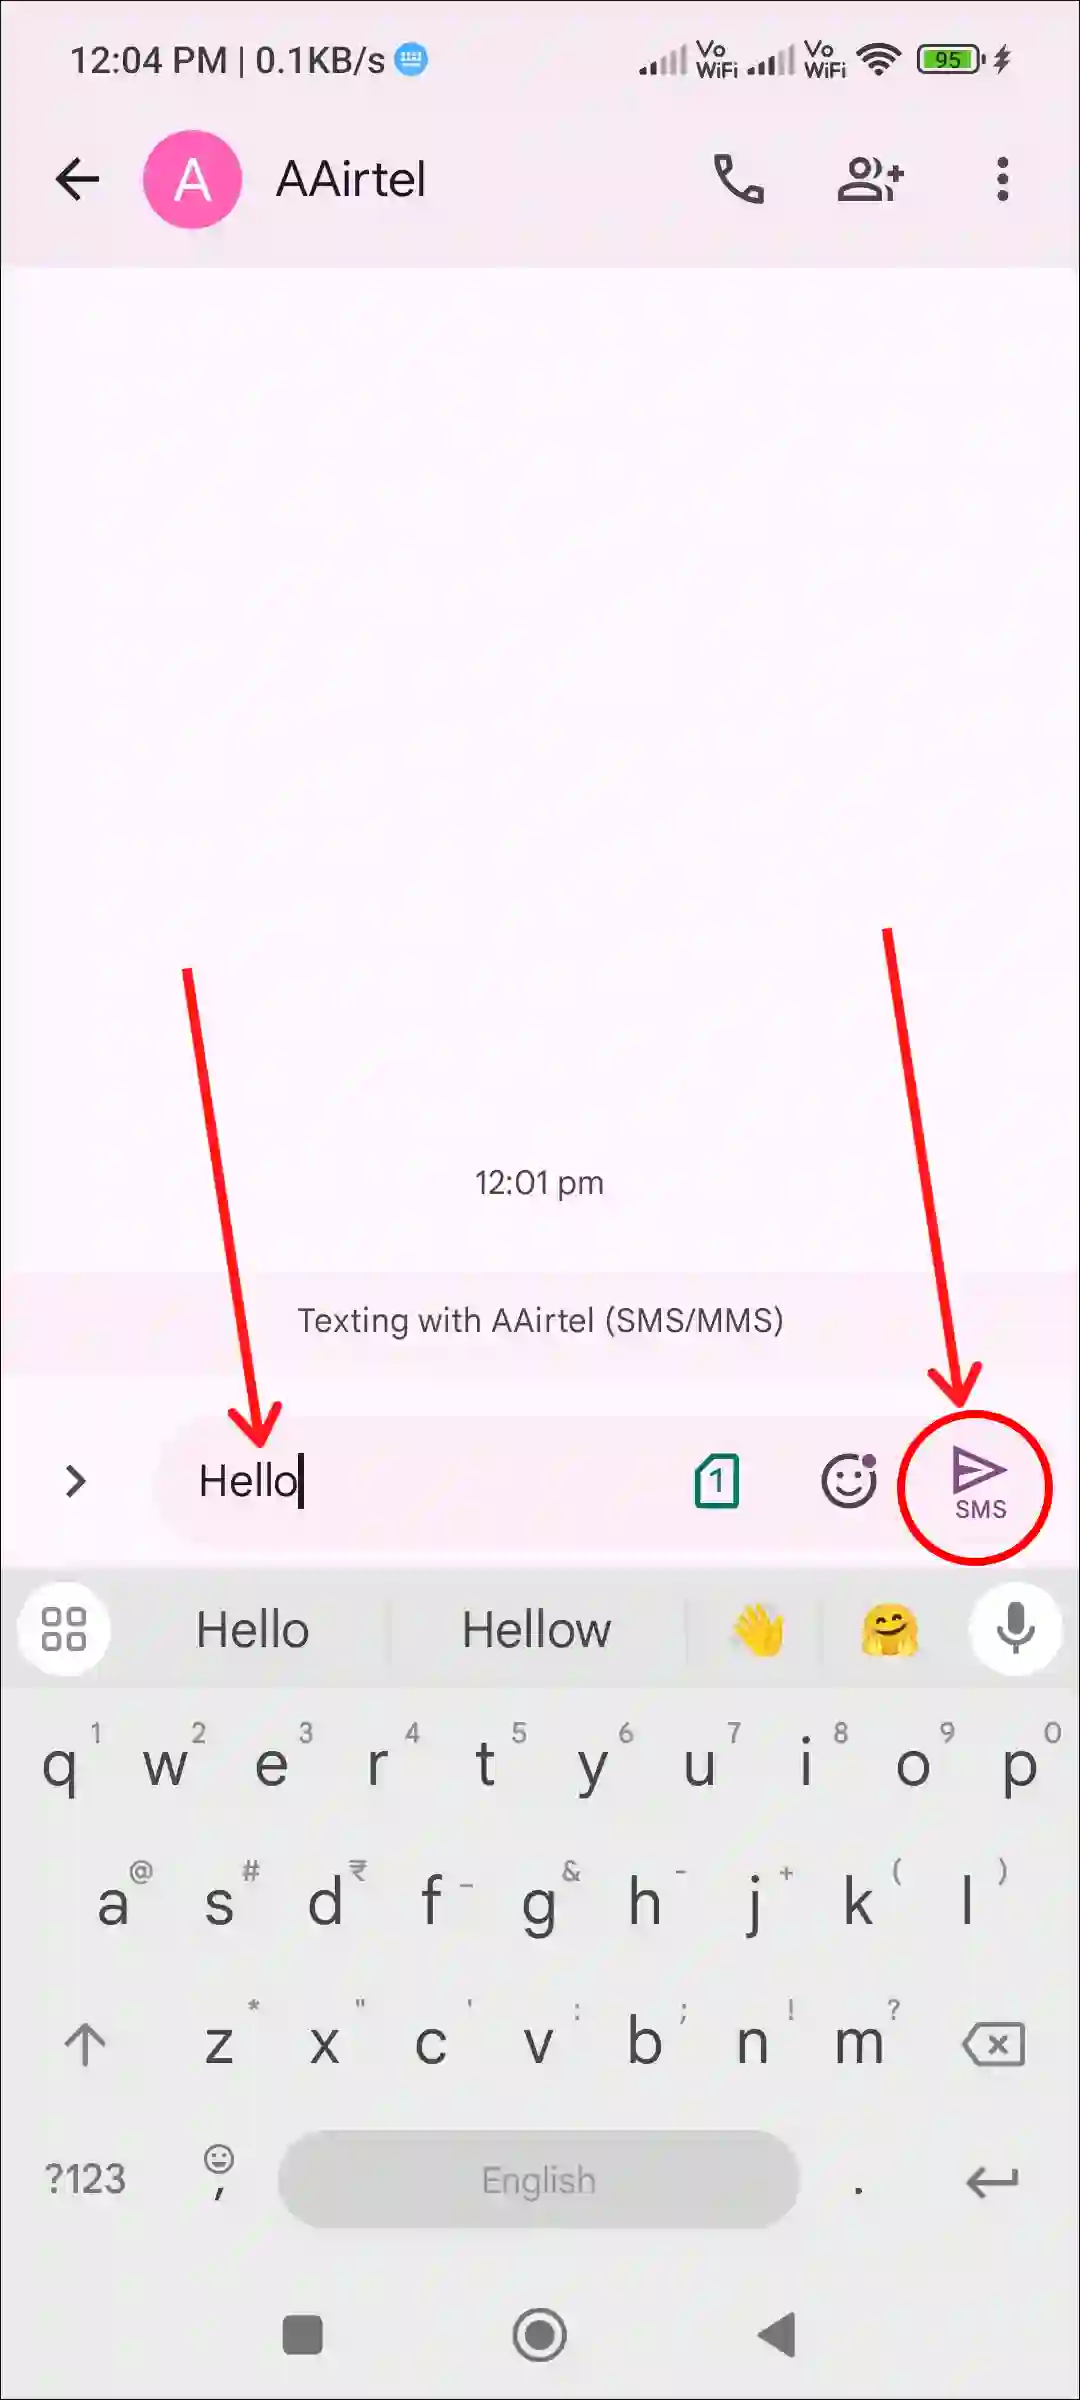
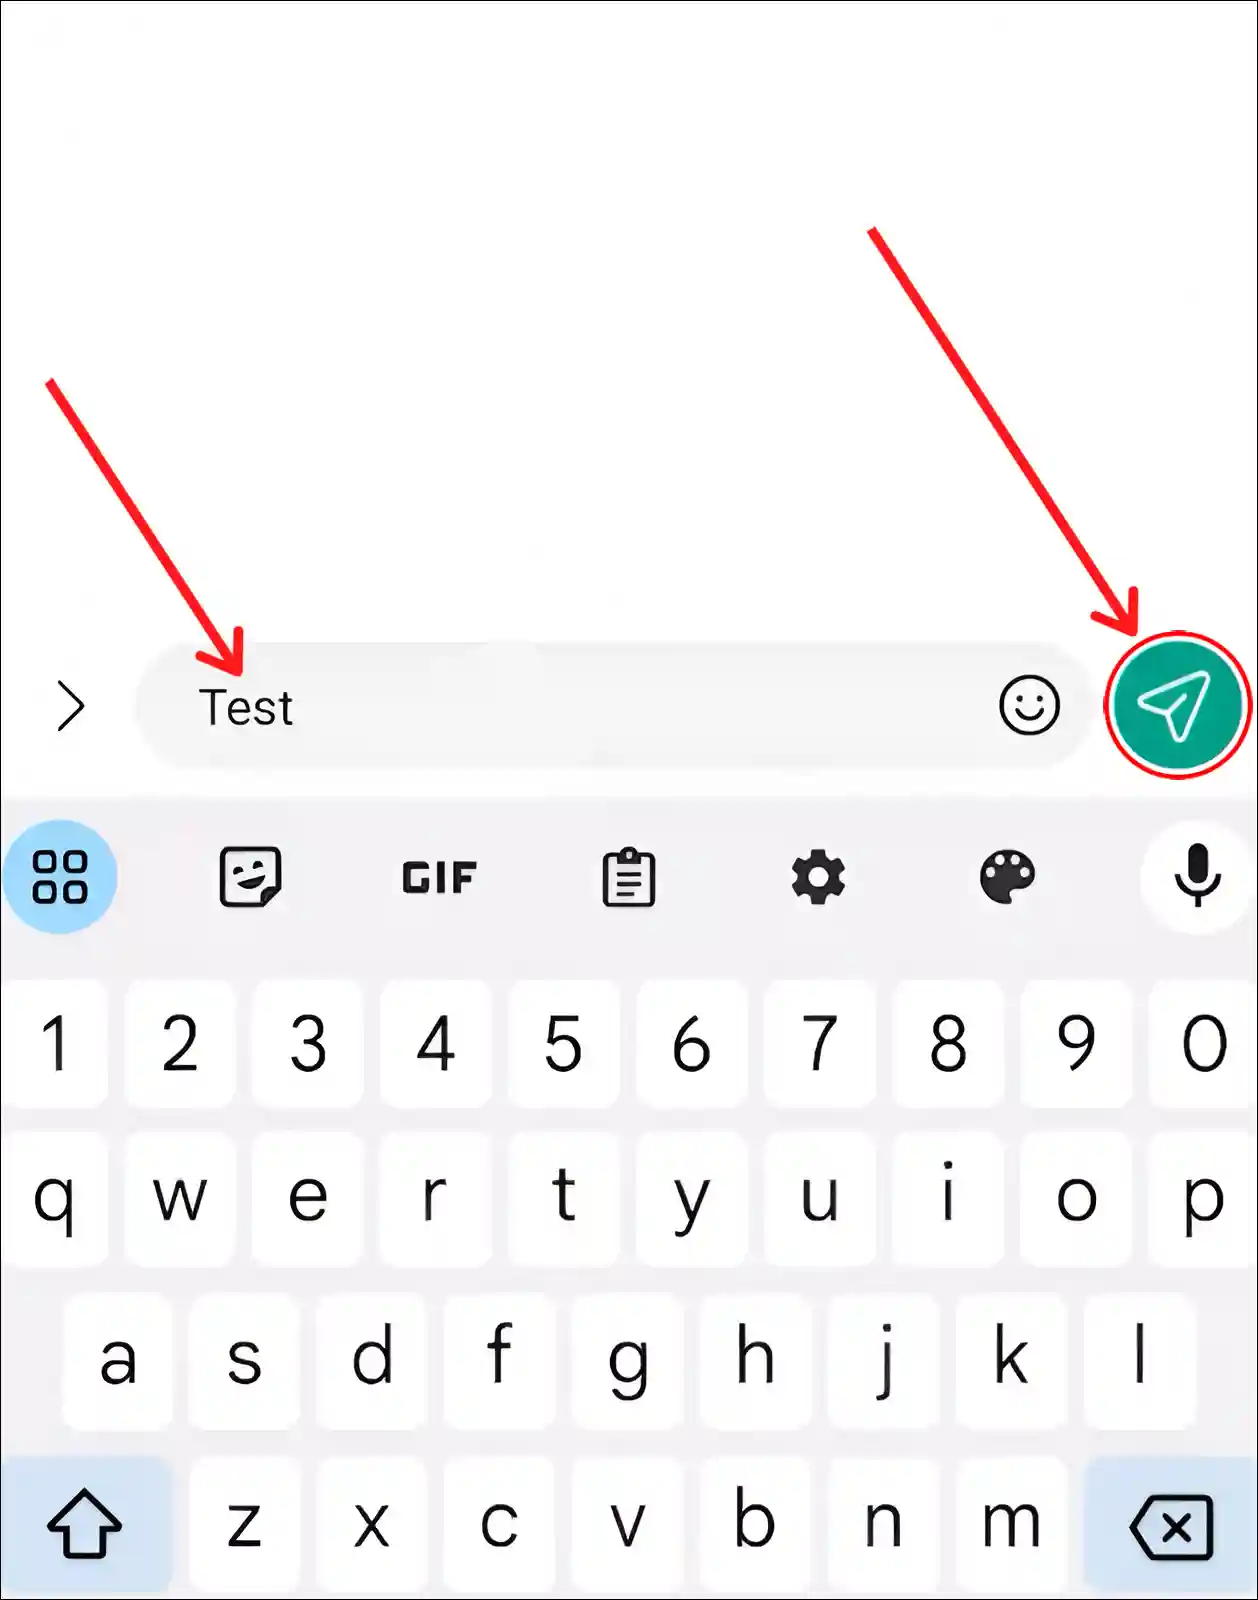
Step 3. Type Your Message then Tap and Hold the Send SMS Arrow.
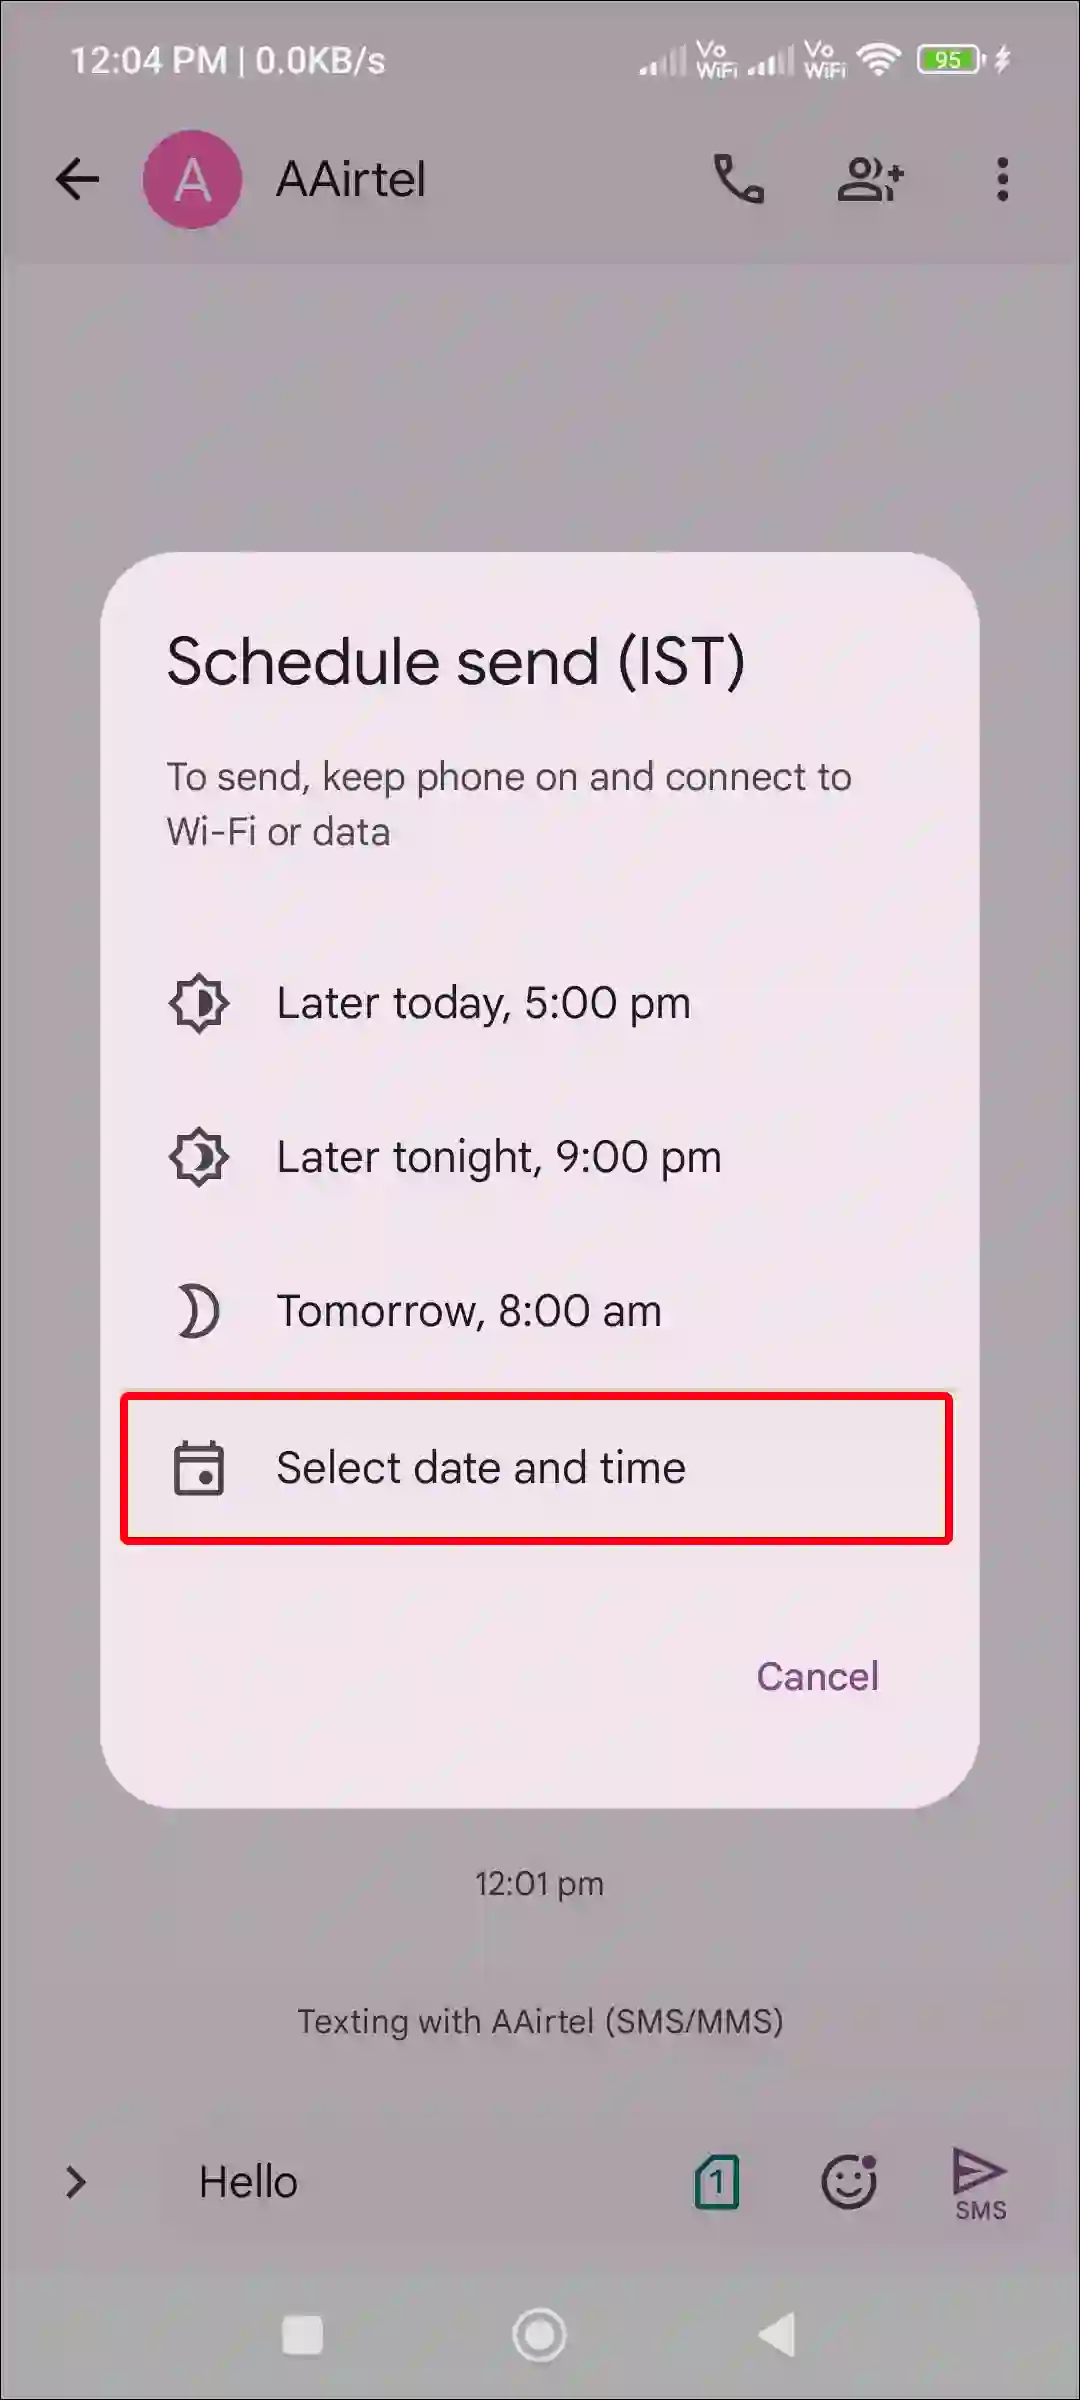
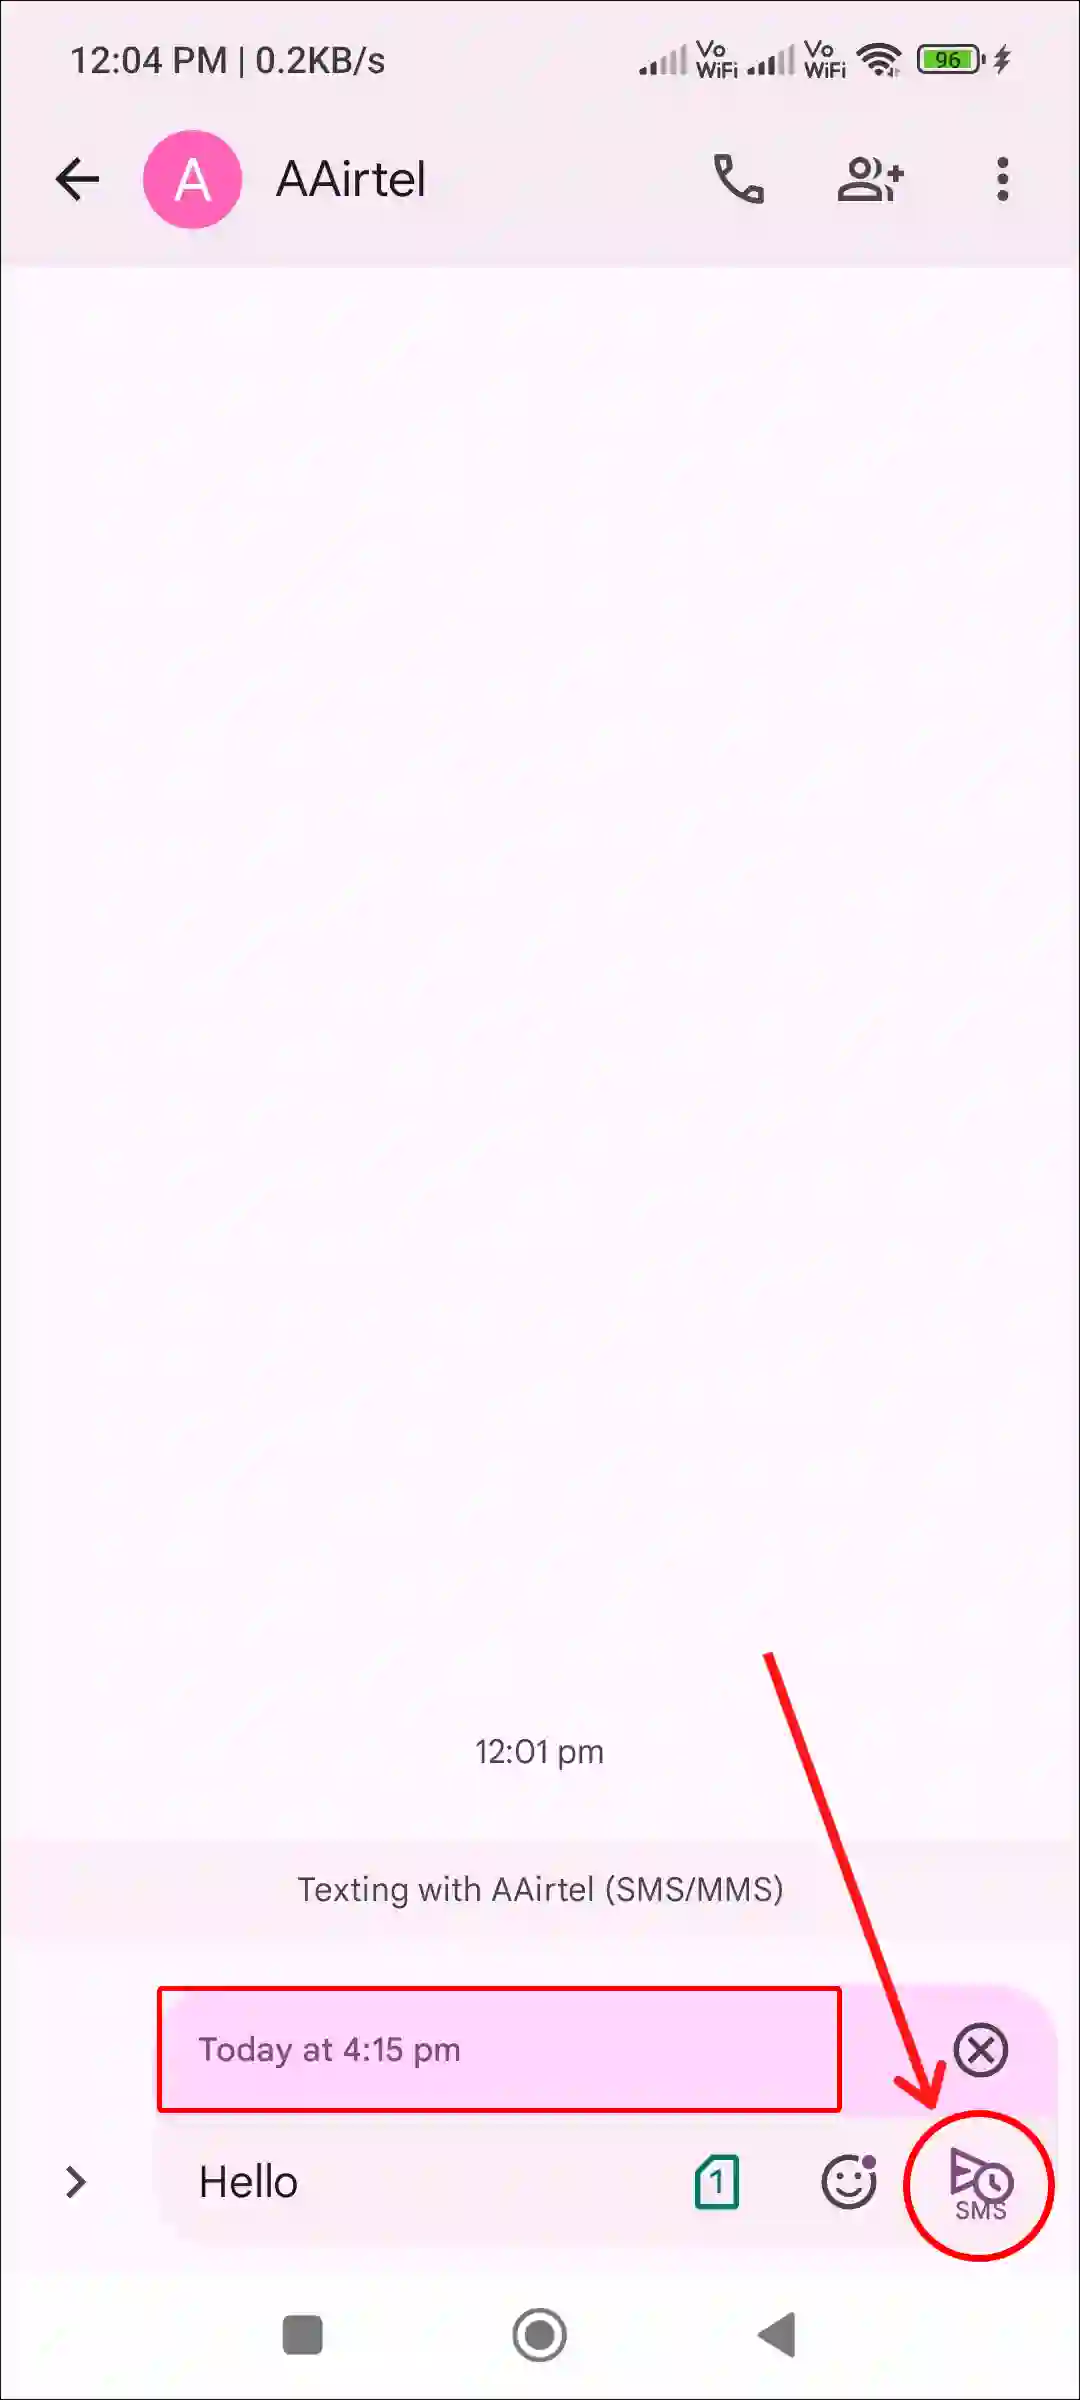
Step 4. Tap on Select Date and Time.
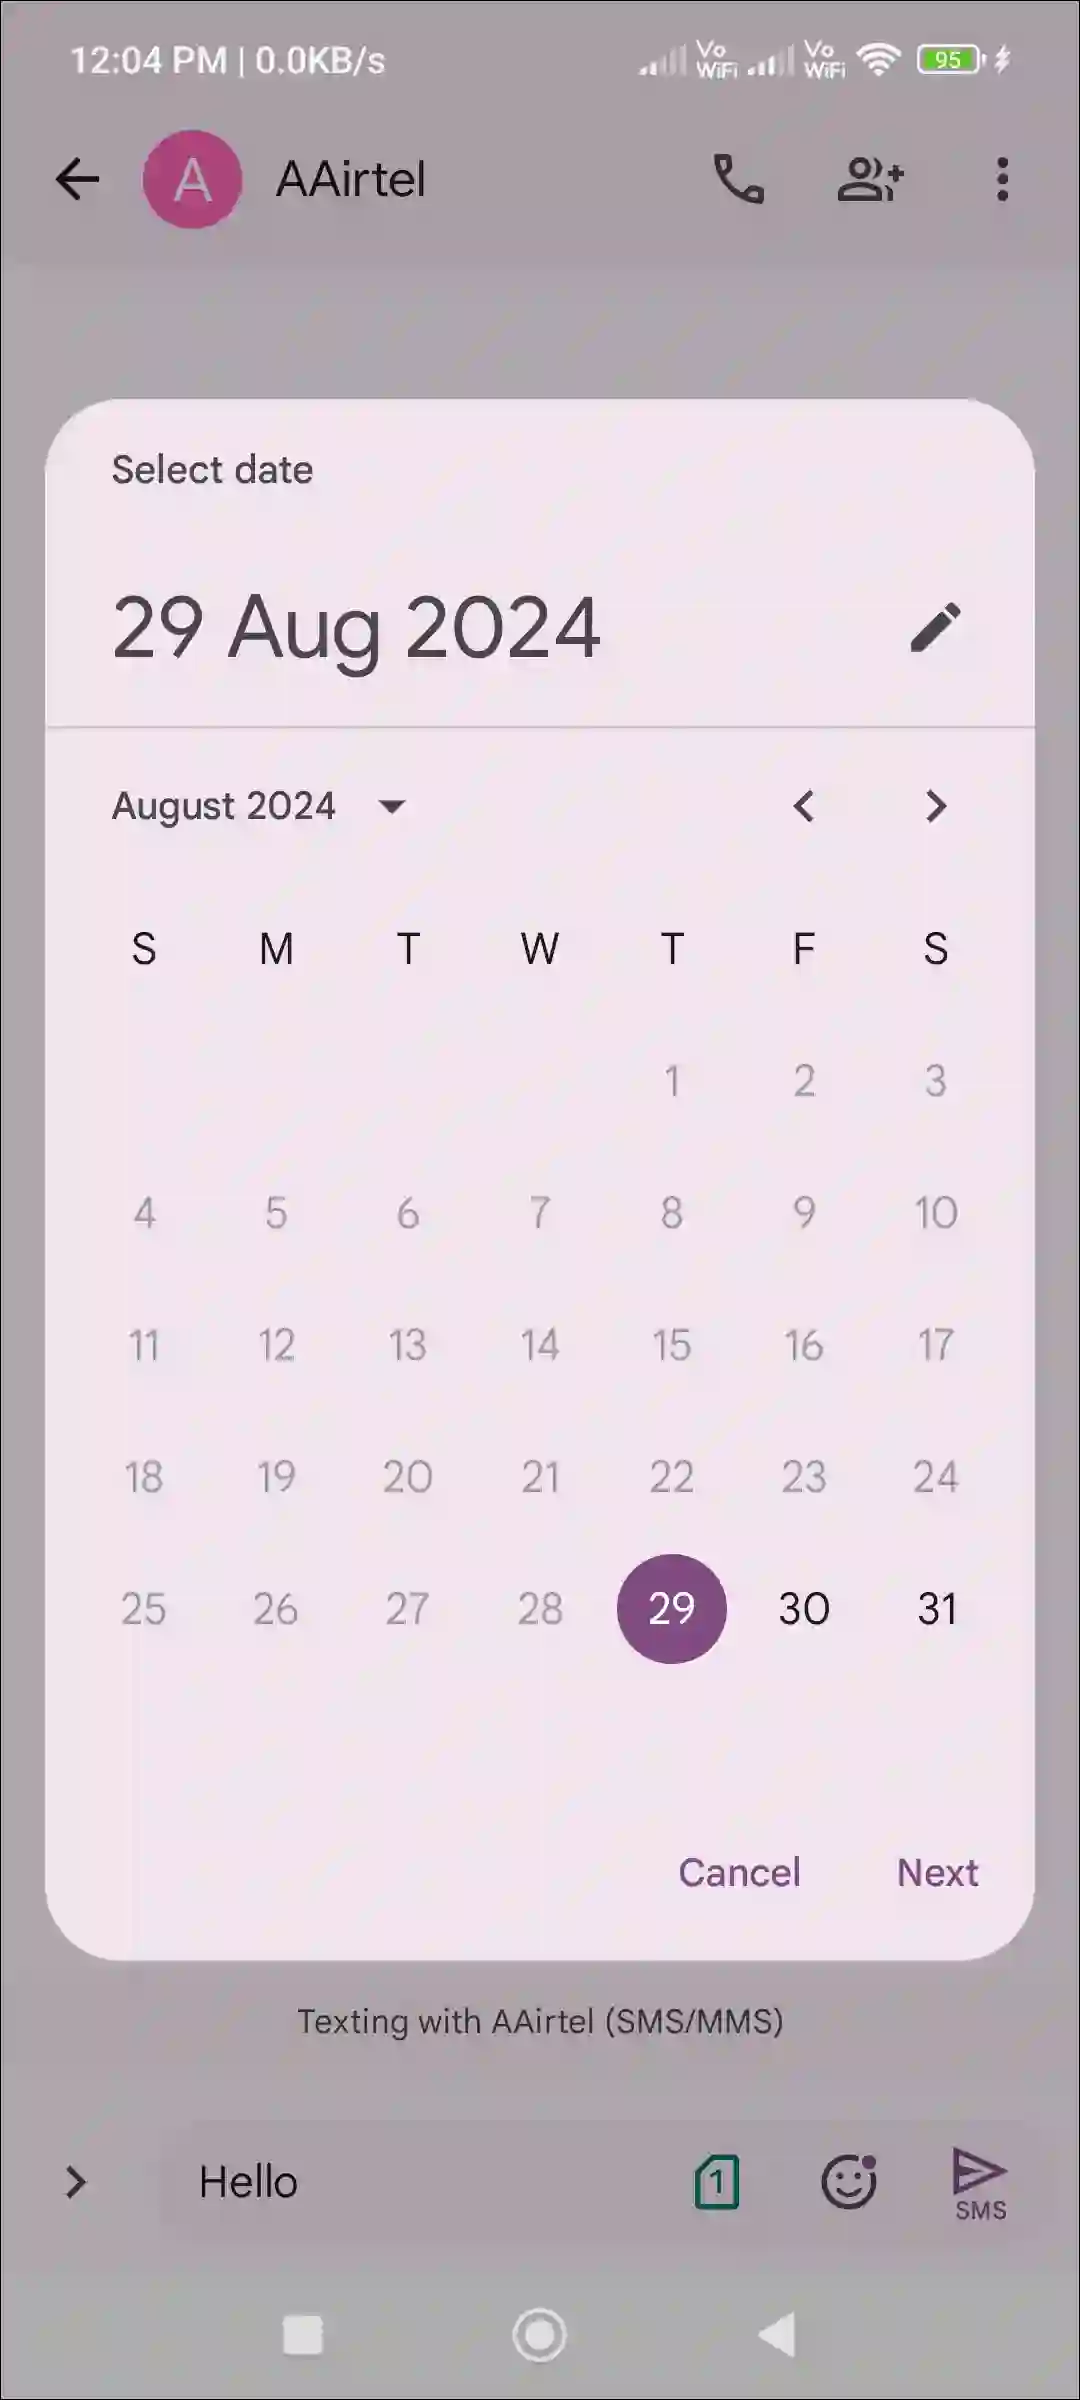
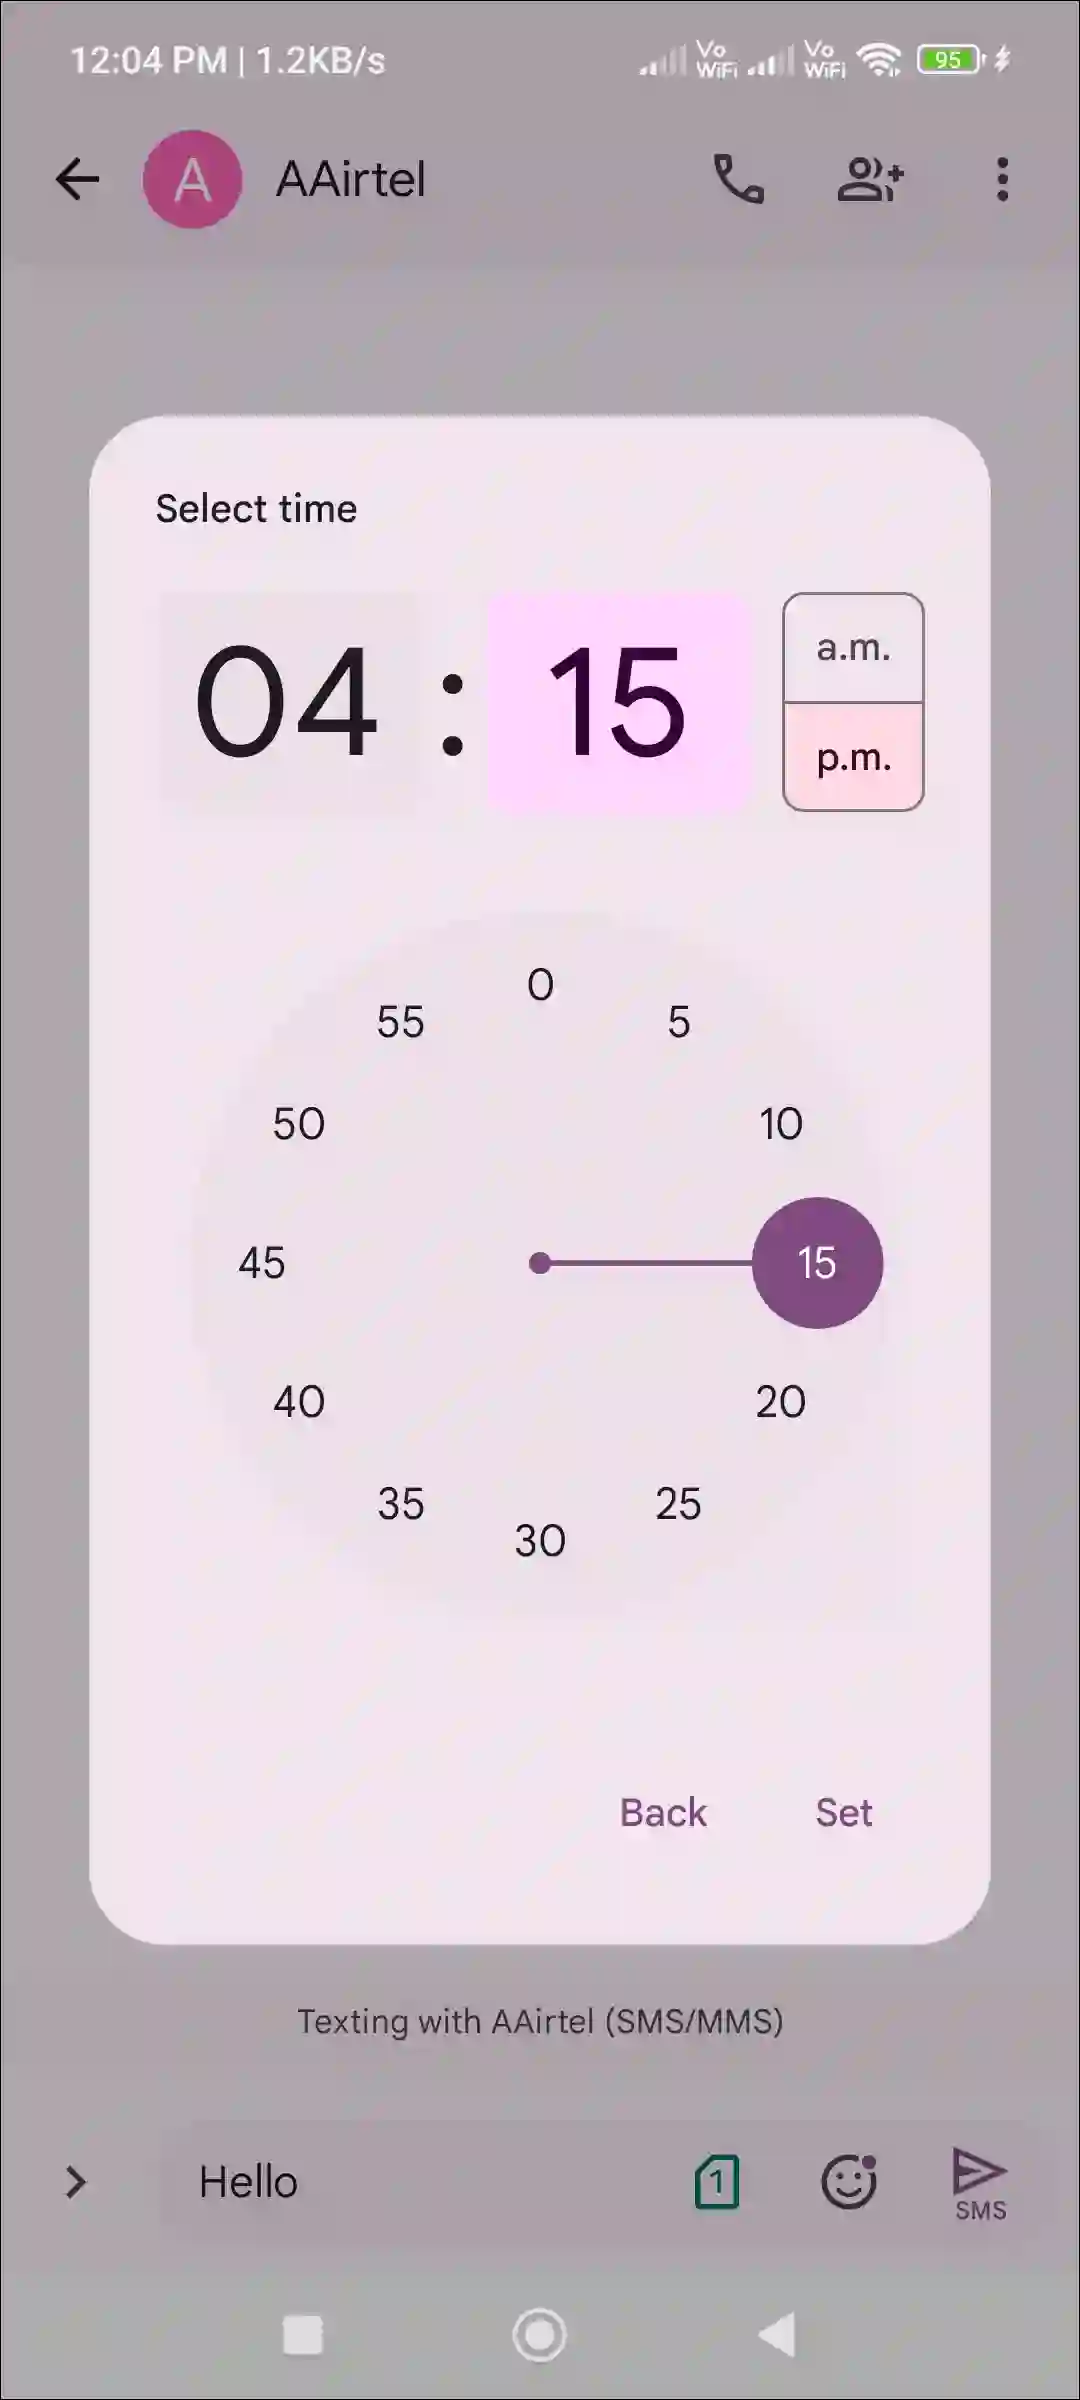
Step 5. Next, Select the Date and Time to Schedule the Message.
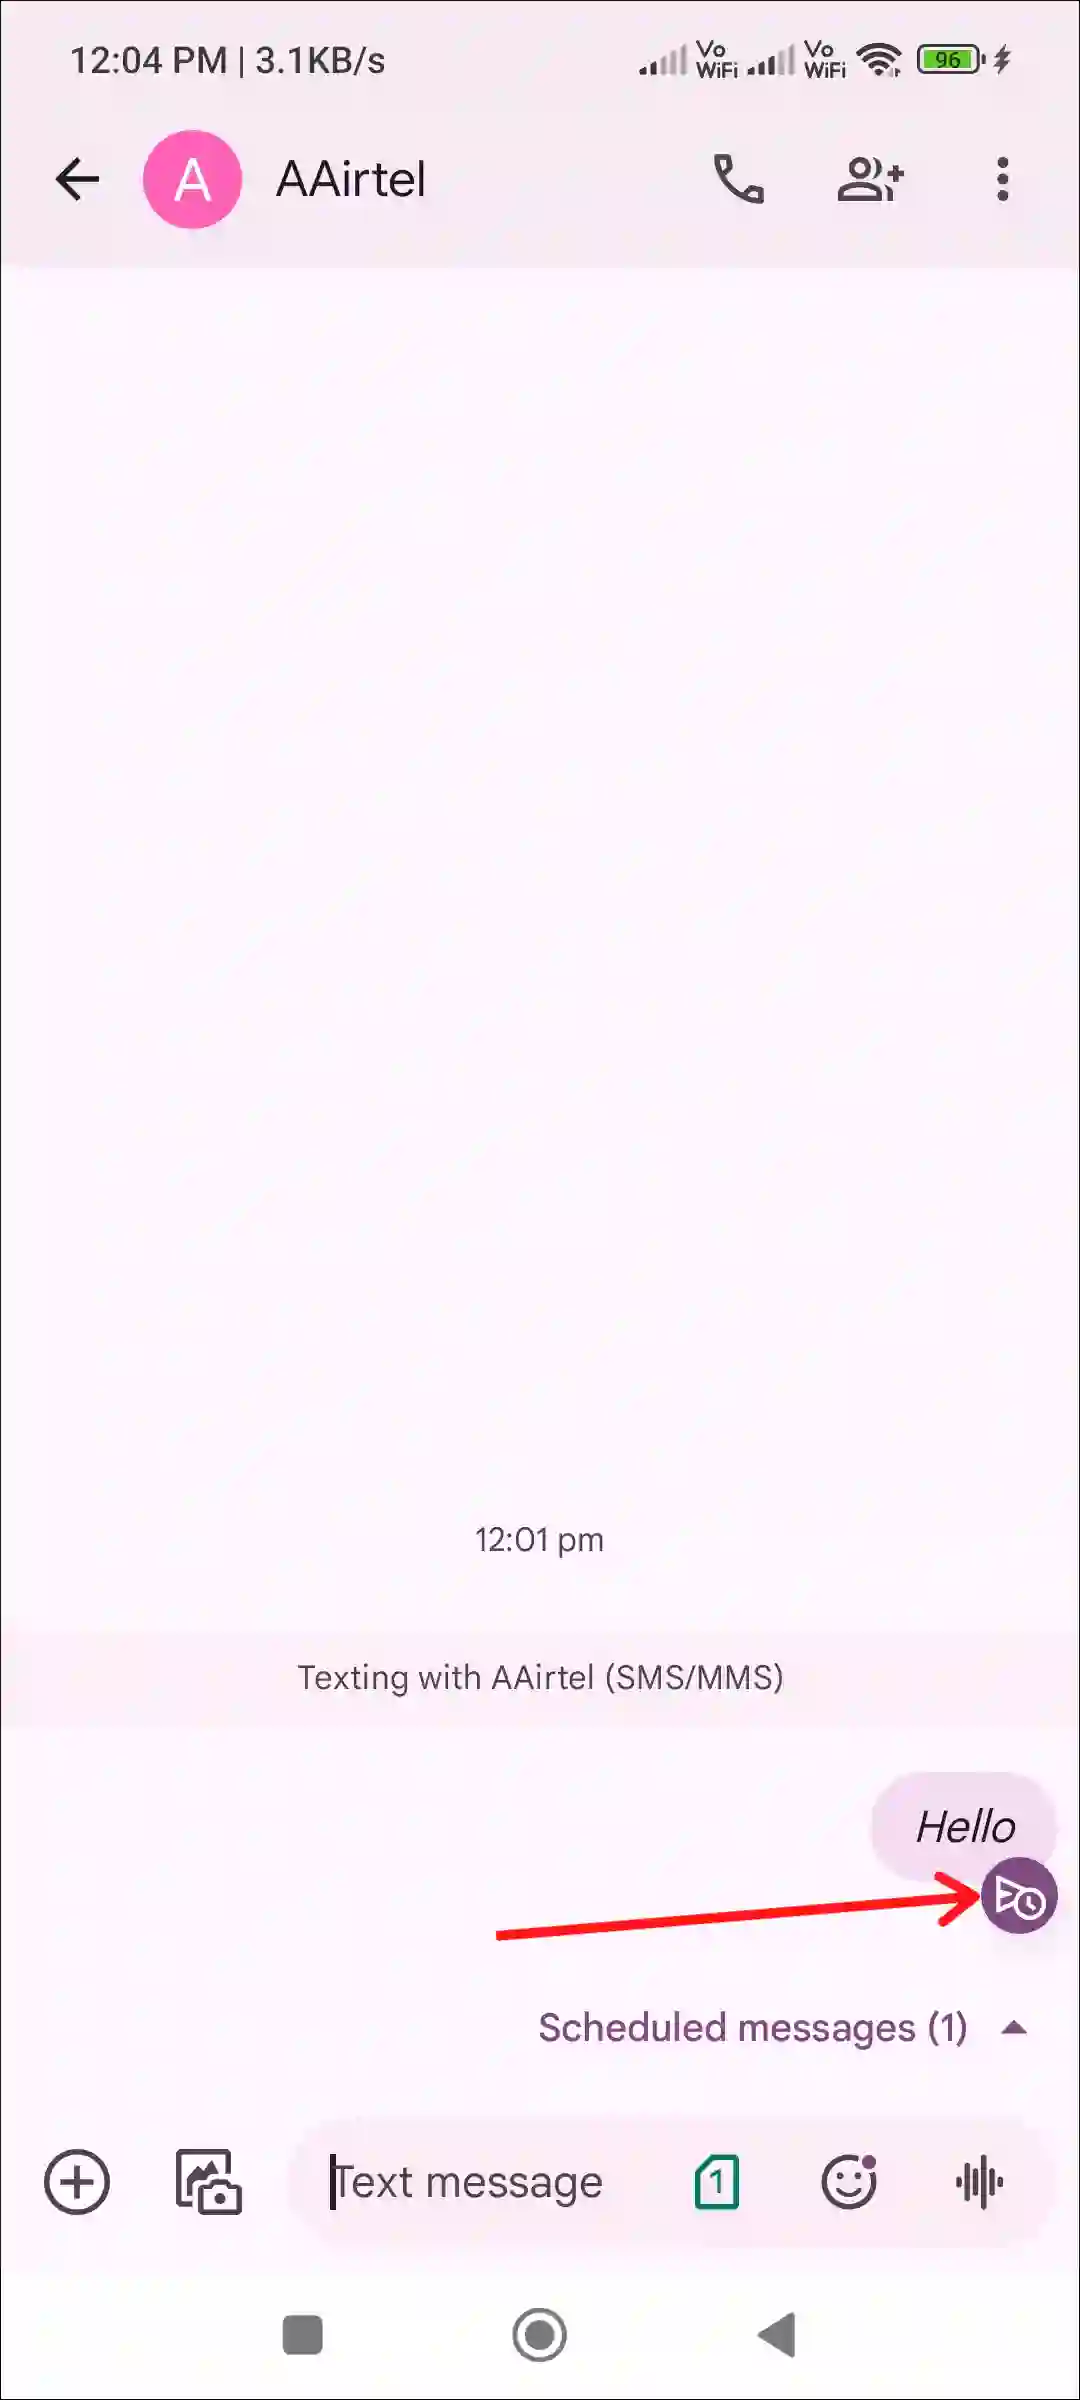
Step 6. Now You Can See that Schedule Time is Set, Now Tap on Send Button.
That’s it! As soon as you complete the above steps, the text message you composed will be scheduled at the specified date and time.
Also read: 9 Ways to Fix Google Messages App Not Working on Android
How to Schedule a Text Message on Samsung
Samsung Galaxy phones have the Samsung Messages app for text messaging. It is a native and default texting app that also allows its users to schedule text messages. For this, you can follow the steps given below.
To schedule texts to send later on your Samsung phone:
Step 1. Open Samsung Messages App on Your Samsung Phone.
Step 2. Select an Existing Conversation or Start a New Chat.
Step 3. Type Your Text in the Message Box.
Step 4. Now Press and Hold the Send Button.
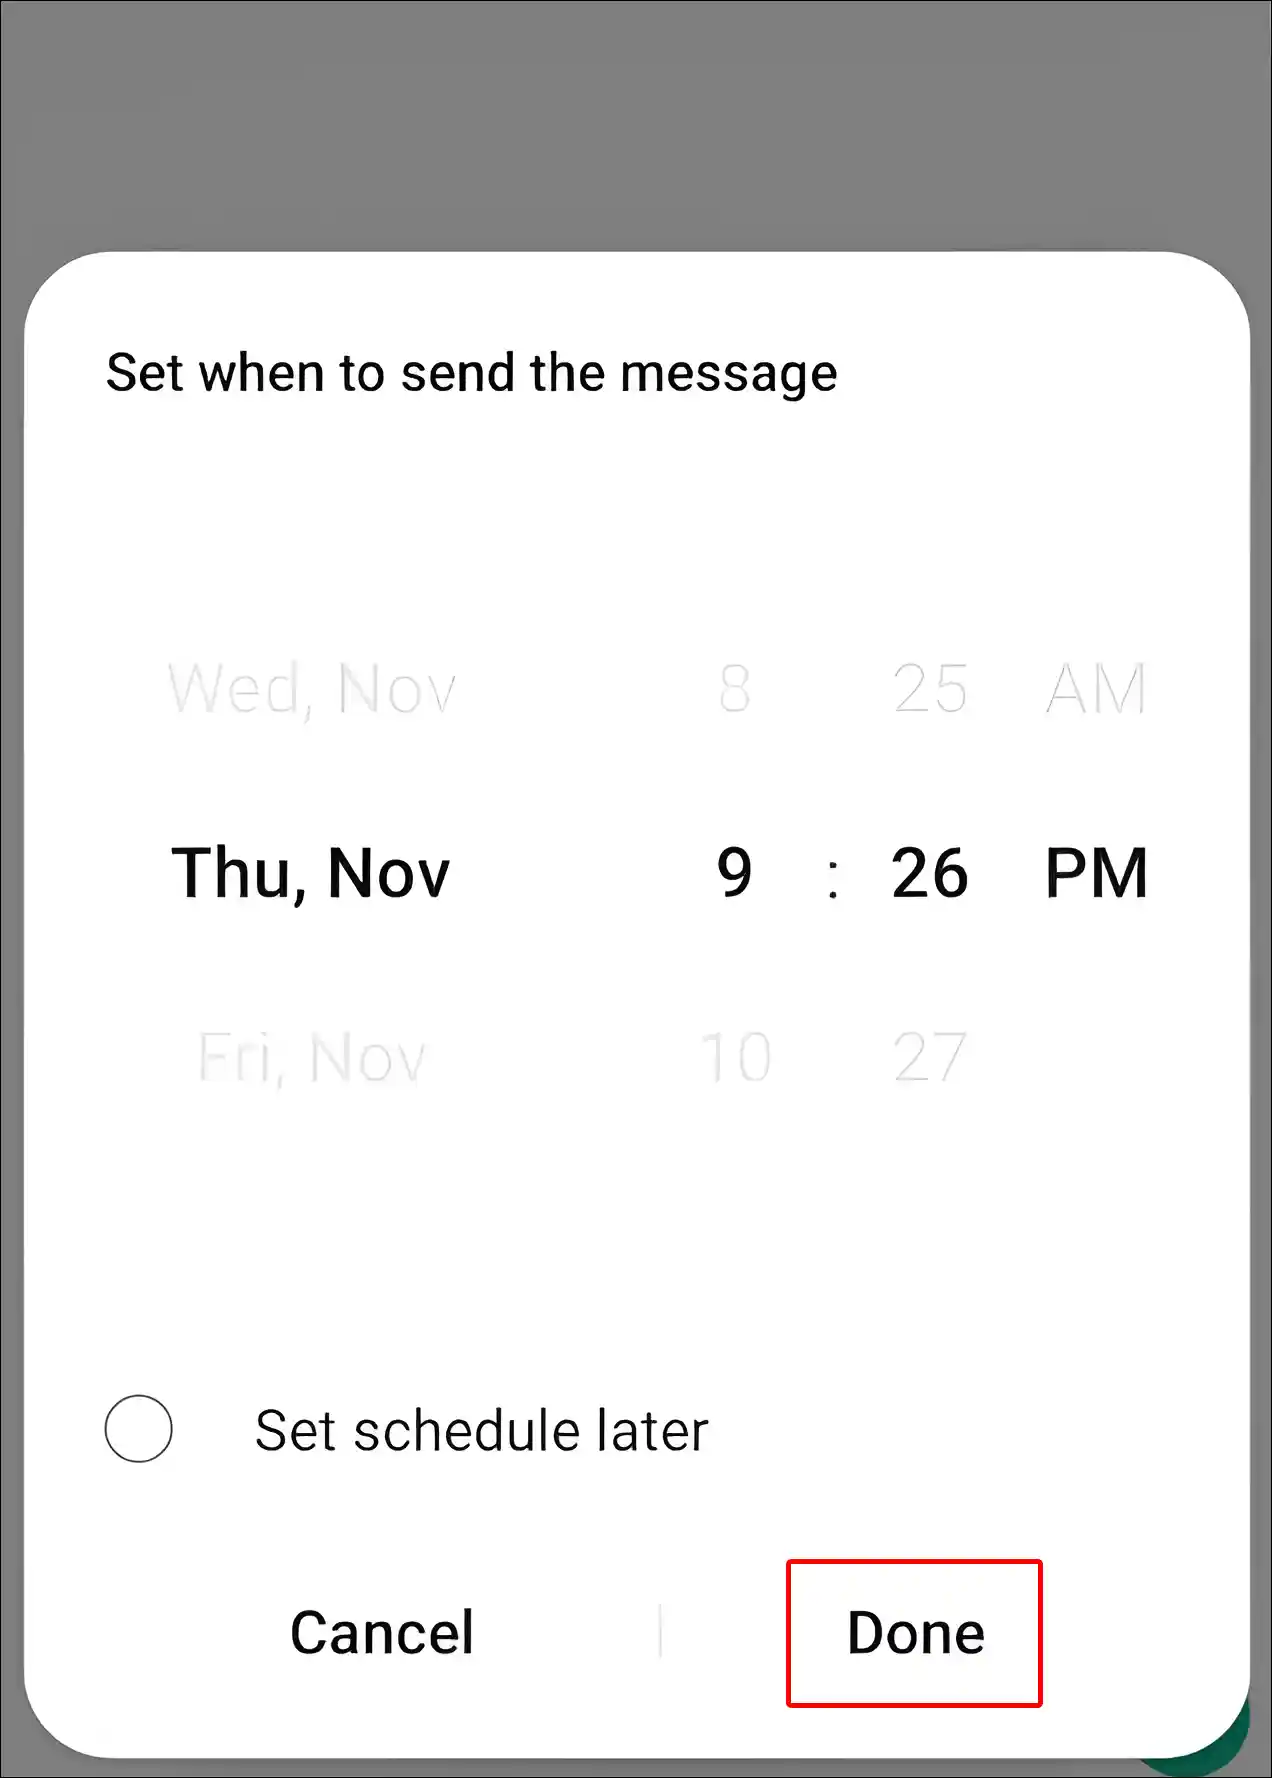
Step 5. Next, Select Date and Time, and Tap on Done.
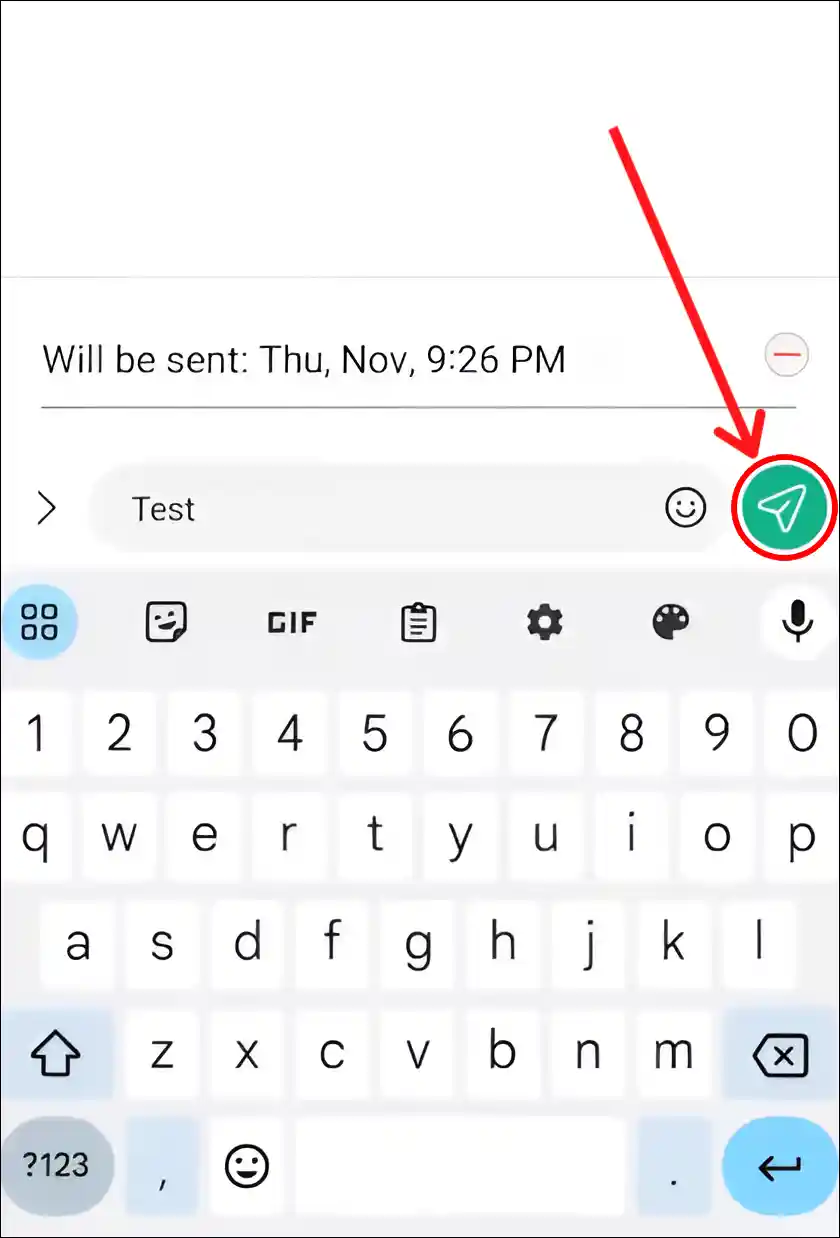
Step 6. Now Tap on Send Icon.
That’s it! Now the text message is scheduled on your Samsung phone. And your message will automatically be sent at the scheduled time.
You may also like:
- Emergency SOS is Activated! How to Turn Off on Android
- How to Turn On or Off NFC on Android (Including Samsung)
- How to Enable Speedometer on Google Maps for Android
FAQs
Q 1. How to cancel a scheduled text message on Android?
Answer – If you have scheduled a text message on your Android phone and now you want to cancel it, you can do it very easily. For this, follow the steps given below.
To cancel a scheduled message on Android using Google Messages; Open the Google Messages app > Find the conversation > Tap and hold the scheduled message > Select “Cancel” or “Delete”.
To cancel a scheduled message on Samsung using Samsung Messages; Open the Samsung Messages app > Go to the scheduled message > Tap on the scheduled message > Choose “Cancel” or “Delete”.
Q 2. Can I edit or reschedule a text message once it’s been scheduled?
Answer – Yes! Once you schedule a message, you can edit or reschedule it later. For this, long press on that scheduled message and then reschedule the time and date.
Q 3. Why is schedule text not working on Android?
Answer – If the Google Messages or Samsung Messages’ schedule text feature is not working on your Android phone and you are unable to schedule a message, there might be a few reasons behind it, like an outdated app, corrupt cache, etc. You can fix this problem by updating the messaging app and clearing the corrupt cache.
I hope you have found this article very helpful. And with the help of this article, you learned how to schedule text messages? If there is any problem, then tell us by commenting below. Please share this article.