How to Show or Hide Libraries Folder in File Explorer on Windows 11
If you have opened File Explorer on a Windows 11-powered PC or laptop, you might have noticed the “Libraries folder” in the left menu. Let’s know what is this Libraries folder and how to show and hide it in Windows 11.
What is the Libraries Folder in Windows 11?
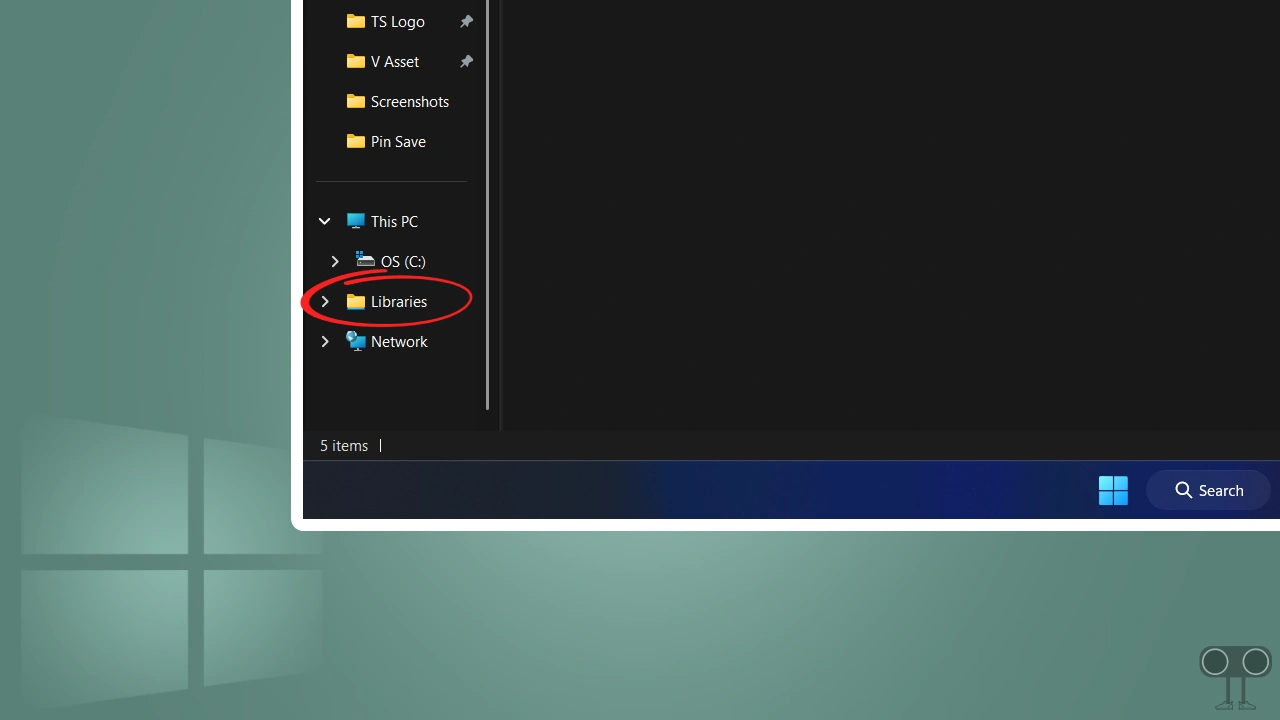
The Libraries folder in Windows 11 is a special folder that collects and organizes files from different locations on your computer. The special thing about this folder is that it gives you the option to easily access your files (like documents, music, pictures, and videos) from one place, even if they are in different folders or drives.
The Libraries folder is hidden by default in Windows 11 File Explorer, but you can easily enable it. Once enabled, it automatically appears pinned to the left pane of File Explorer.
Note: The Libraries folder does not store files directly. Instead, it provides a unified view of files from different locations in one place.
How to Show the Libraries Folder in File Explorer on Windows 11
As I mentioned above, by default this folder does not appear in File Explorer. If you want to show it, you have to enable it manually. Here are two different methods you can use to display the Libraries folder in File Explorer.
Method 1. Using File Explorer Options
- Press Windows + E Simultaneously to Quickly Open File Explorer.
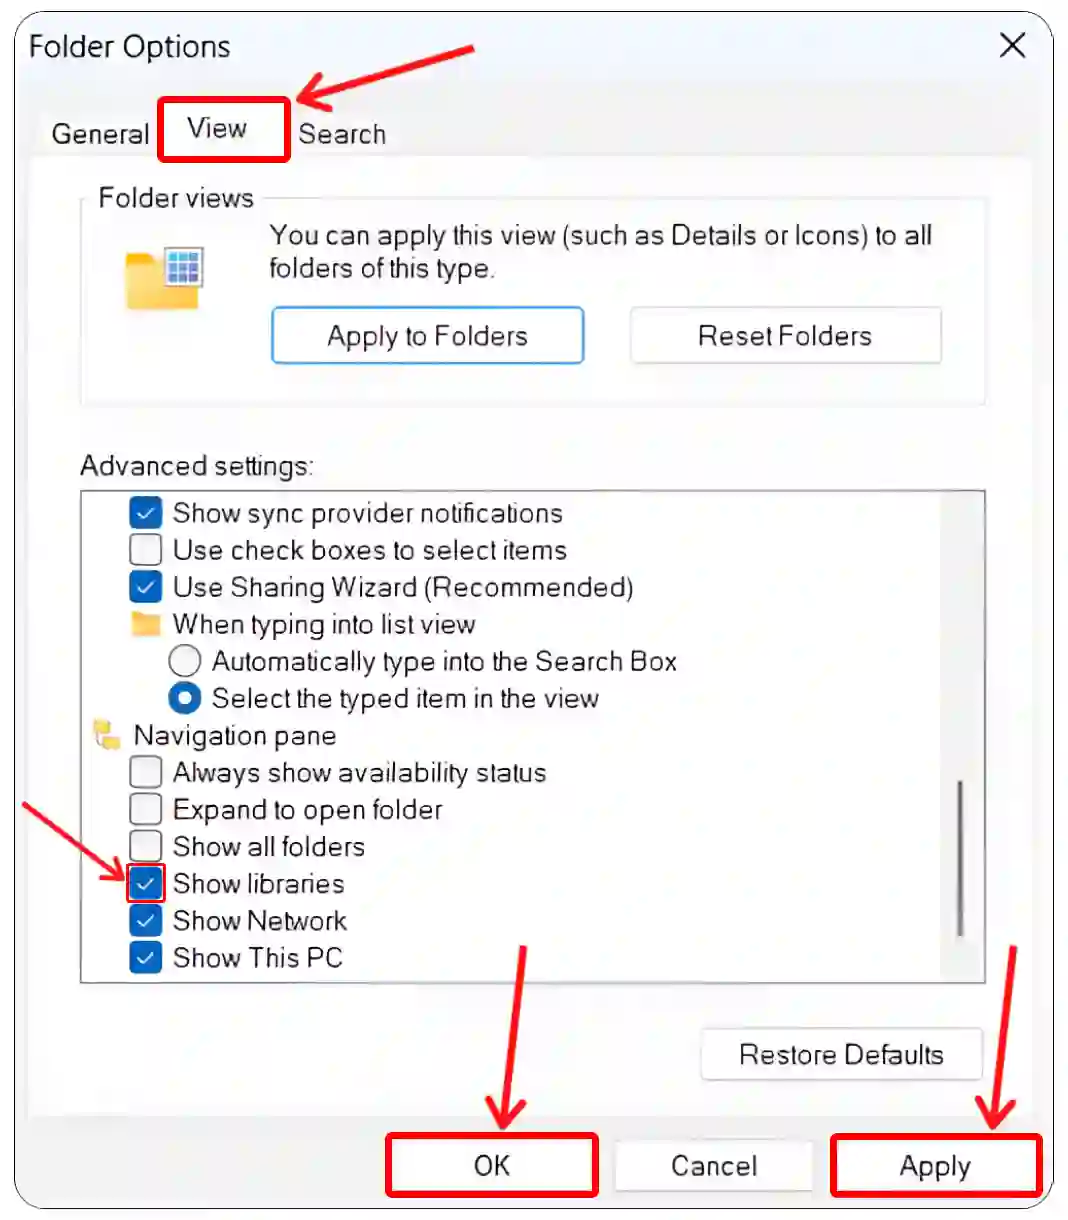
- Click on Three Dots (•••) Next to Filter and Select Options.
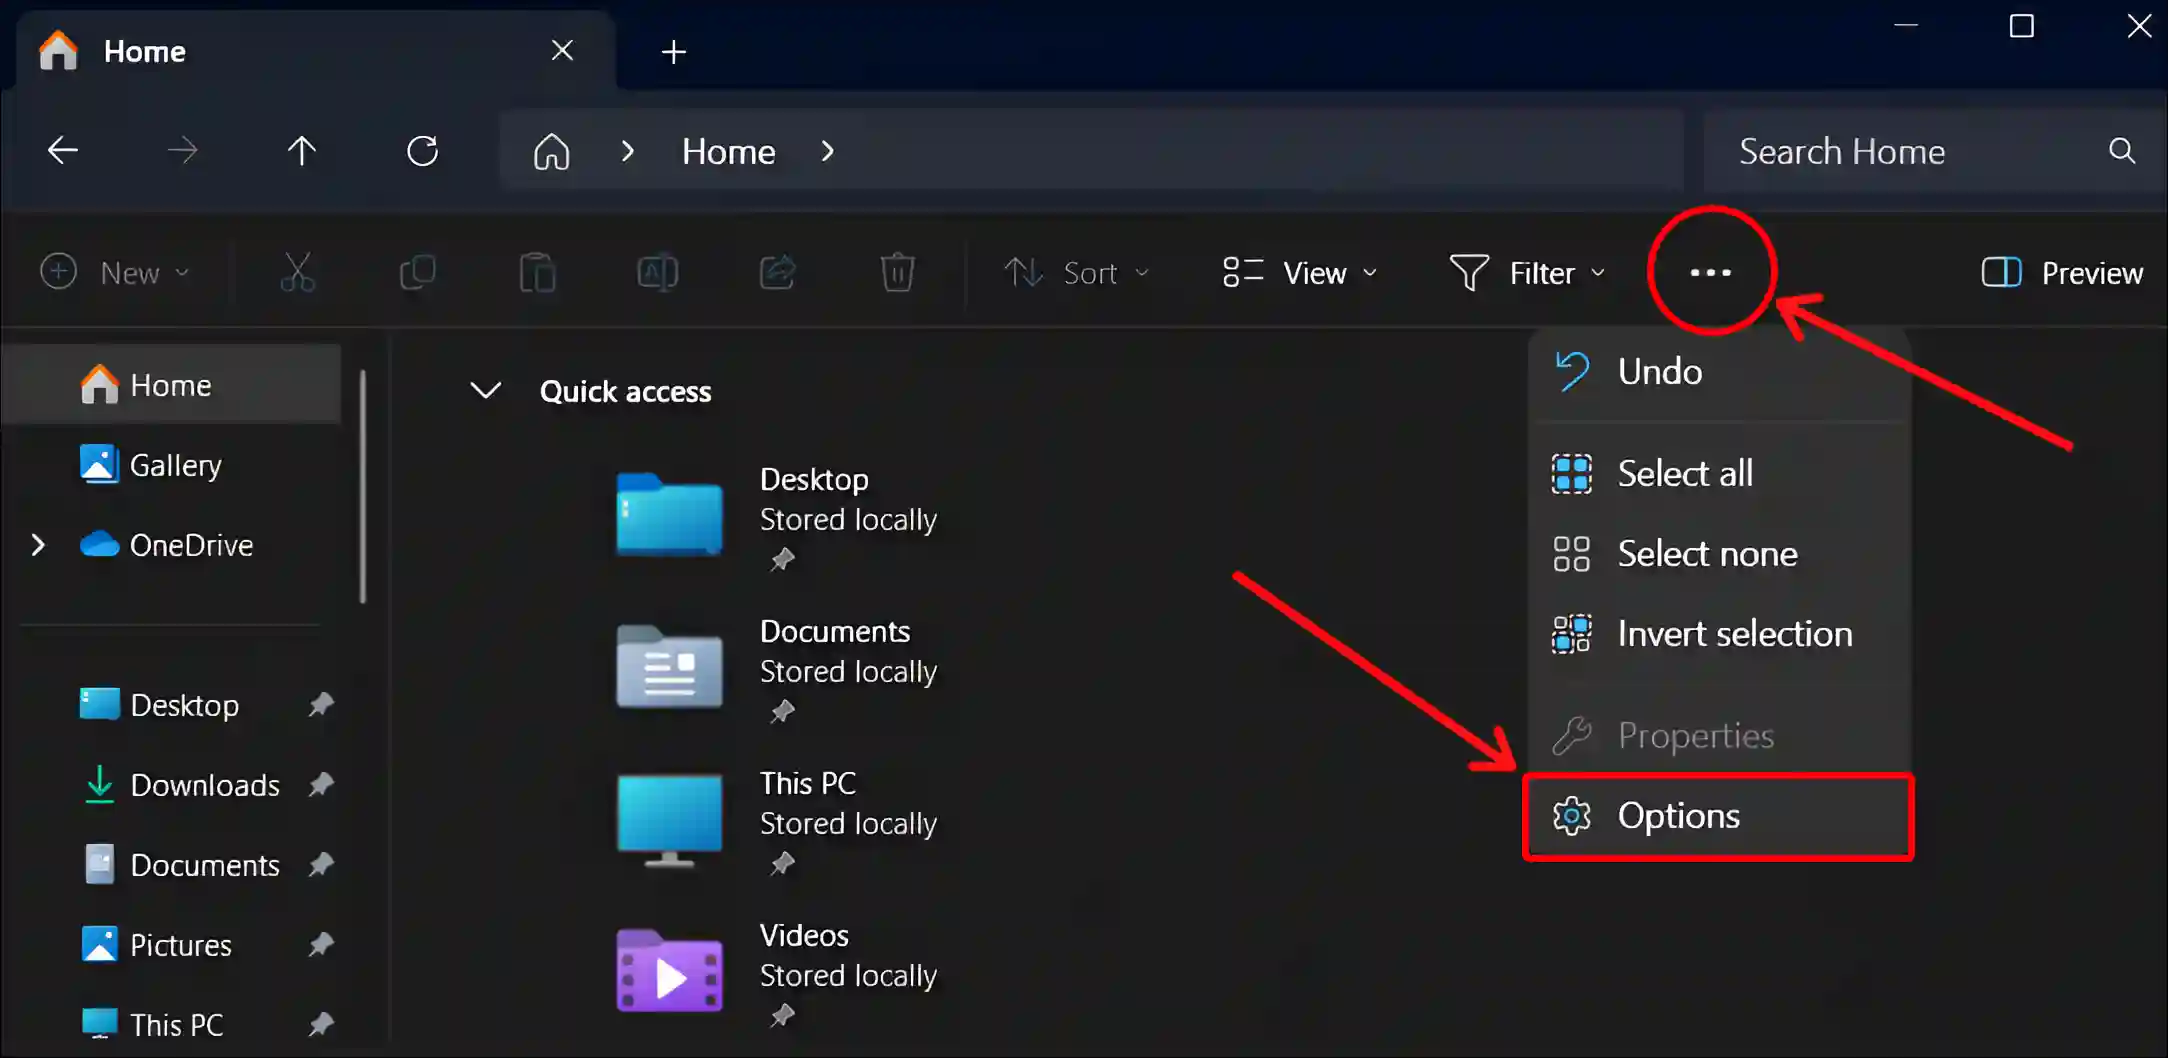
- A Tiny Popup Window will Appear. Just Click on View Section.
- Check the Show Libraries Box, Then Click on Apply and OK.
Method 2. Using Registry Editor
- Press Windows + R to Open Run Dialog Box.
- Now, Type
regeditin the Text Box and Click on OK.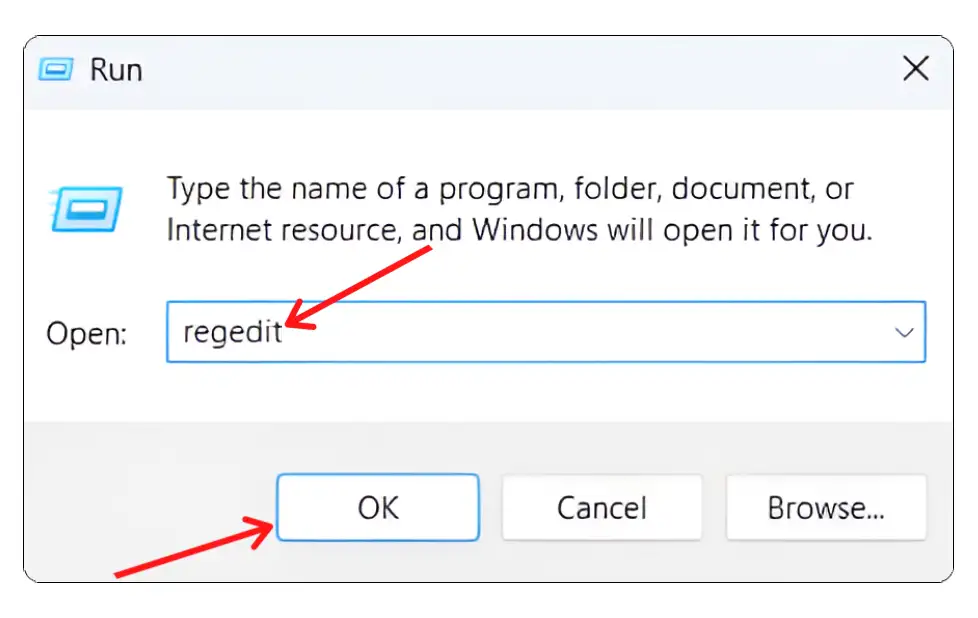
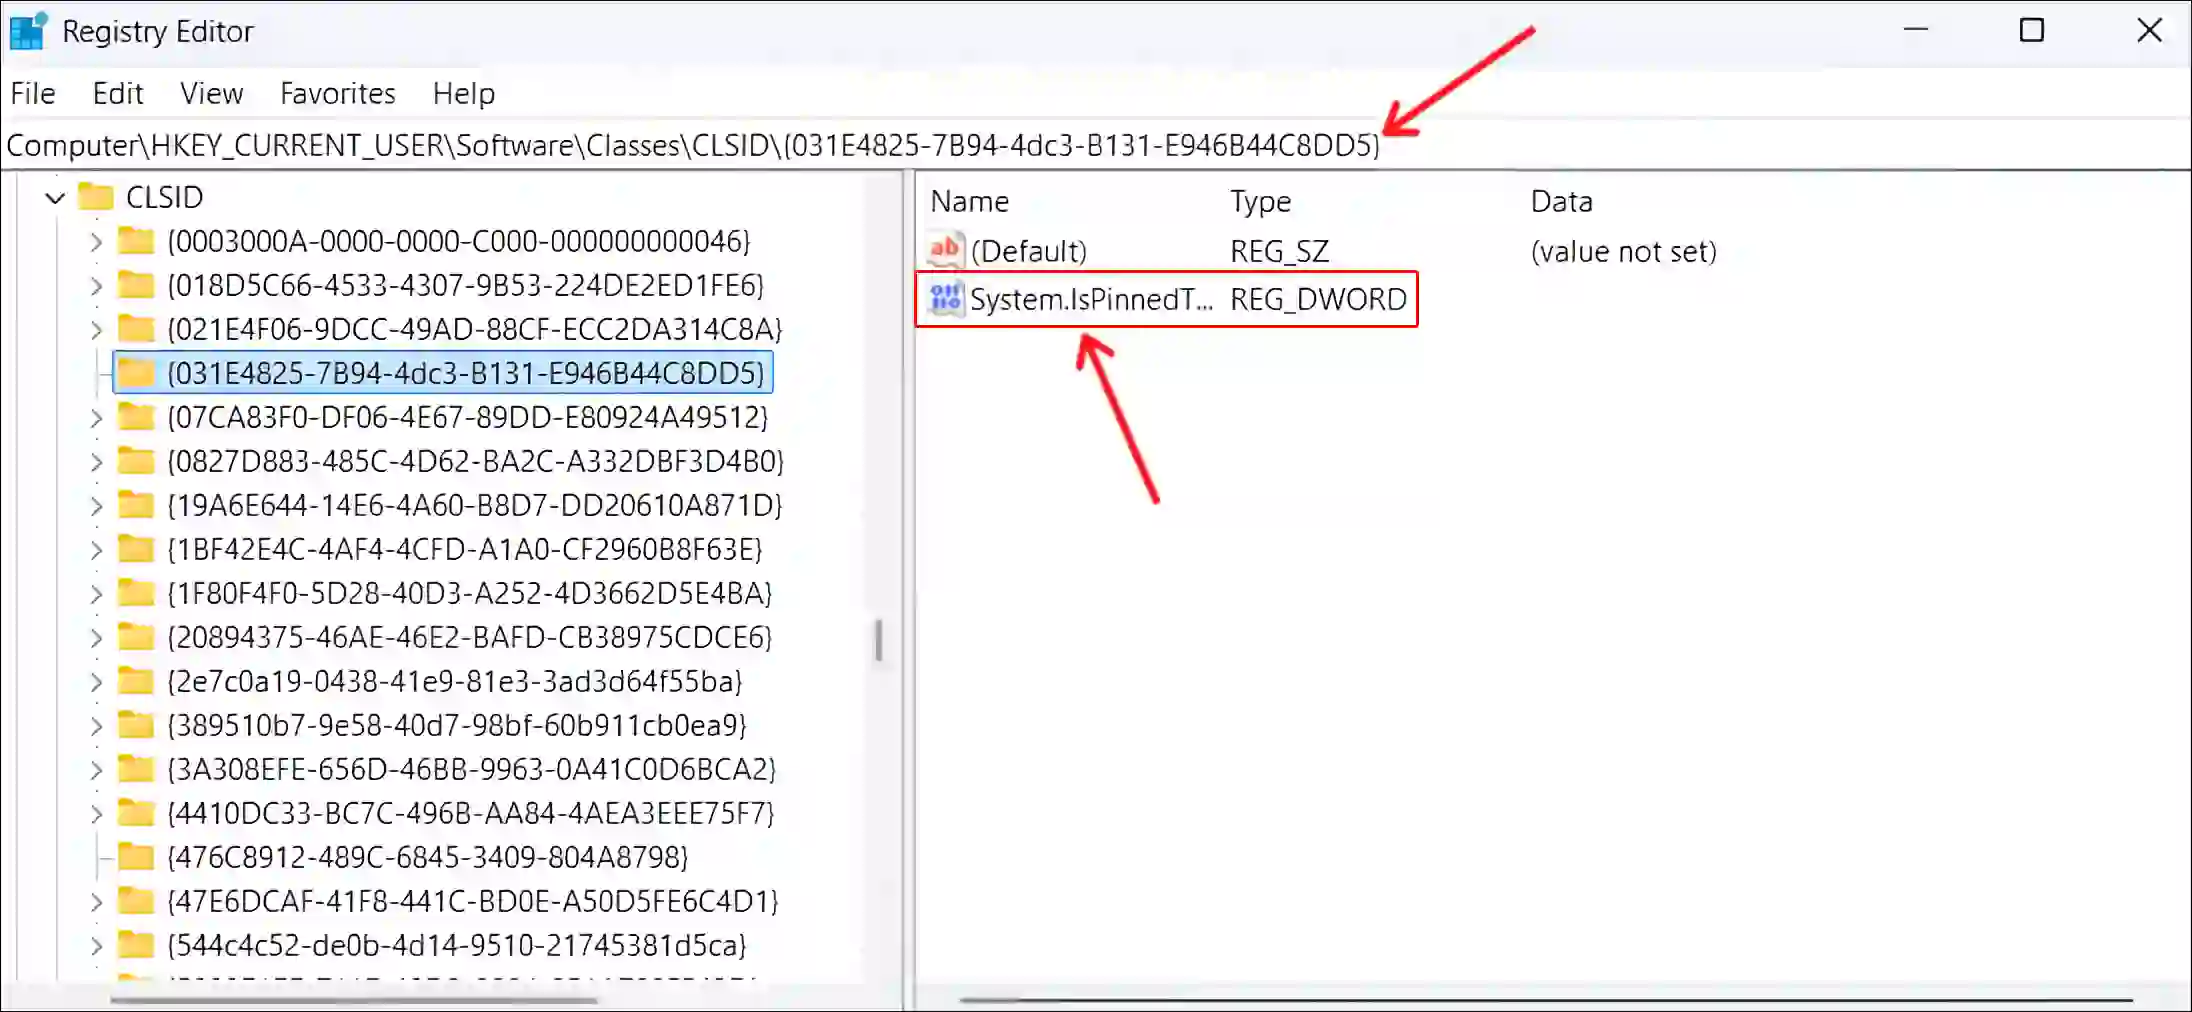
- Now, Navigate to
Computer\HKEY_CURRENT_USER\Software\Classes\CLSID\{031E4825-7B94-4dc3-B131-E946B44C8DD5}Path. - Double-Click on the System.IsPinnedToNameSpaceTree.
- Set the Value Data to
1and Click on OK Button.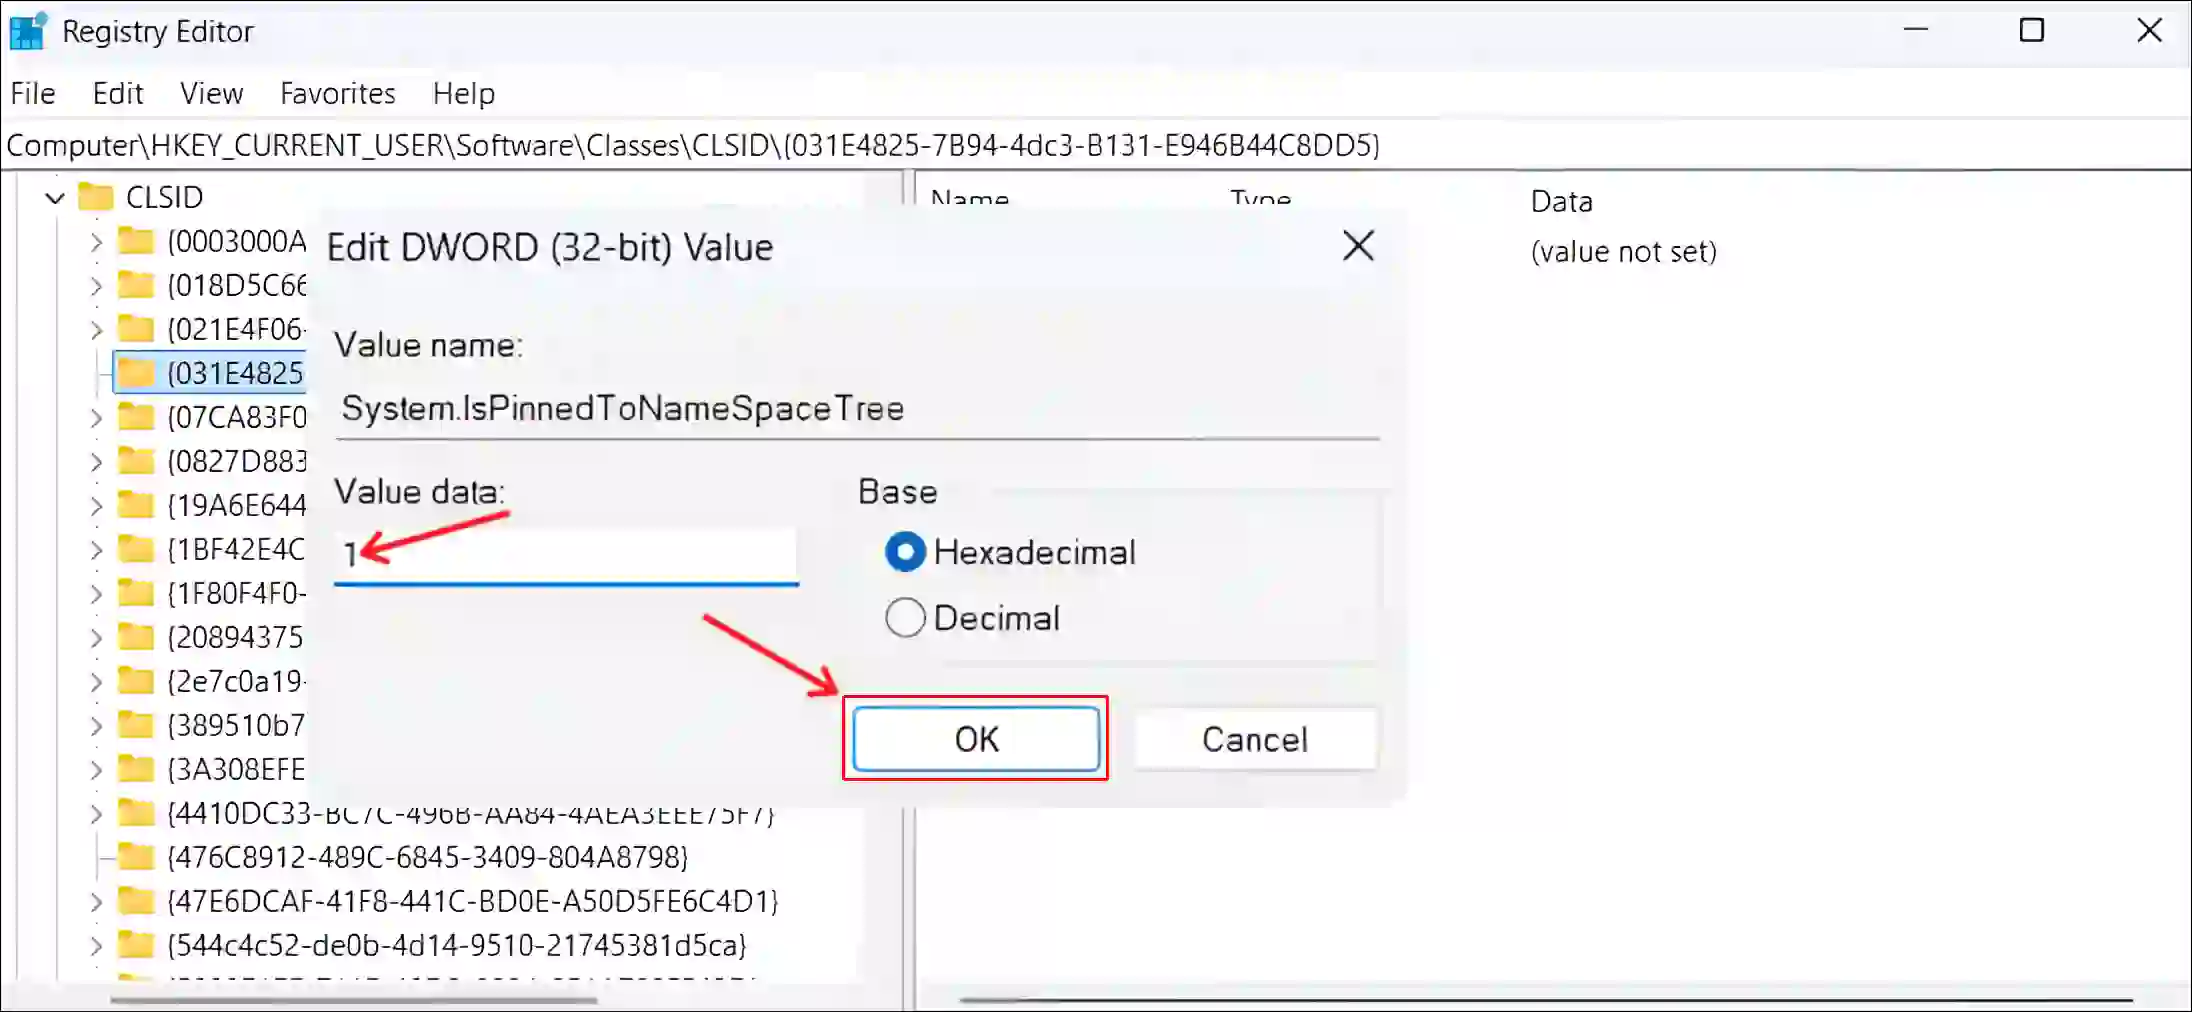
By completing any of the two methods given above, the Libraries Folder will start appearing in your Windows 11 File Explorer.
Also read: How to Enable Group Policy Editor (GPEdit.msc) in Windows 11 Home Edition
How to Hide the Libraries Folder in File Explorer on Windows 11
If you want to keep your File Explorer clean or you don’t need the Libraries folder, you can hide or remove this Libraries folder. Here are two different ways to remove the Libraries folder from This PC (File Explorer).
Method 1. Using File Explorer Options
- Press Windows + E Simultaneously to Quickly Open File Explorer.
- Click on Three Dots (•••) Next to Filter and Select Options.

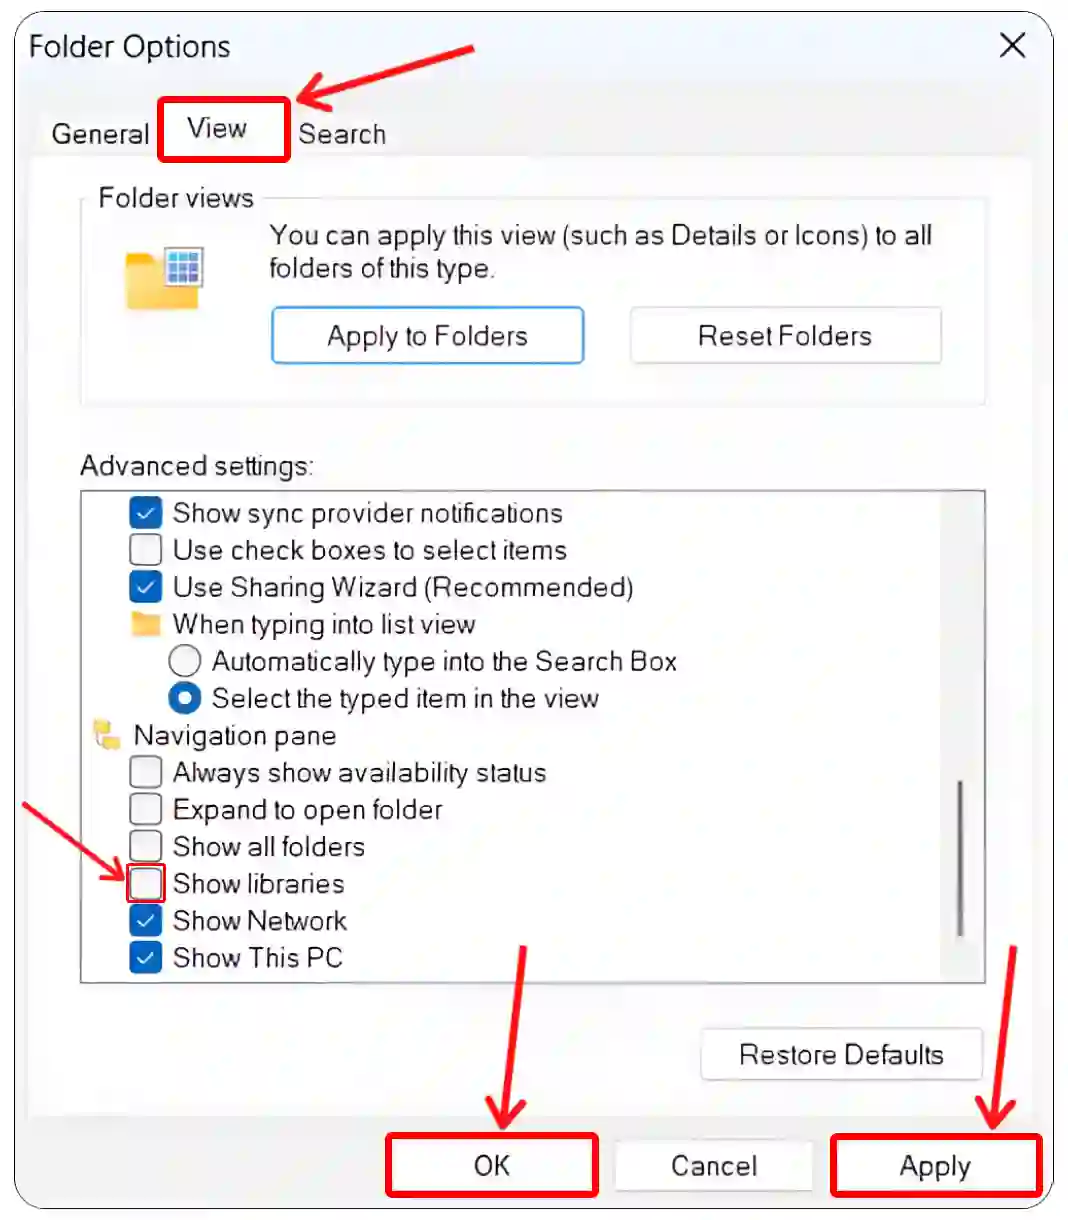
- A Tiny Popup Window will Appear. Just Click on View Section.
- Uncheck the Show Libraries Box, Then Click on Apply and OK.
Method 2. Using Registry Editor
- Press Windows + R to Open Run Dialog Box.
- Now, Type
regeditin the Text Box and Click on OK.
- Now, Navigate to
Computer\HKEY_CURRENT_USER\Software\Classes\CLSID\{031E4825-7B94-4dc3-B131-E946B44C8DD5}Path. - Double-Click on the System.IsPinnedToNameSpaceTree.

- Set the Value Data to
0and Click on OK Button.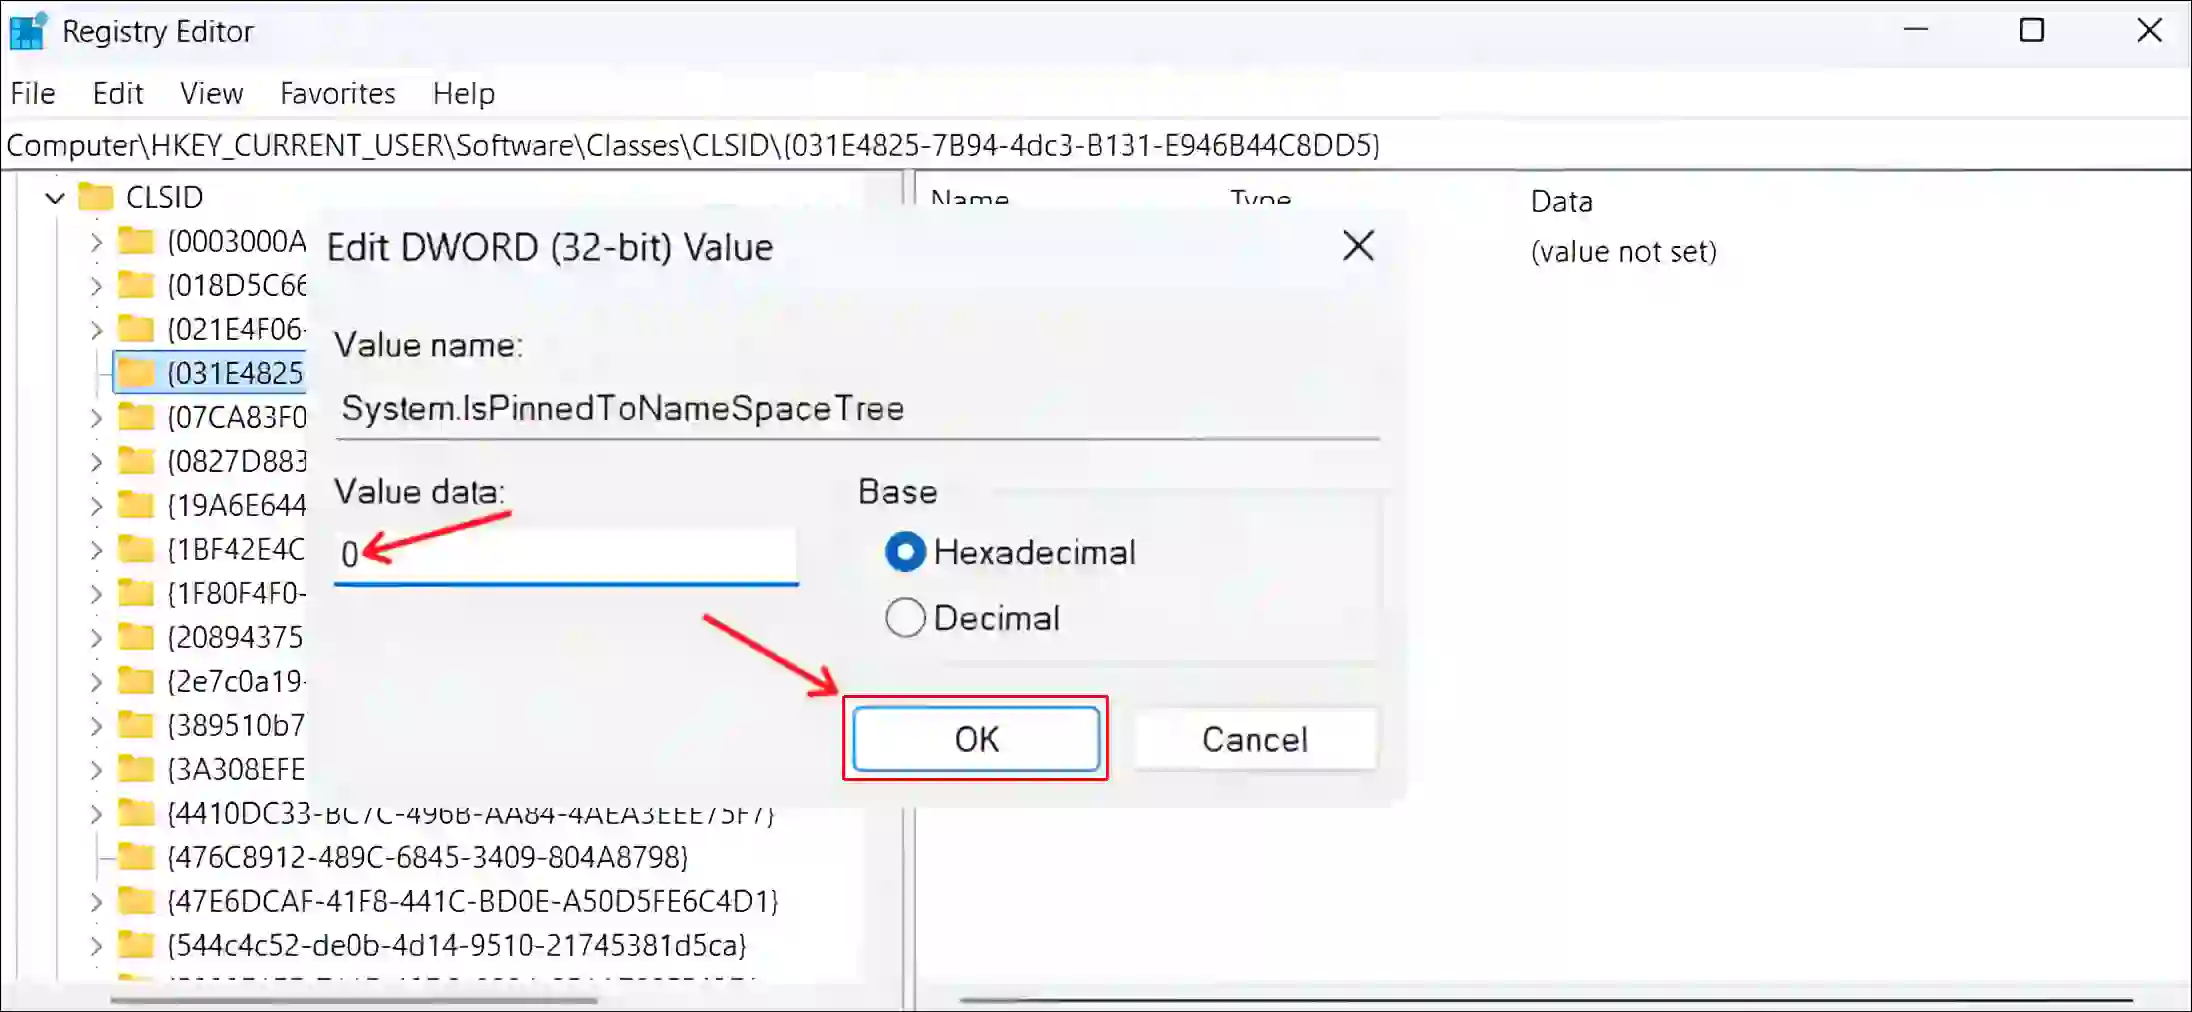
That’s all! Once you complete any one of the two methods mentioned above, your file explorer will no longer show the Libraries folder.
You may also read:
- Clear and Disable Activity History on Windows 11
- Hide (or Show) Date and Time from Taskbar in Windows 11
- How to Turn On or Off Dark Mode in Task Manager
FAQs
Q 1. Why is the Libraries folder not showing in Windows 11?
Answer – The Libraries folder is hidden by default in Windows 11. To show it, you need to manually enable it by going into File Explorer settings.
Q 2. Where is the Libraries folder in Windows 11?
Answer – You can find the Libraries folder in Windows 11 on the left panel of File Explorer. If it’s not visible, you can show it by selecting the “Show Library” option.
I hope you found this article very helpful and learned how to enable or disable the Libraries folder in File Explorer on Windows 11. If you have any problems, then tell us by commenting below. Please share this article.

