3 Quick Ways to Show or Hide “This PC” in File Explorer (Windows 11)
If you open File Explorer on your Windows PC or laptop, you will see the “This PC” option in the navigation pane. But did you know that you can show or hide it? Yes! In this article, I have shared 3 different methods that will teach you how to show and hide “This PC” in File Explorer.
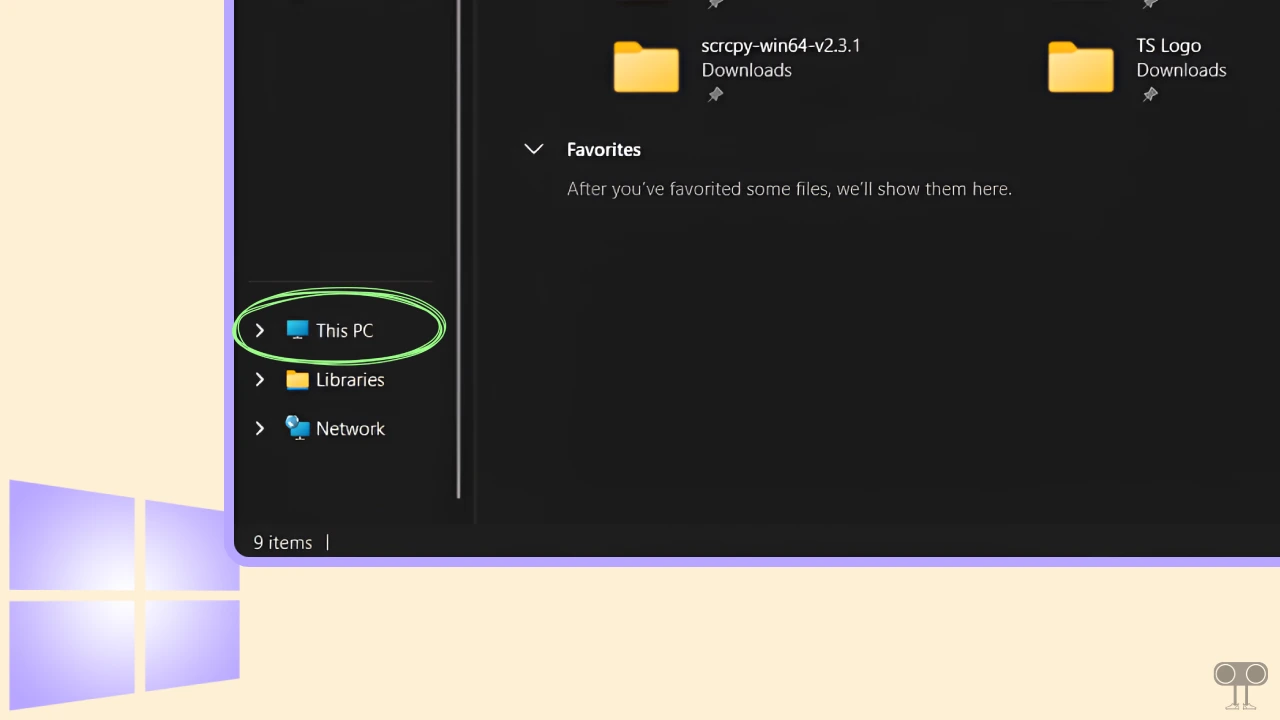
What is This PC in File Explorer?
“This PC” is a location in Windows File Explorer where you can view all the drives and storage devices on your computer. This shows your primary drive (the C: Drive), as well as additional drives, external drives (such as USB, external SSD, and HDD), and network drives.
How to Show or Hide “This PC” in File Explorer in Windows 11 (3 Ways)
Showing or hiding ‘This PC’ in File Explorer is a feature that lets you customize your computer screen according to your needs. Sometimes you want the “This PC” icon to appear in your File Explorer window, and sometimes you want to remove it.
Just as it’s easy to add ‘This PC’ to File Explorer, you can also easily remove it. Follow the steps below to remove the ‘This PC’ option from File Explorer.
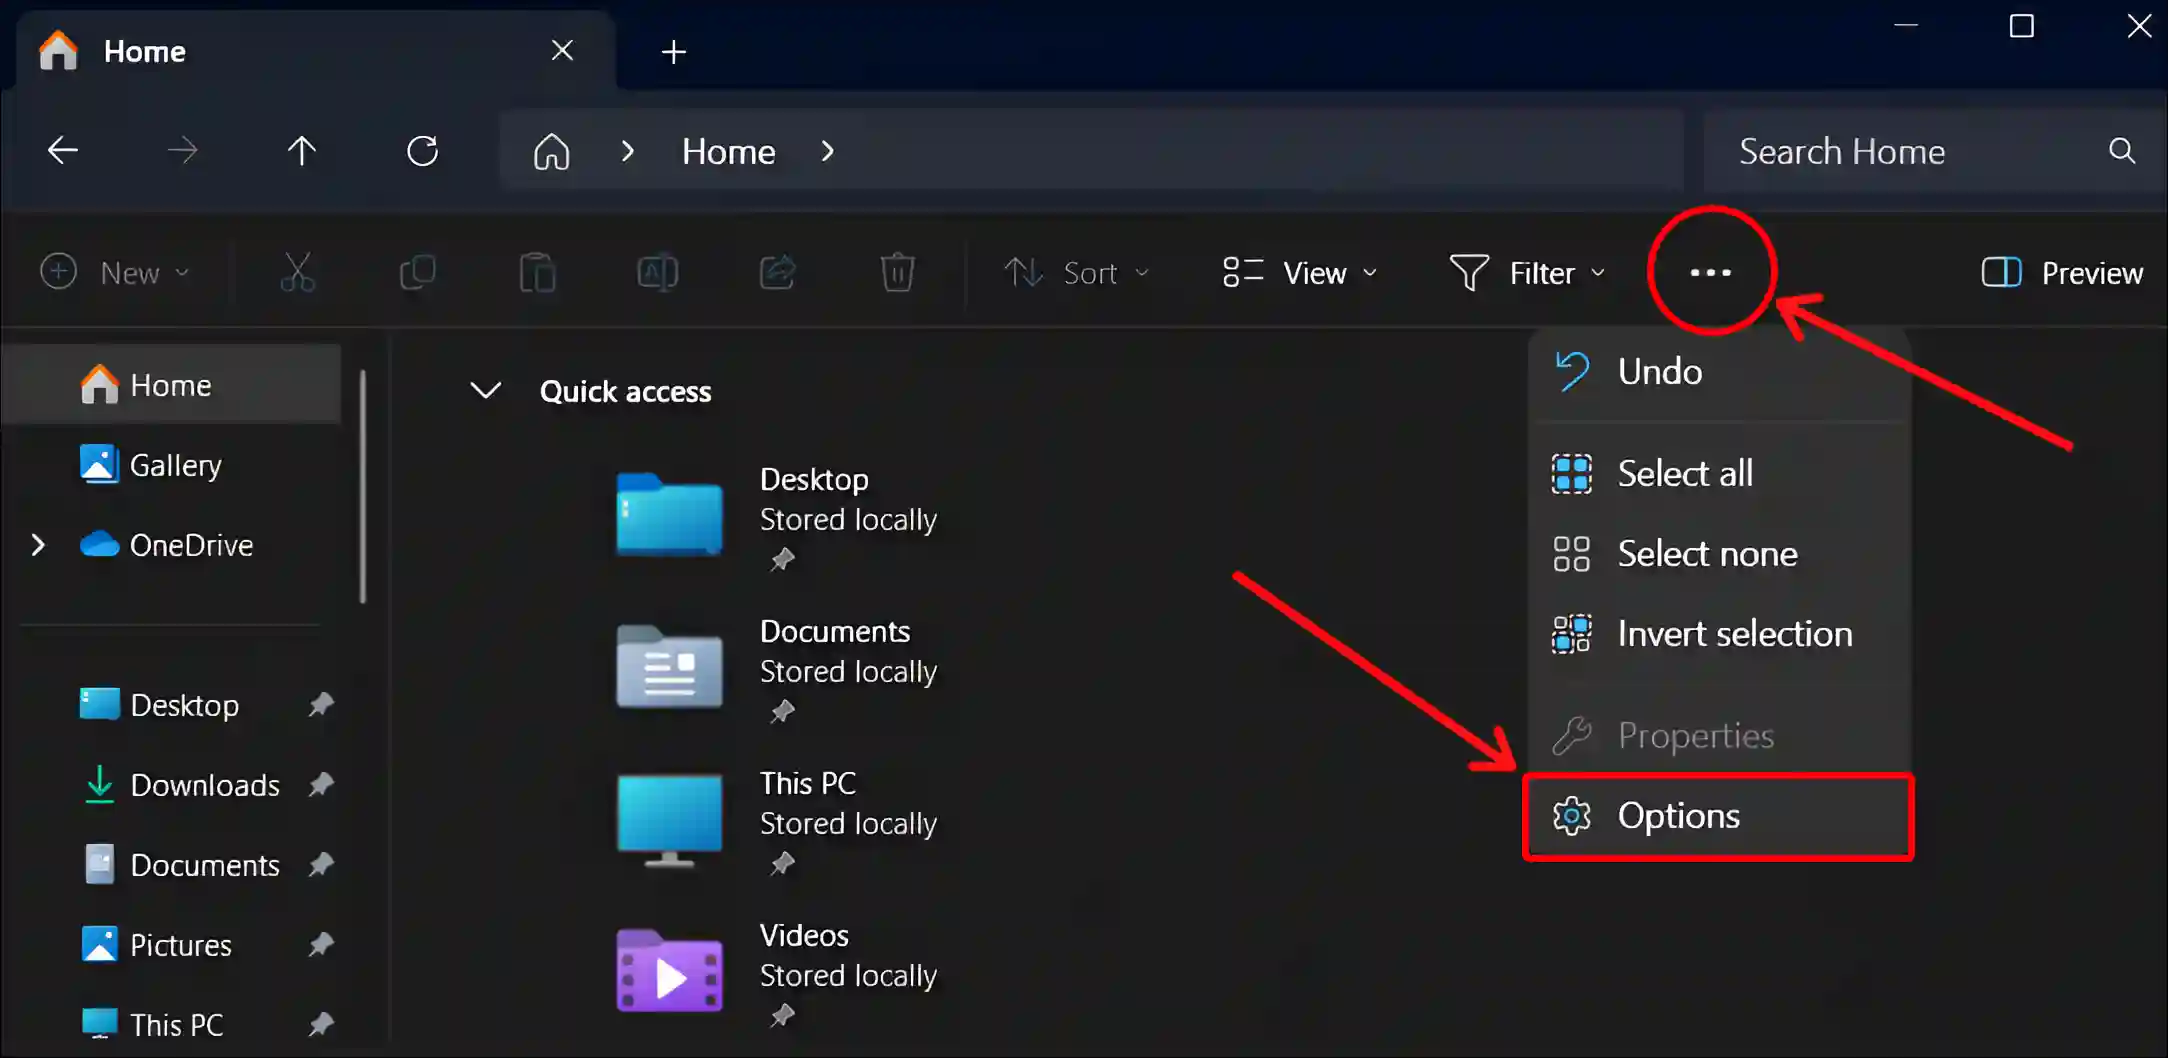
#1. Show/Hide “This PC” in File Explorer from Folder Options
File Explorer has a Hidden Folder Options setting that allows users to enable and disable the options. Using the file manager’s folder options, you can show or hide “This PC”.
- Press 🪟 Windows + E Simultaneously to Open File Explorer.
- Click on Three Dots (•••) Next to Filter and Select Options.
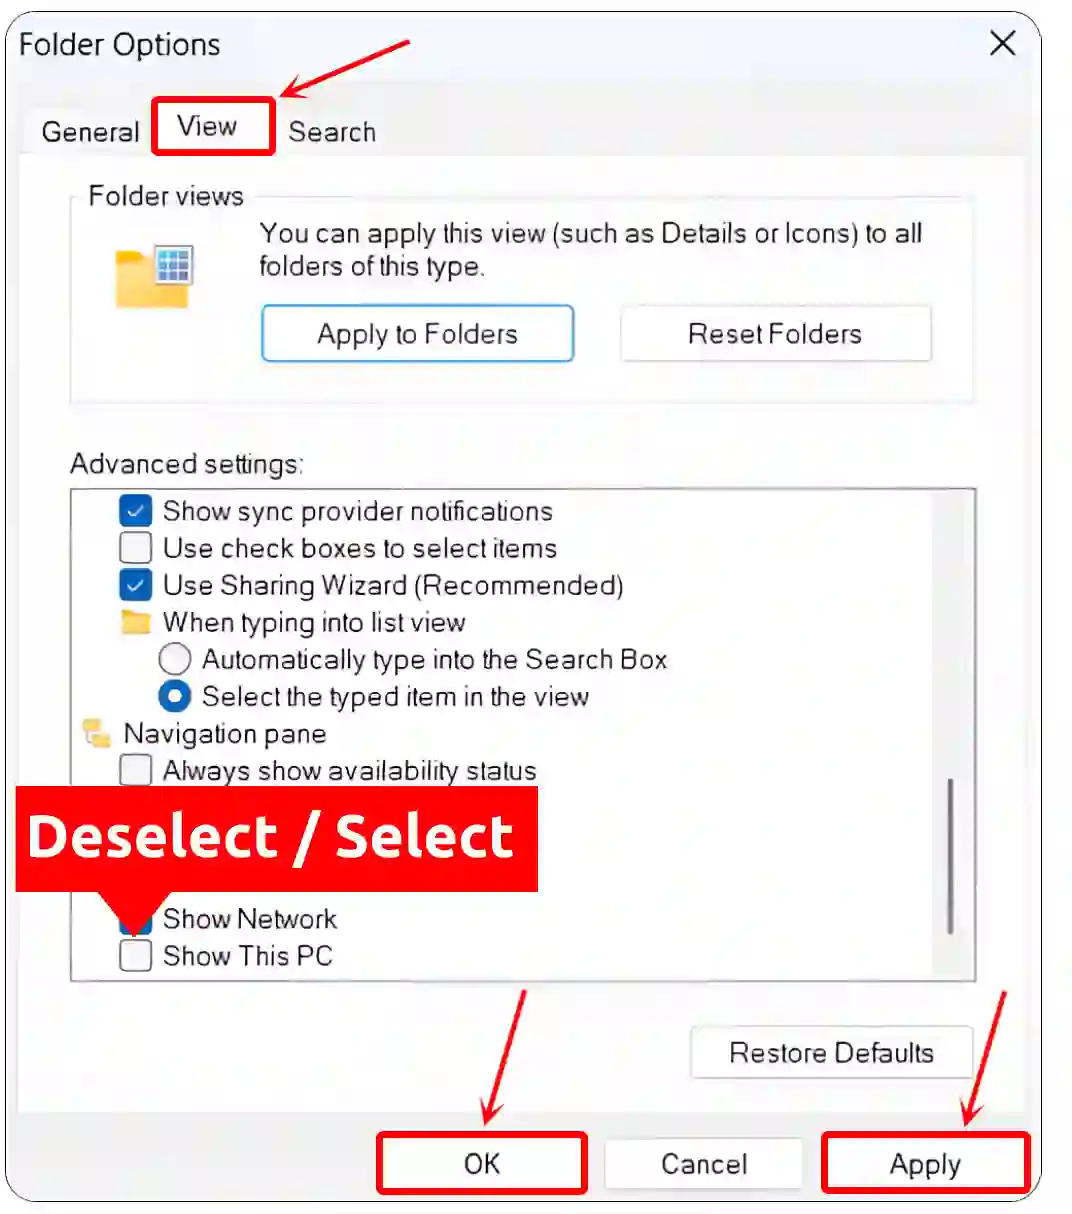
- A Tiny Popup Window will Appear. Just Click on View Section.
- Deselect or Select “Show This PC” Option, Then Click on Apply and OK.
Also read: Show or Hide Empty Drives in File Explorer on Windows 11
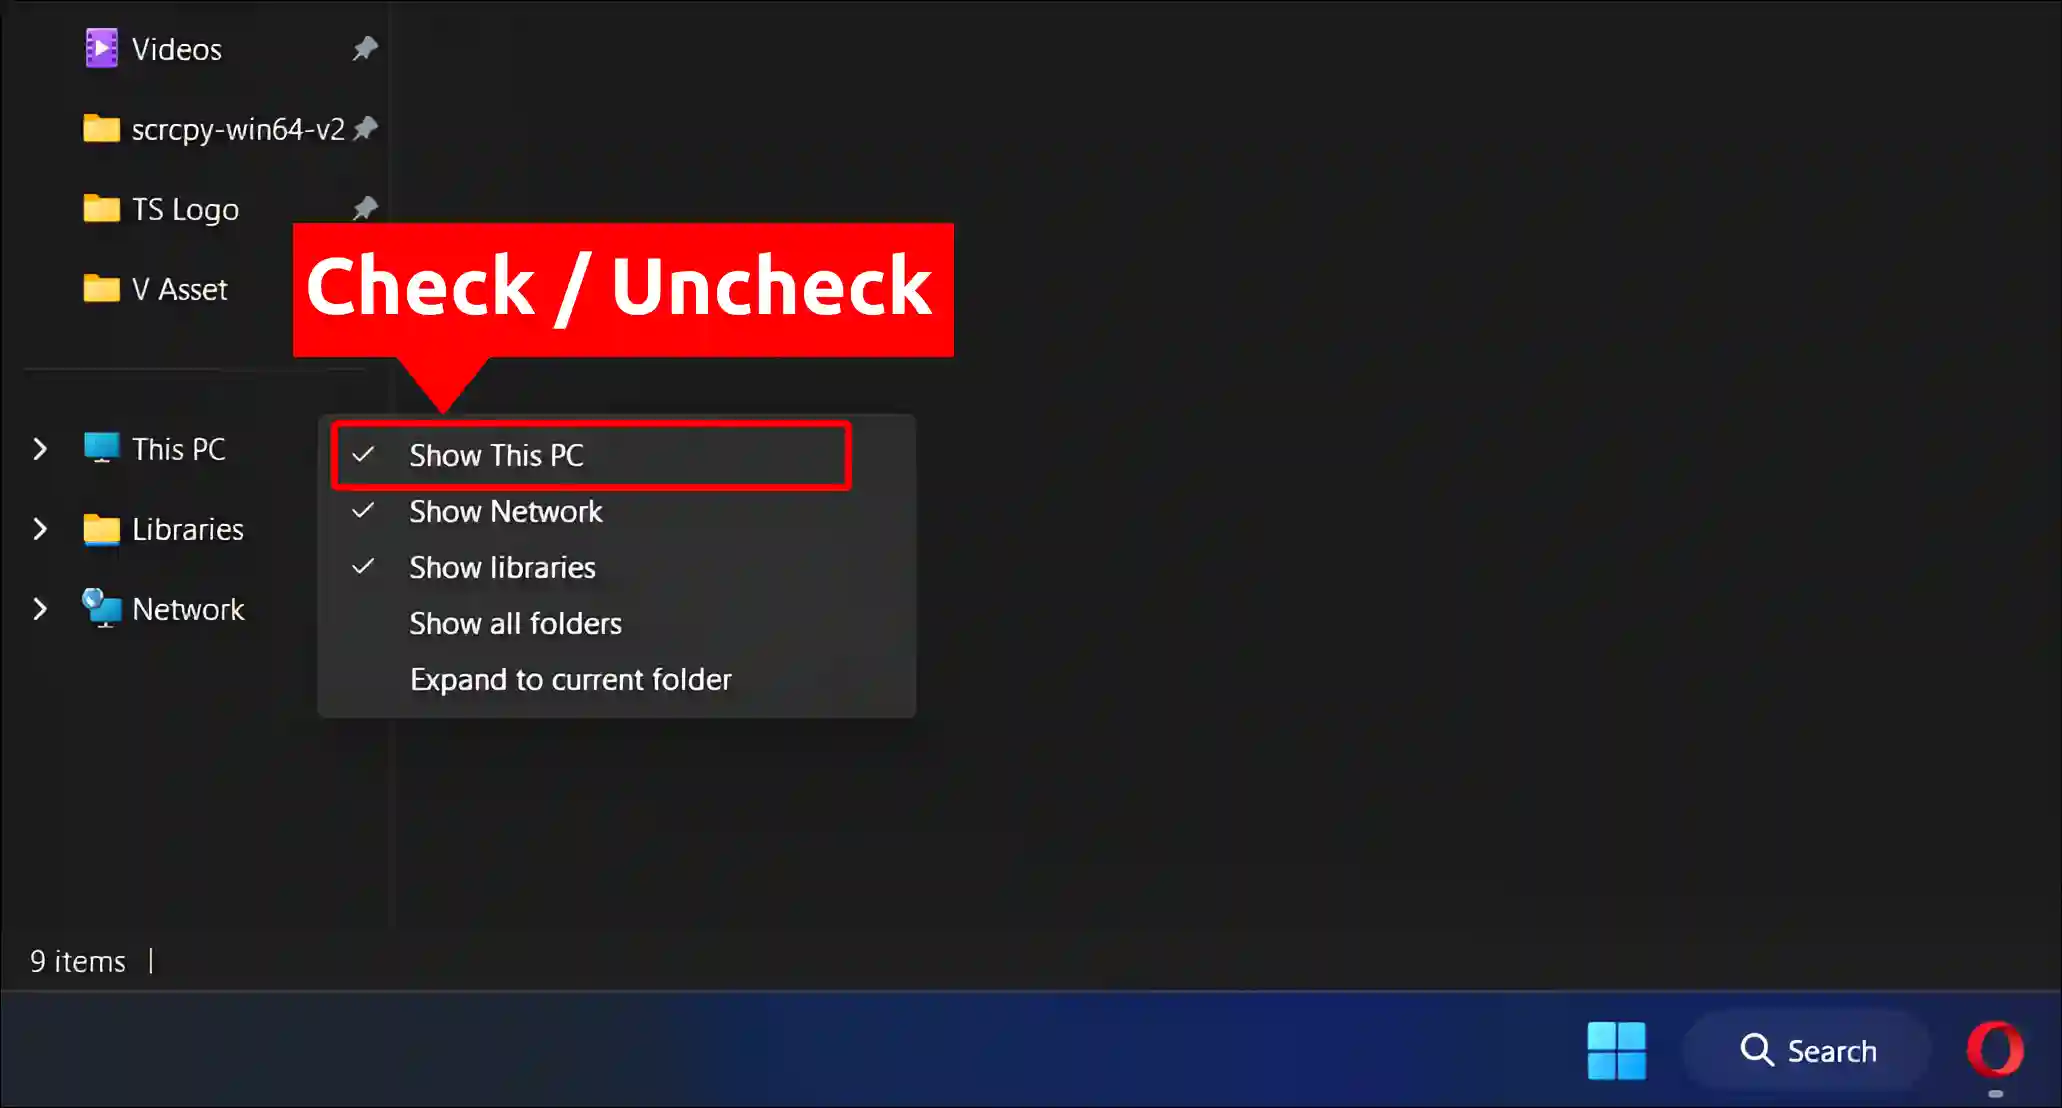
#2. Show/Hide “This PC” in File Explorer from Navigation Pane
Although the ‘This PC’ option is located at the bottom of the Navigation Pane in File Explorer, did you know you can add or remove it directly from the Navigation Pane? It’s the easiest way. Just follow the steps below.
Step 1. Press Press 🪟 Windows + E to Open File Explorer.
Step 2. Right-Click on an Empty Space in the Navigation Pane and Check or Uncheck the “Show This PC” Option.
#3. Show/Hide “This PC” in File Explorer from Registry Editor
Follow the steps below to show or hide “This PC” in File Explorer using the Registry Editor. But be careful while making changes in the Registry Editor, because even a small mistake can have a negative impact on your system.
- Press 🪟 Windows + R to Open Run Dialog Box.
- Now, Type
regeditin the Text Box and Click on OK.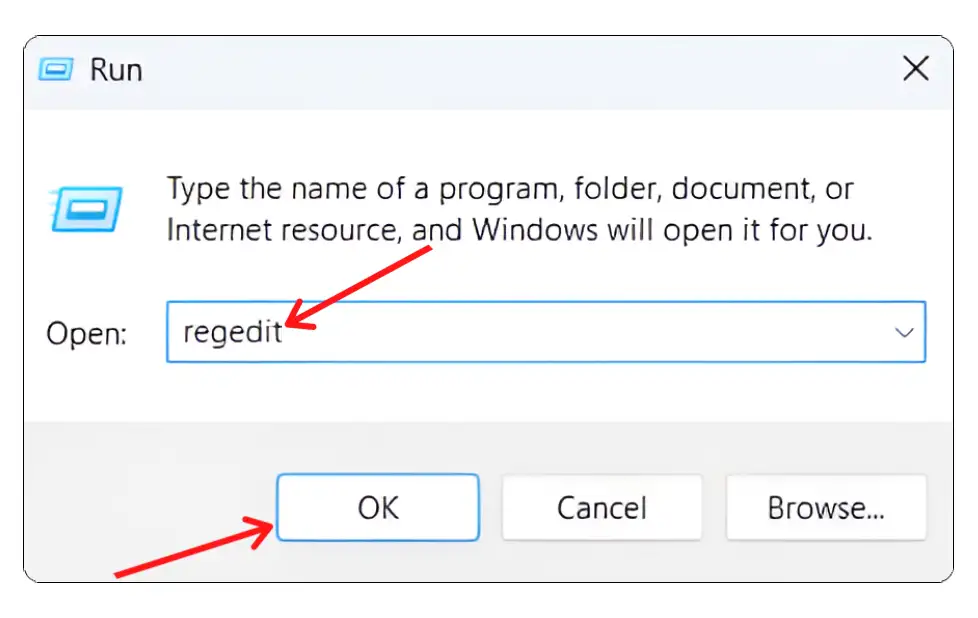
- Click Yes on User Account Control (UAC) Pop-up.
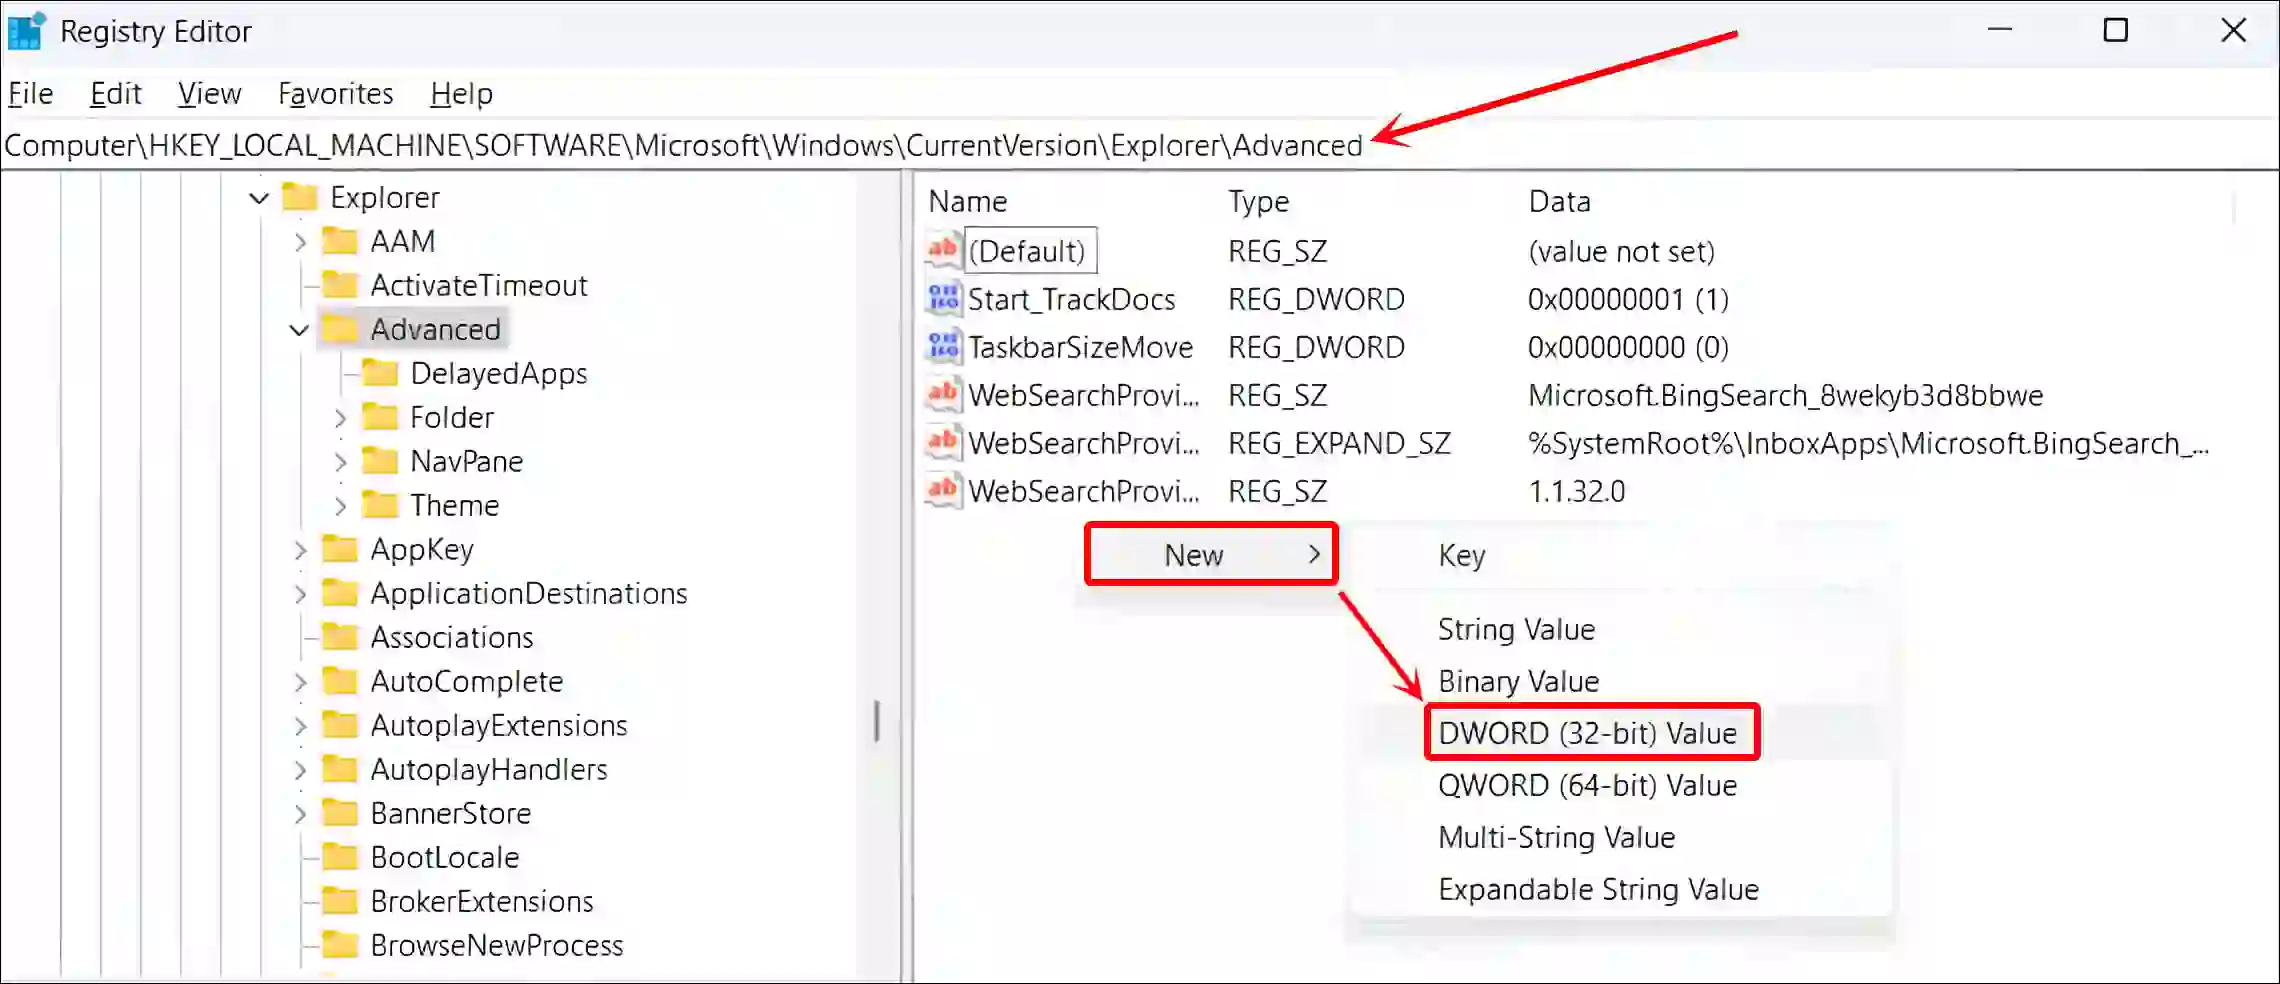
- Now, Navigate to
Computer\HKEY_LOCAL_MACHINE\SOFTWARE\Microsoft\Windows\CurrentVersion\Explorer\AdvancedPath. - Right-Click on the Blank Screen and Select New > DWORD (32-bit) Value.
- Name the New Value HideMyComputerIcons.
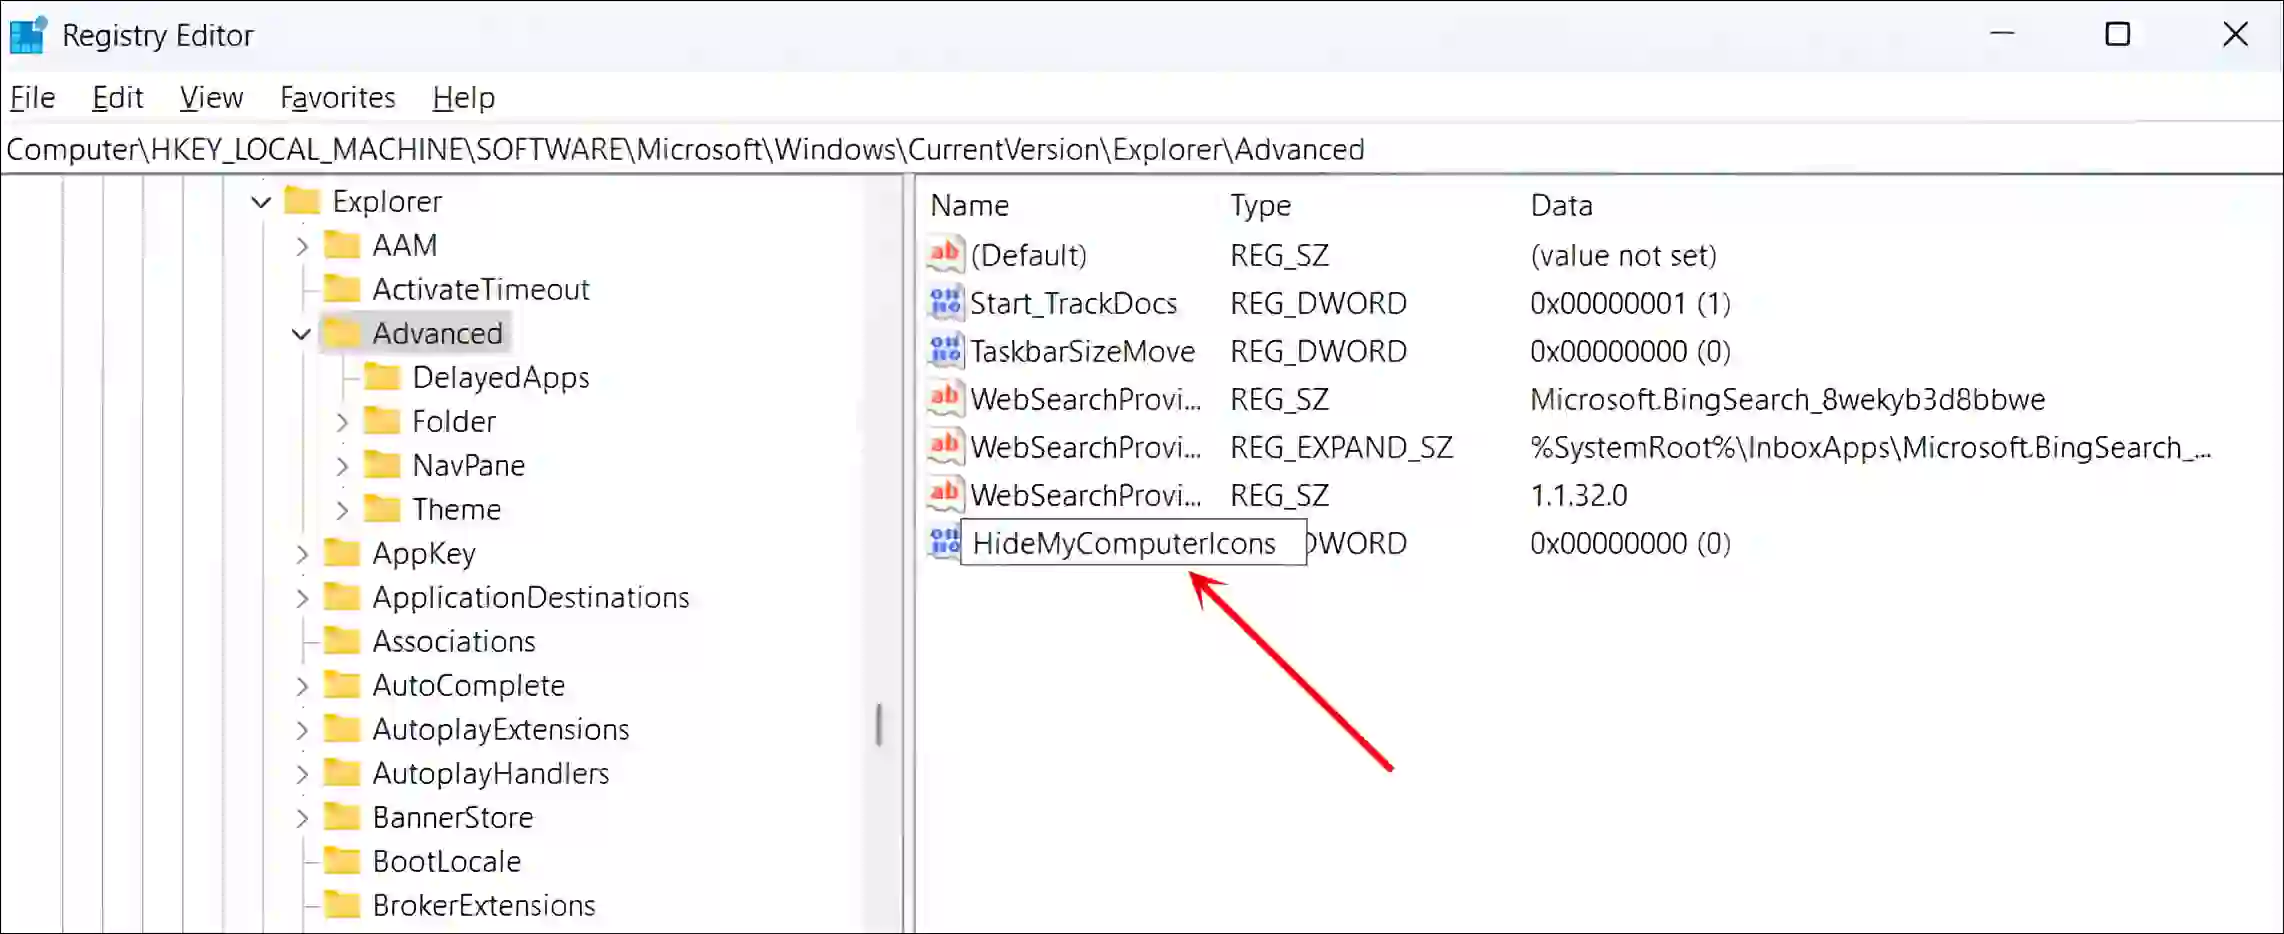
- Now, Double-Click on the HideMyComputerIcons.
- Set the Value Data to
0(to Show This PC) and Click on OK Button.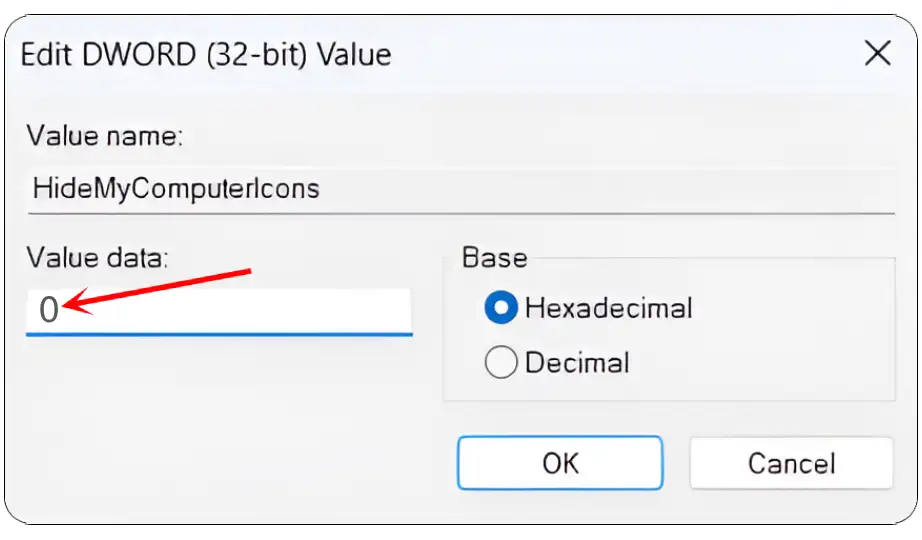
- Set the Value Data to
1(to Hide This PC) and Click on OK Button.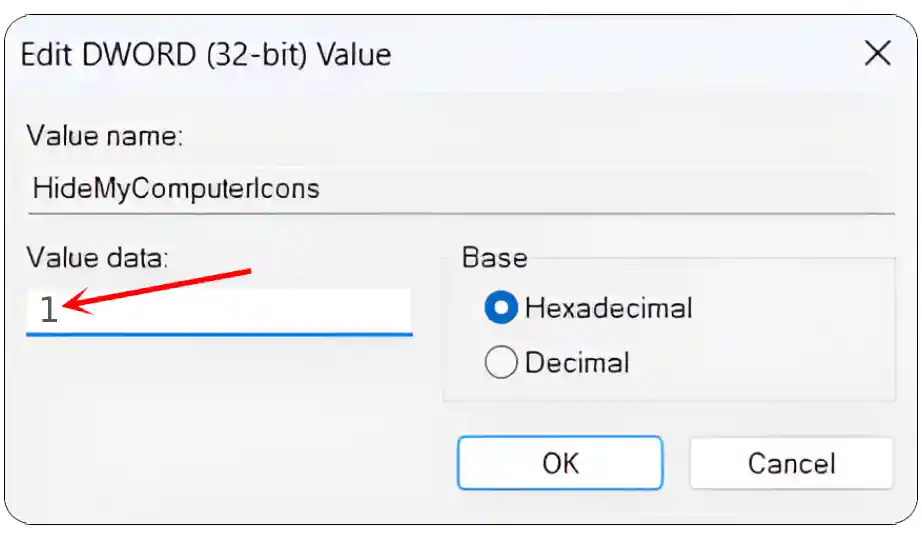
That’s all! Once you complete the above-mentioned methods on your computer, the “This PC” option will show and hide in your file explorer.
Also read: Enable Group Policy Editor (GPEdit.msc) in Windows 11 Home Edition
I hope you found this article very helpful and learned how to show or hide ‘This PC’ in File Explorer on Windows 11. If you have any problems, then tell us by commenting below. Please share this article.


![Check Last System Boot Date and Time of Windows 11 [CMD, PowerShell, Task Manager, Event Viewer]](https://techysnoop.com/wp-content/uploads/2026/03/last-system-boot-date-time-windows-11-768x432.webp)