4 Quick & Simple Ways to Find Product Key on Windows 11
The Windows product key is a 25-character code that is required to authenticate and activate your Windows operating system. This product key ensures that the Windows OS you are using is genuine and not pirated. There are many types of these product keys, such as retail keys, OEM keys, volume license keys, digital licenses, etc.
Do you know that you can easily find your Windows product key whether you have a computer or a laptop? Many times you need a product key, but you don’t know where to find it.
If you are a Windows 11 OS user, then this article is for you. In this article, I have shared four methods that will help you find the product key on a PC or laptop running Windows 11. All these four methods are genuine and tested by our team.
Note: Brand-new laptops from companies like HP, Asus, Lenovo, or Dell come with Windows OS pre-installed. The product key included is called an ‘OEM product key’.
#1. Using CMD (Command Prompt)
If you also want to view the product key on your PC or laptop, Windows CMD can help you. Simply run a short command in the Command Prompt to retrieve the pre-installed product key. The process is straightforward; follow the steps below for guidance.
To find Windows 11 product key using cmd:
- Press Windows + S and Search “CMD” and Run as Administrator.
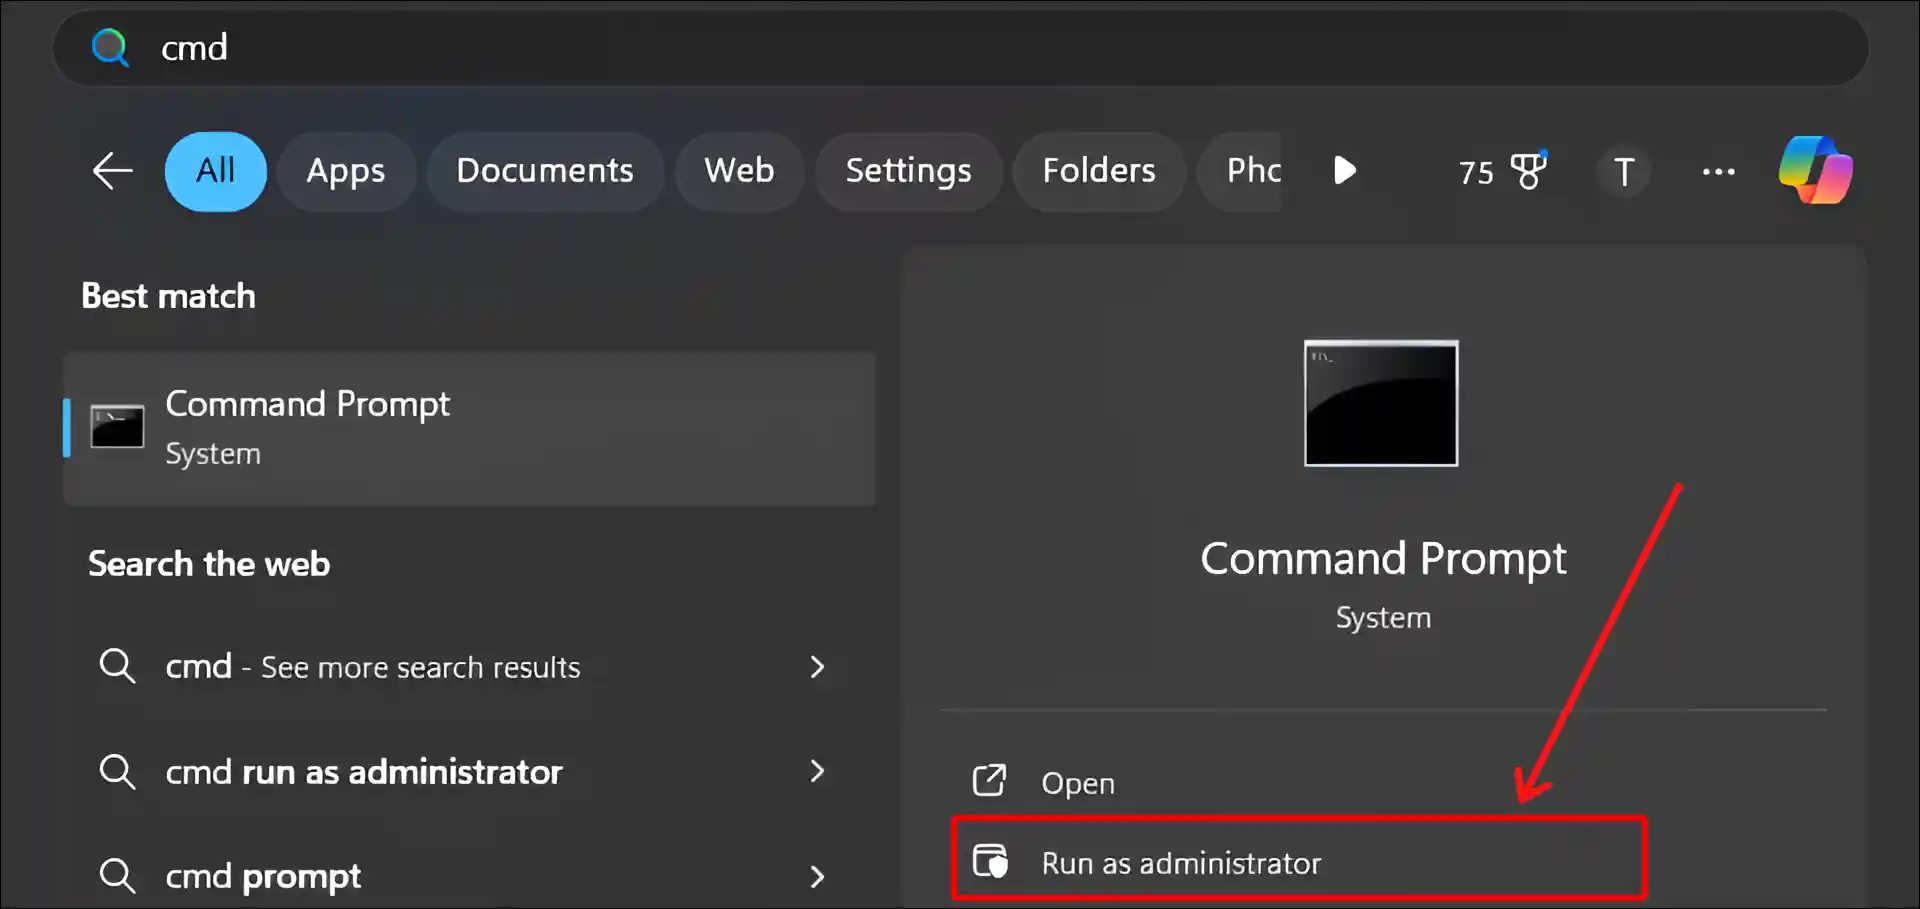
- Click OK to Bypass User Account Control.
- Enter
wmic path softwarelicensingservice get OA3xOriginalProductKeyCommand Line and Hit Enter.
- Now, Here You Can See Your Original Product Key.
You can copy and save this key in a safe location, such as your Dropbox or Google Drive account, for future use.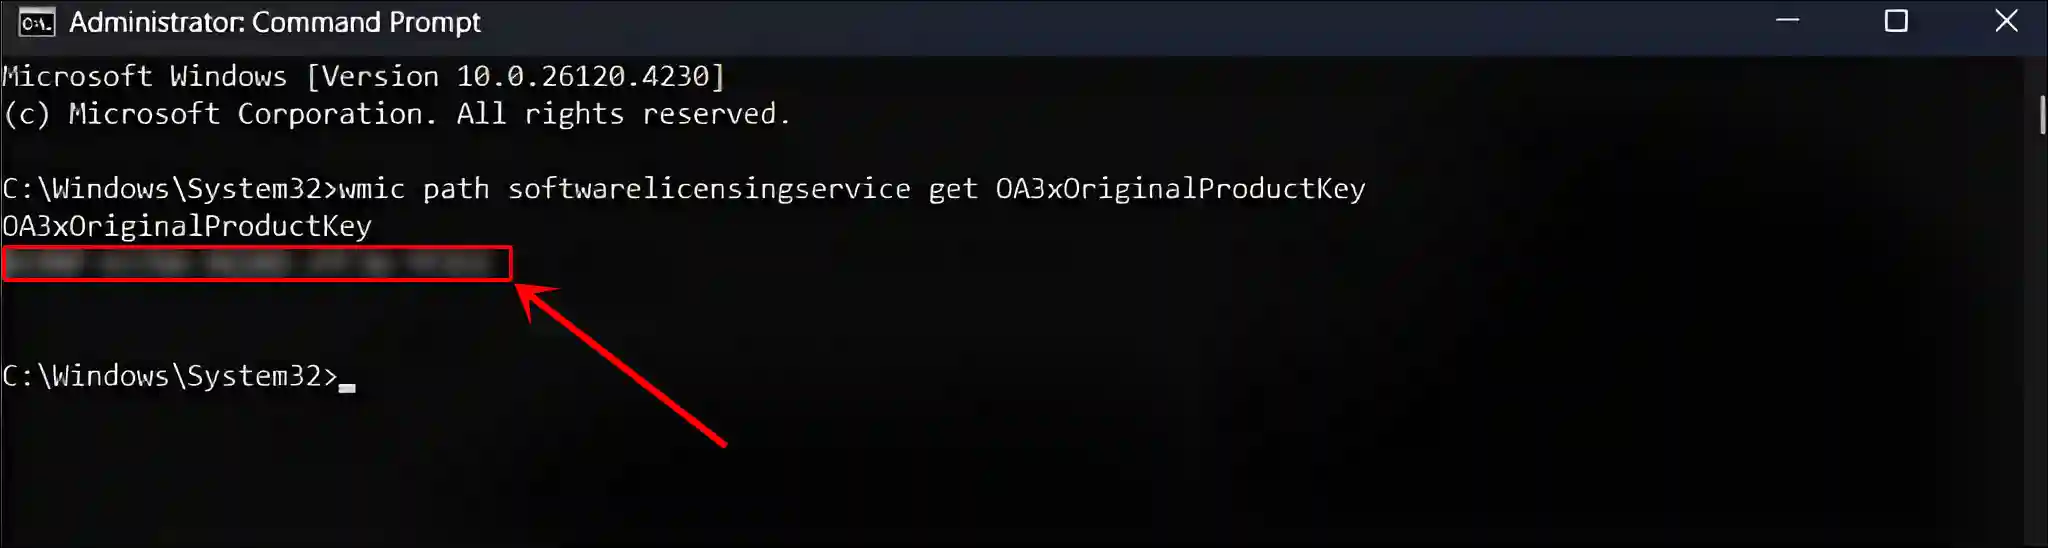
Also read: How to Create Shutdown and Restart Shortcut in Windows 11
#2. Using PowerShell
In the Windows OS, PowerShell works similarly to CMD. It also comes pre-installed and can easily execute users’ command lines to run programs. Using the steps mentioned below, you can enter a specific command in PowerShell to view the product key.
To find Windows 11 product key using powershell:
- Press Windows + S and Search “PowerShell” and Run as Administrator.
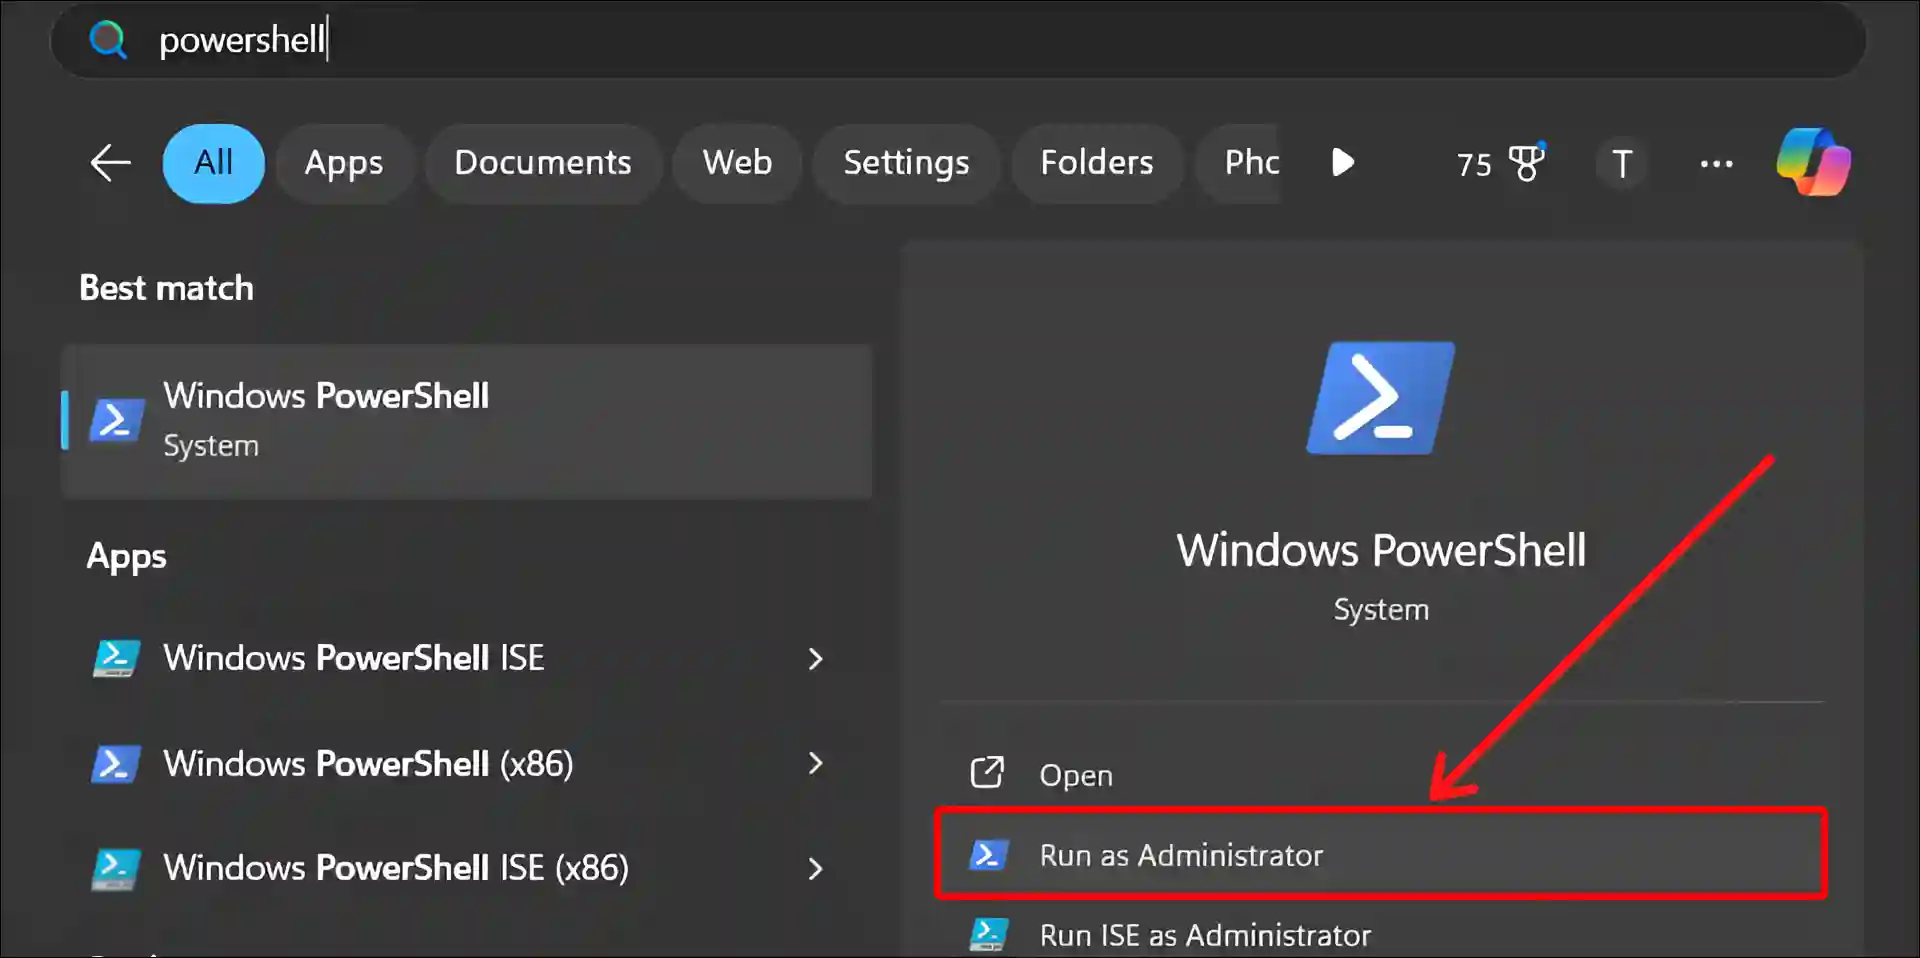
- Click OK to Bypass User Account Control.
- Enter
(Get-WmiObject -query 'select * from SoftwareLicensingService').OA3xOriginalProductKeyCommand Line and Hit Enter.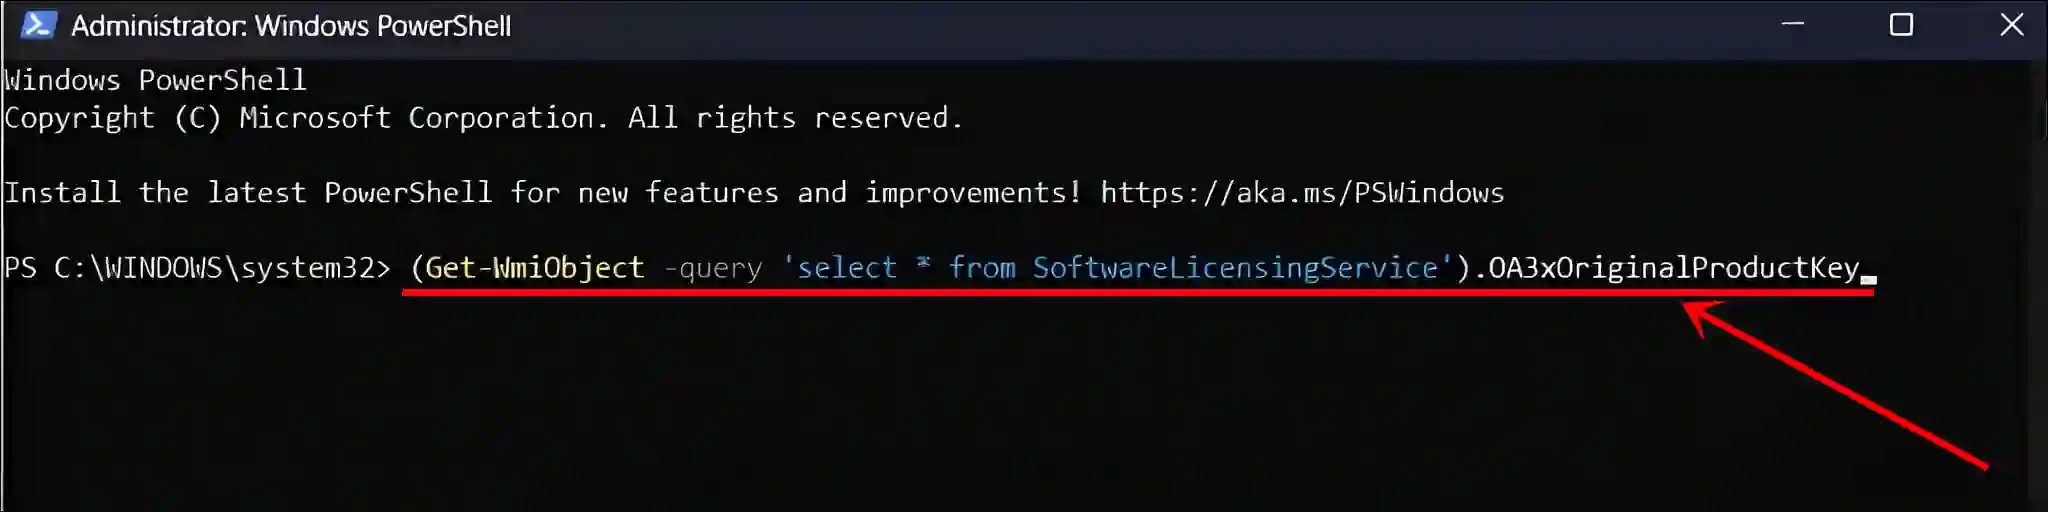
- Now, You Can See Your Product Key.

Also read: How to Check BIOS Version in Windows 11
#3. Using Registry Editor
The registry is a database where all the settings, configurations, and preferences of Windows and installed programs are stored, allowing you to view and edit them. Did you know that you can also view the Windows product key using this registry editor? Let me tell you how.
To get windows 11 product key from registry:
- Press 🪟 Windows + R to Open Run Dialog Box.
- Now, Type
regeditin the Text Box and Click on OK.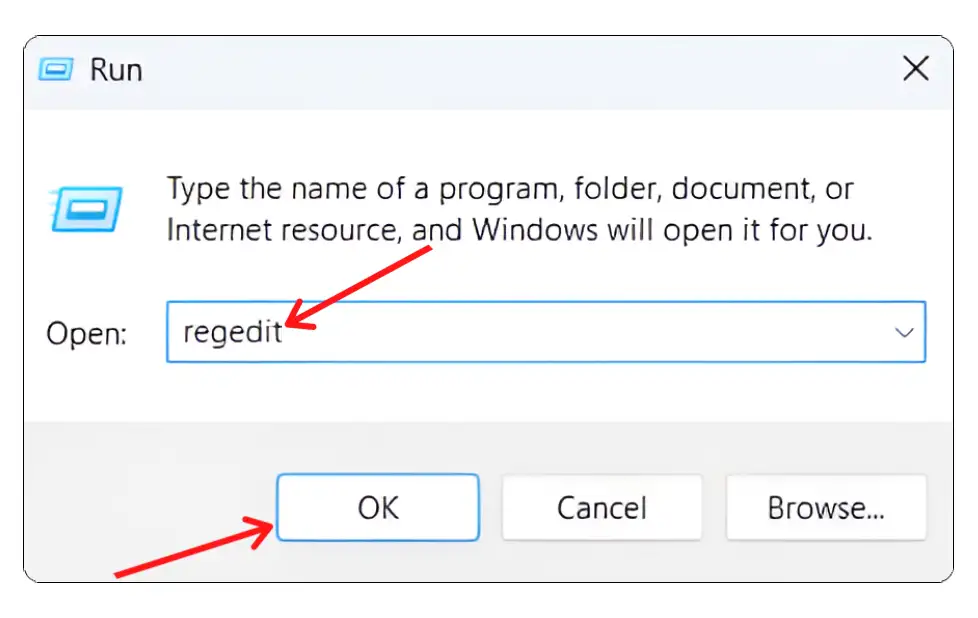
- Click Yes on User Account Control (UAC) Pop-up.
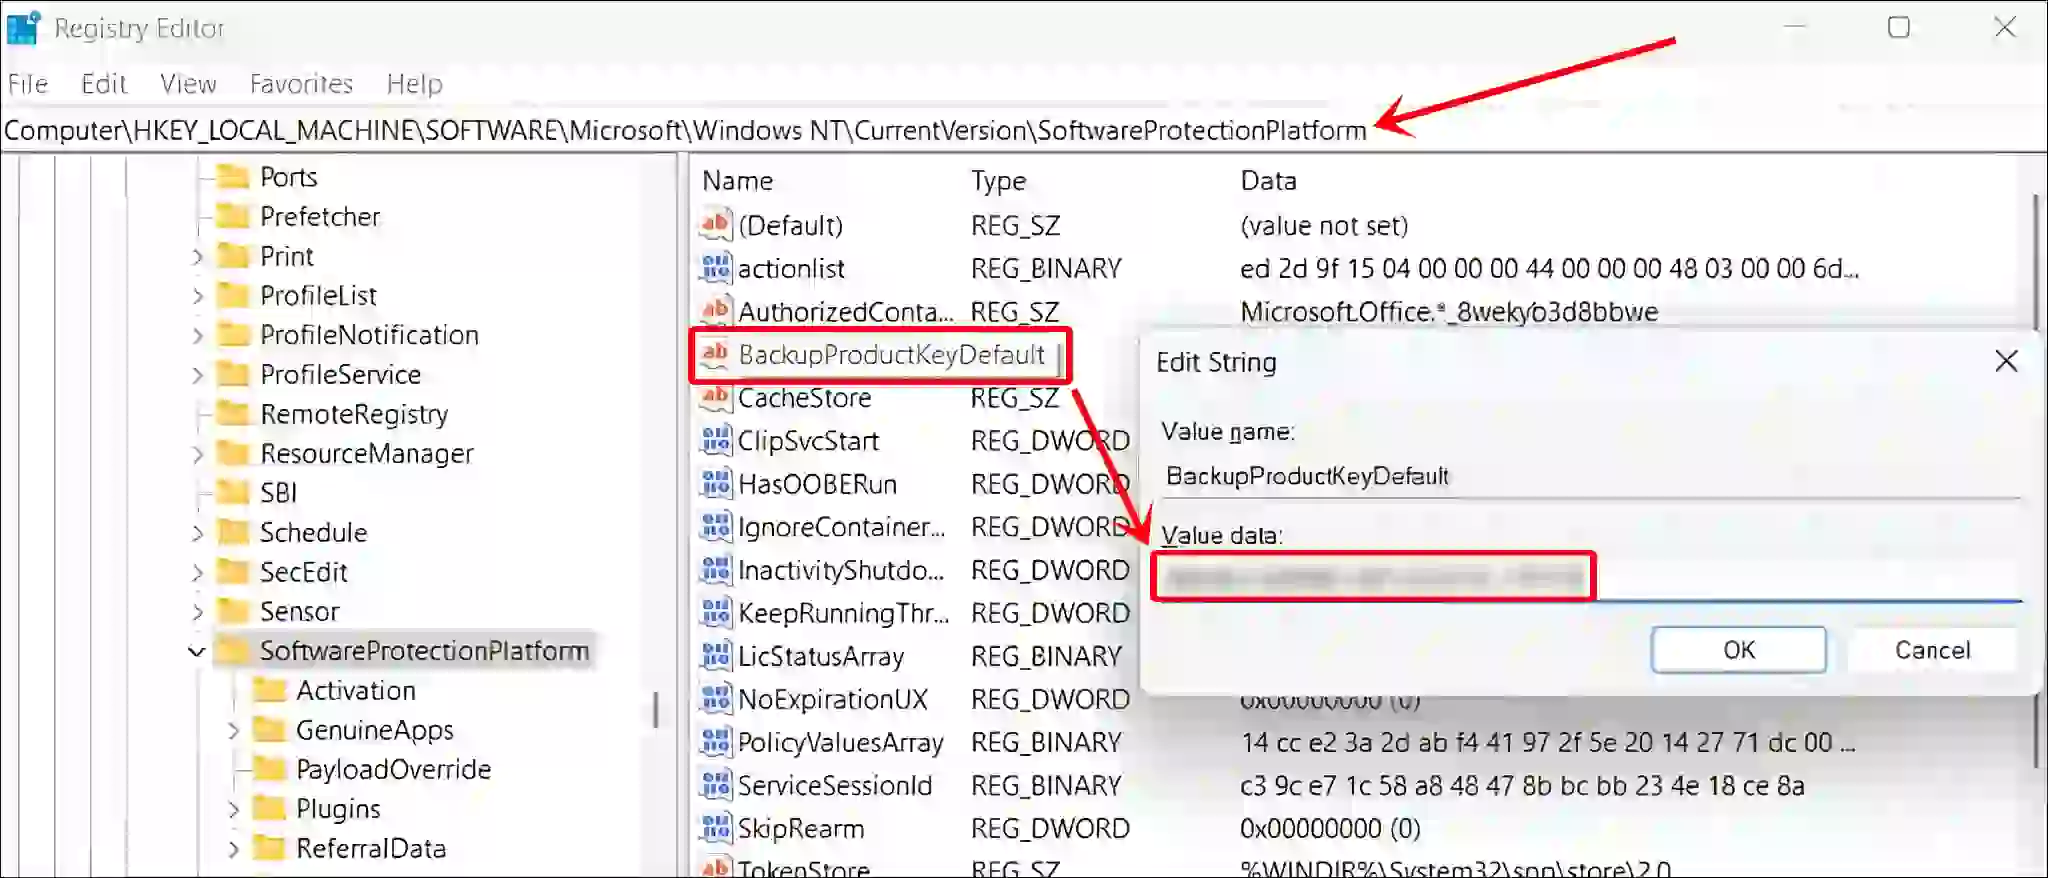
- Now, Navigate to
Computer\HKEY_LOCAL_MACHINE\SOFTWARE\Microsoft\Windows NT\CurrentVersion\SoftwareProtectionPlatformPath. - Now, Double-Click on the BackupProductKeyDefault.
- The Value Data is Your Product Key.
Also read: Enable Group Policy Editor (GPEdit.msc) in Windows 11 Home Edition
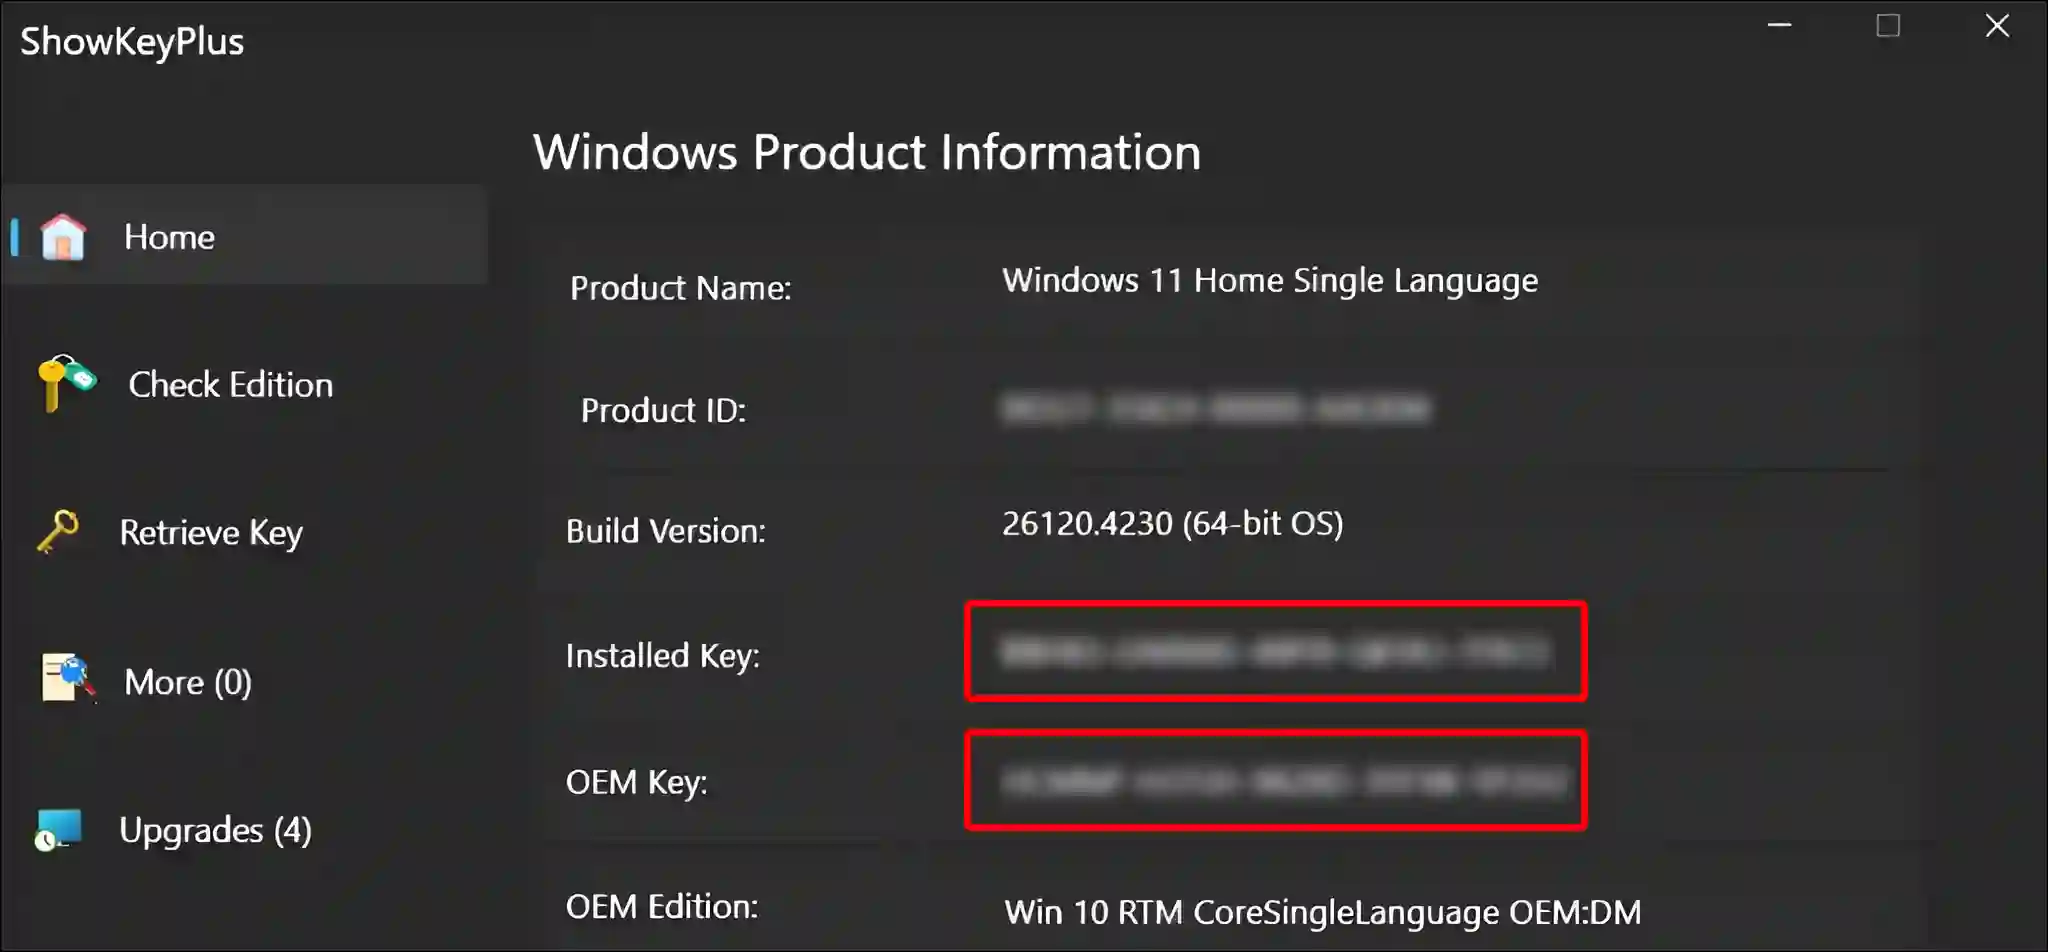
#4. Using ShowKeyPlus
ShowKeyPlus is free software that easily displays your Windows product key, digital license, and OEM activation details. This software is especially useful for you if you have lost your Windows license or want to check it before reinstalling the system.
To see windows 11 product key using ShowKeyPlus:
- Install ShowKeyPlus ↗ Application from Microsoft Store.
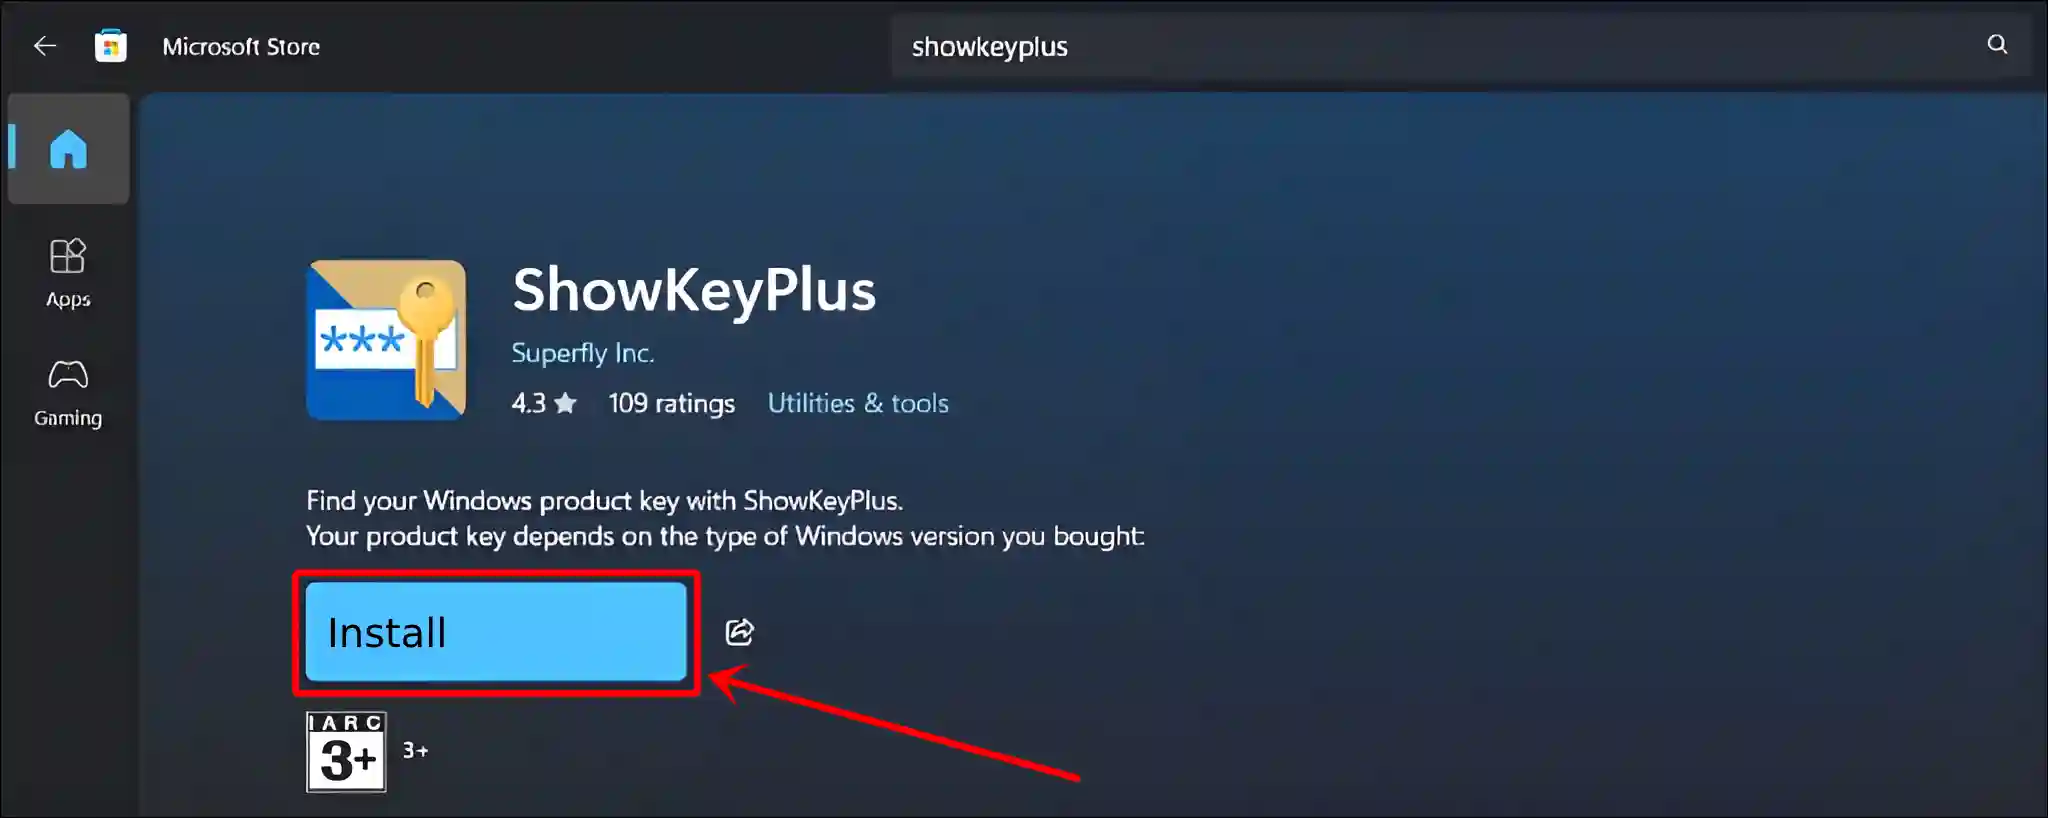
- Now Launch the ShowKeyPlus App.
- Here, You Can See Your Installed Key and OEM Key.
That’s all! You’re done…
Also read: 3 Quick Ways to Show or Hide “This PC” in File Explorer
I hope you found this article quite helpful and learned how to find a product key in Windows 11. If you have any problem or question related to Windows 11, feel free to ask by commenting below. Do share this article.