Enable or Disable No GUI Boot in Windows 11! Here’s The Complete Guide
If you want to boot your Windows operating system without graphical user interface (GUI) elements during the startup process, then the “No GUI boot” feature is for you. This is quite an amazing feature in Windows 11. In this article, I have shared how you can enable and disable ‘No GUI boot’ in Windows 11.
This setting can be especially useful for your Windows PC or laptop when the graphical element of the boot process interferes with system diagnostics. It can also help speed up boot times.
What does “No GUI boot” mean in msconfig?
“No GUI boot” is a secret and hidden feature in msconfig that controls whether Windows will display the graphical user interface (GUI) during the boot process. When you enable “No GUI boot” in msconfig, it modifies the way Windows boots.
How to Enable No GUI Boot in Windows 11
Enabling the “No GUI boot” mode in Windows 11 will cause Windows to skip showing the usual loading screen with the Windows logo and spinning circle. It may instead just show a black screen or a text-based boot process. Follow the steps below to activate it.
Steps to turn on ‘No GUI boot’ on Windows 11 running pc or laptop:
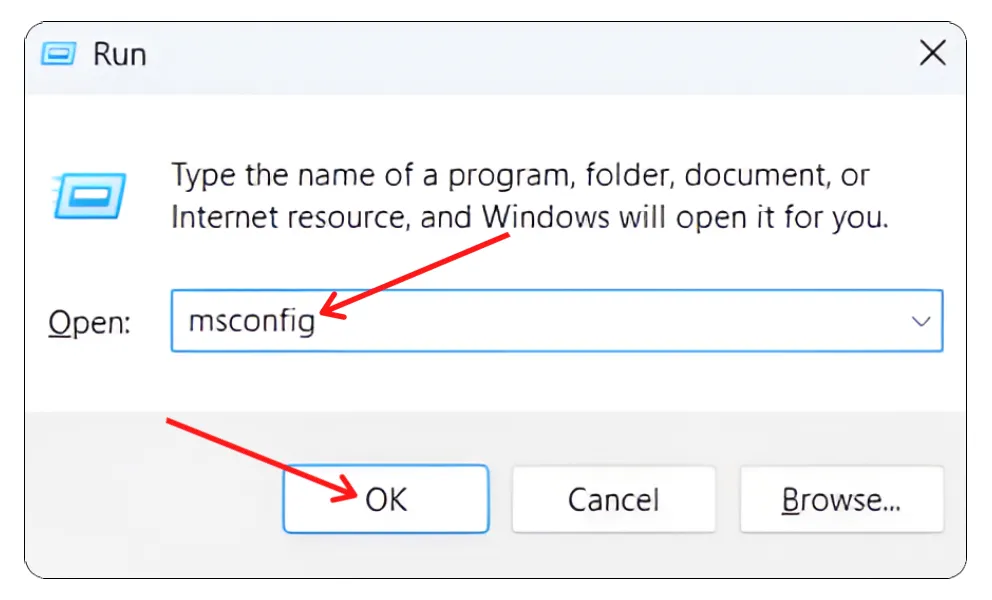
1. Press Windows + R to Open Run Dialog Box.
2. Type msconfig in the Text Box and Hit Enter.
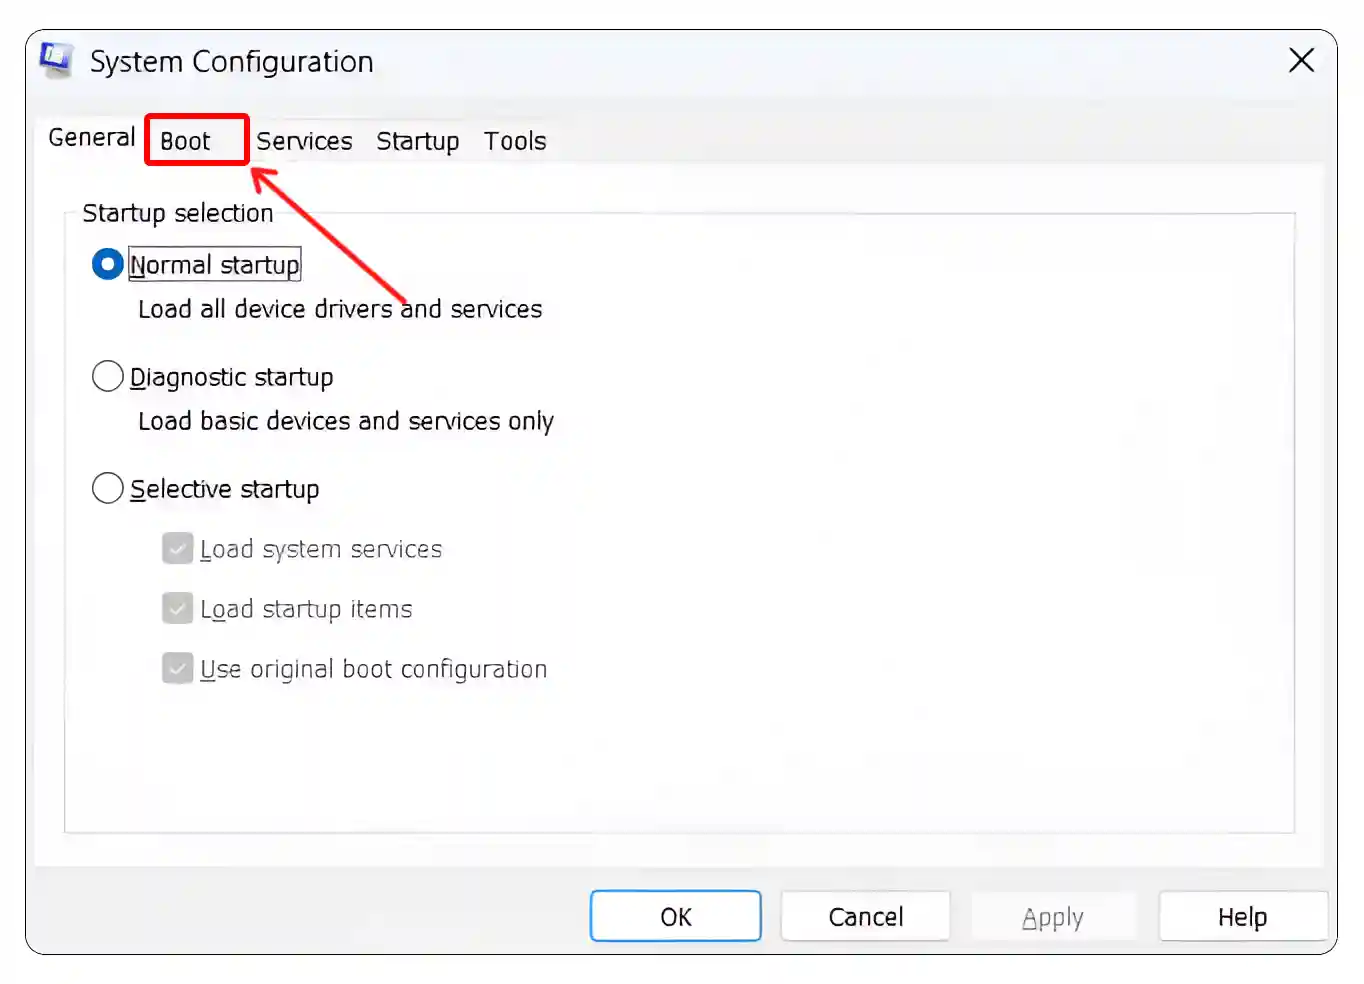
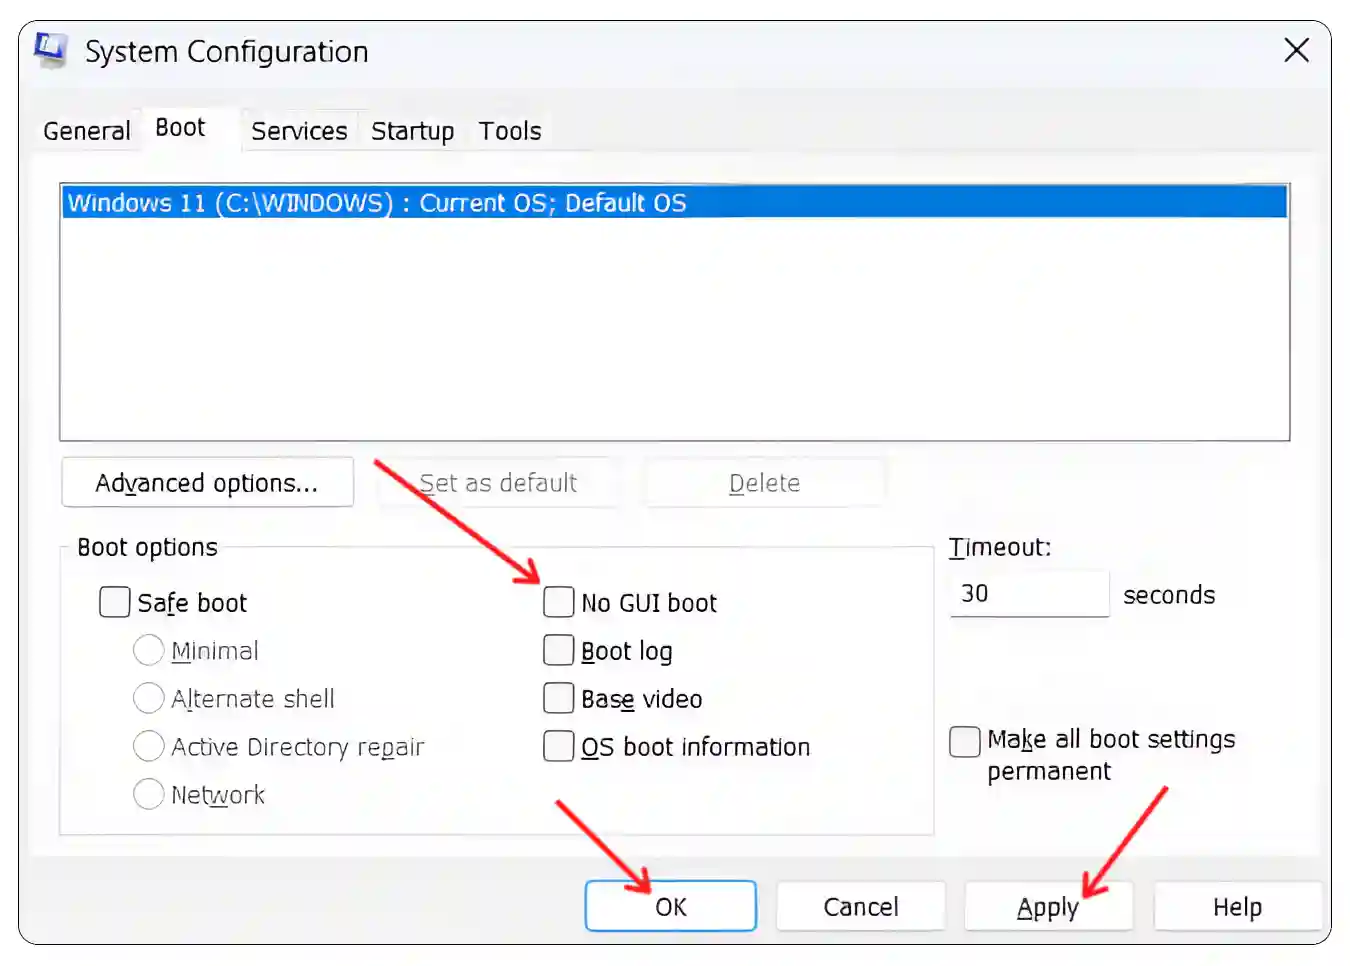
3. Now System Configuration Window Will Appear, Click on Boot.
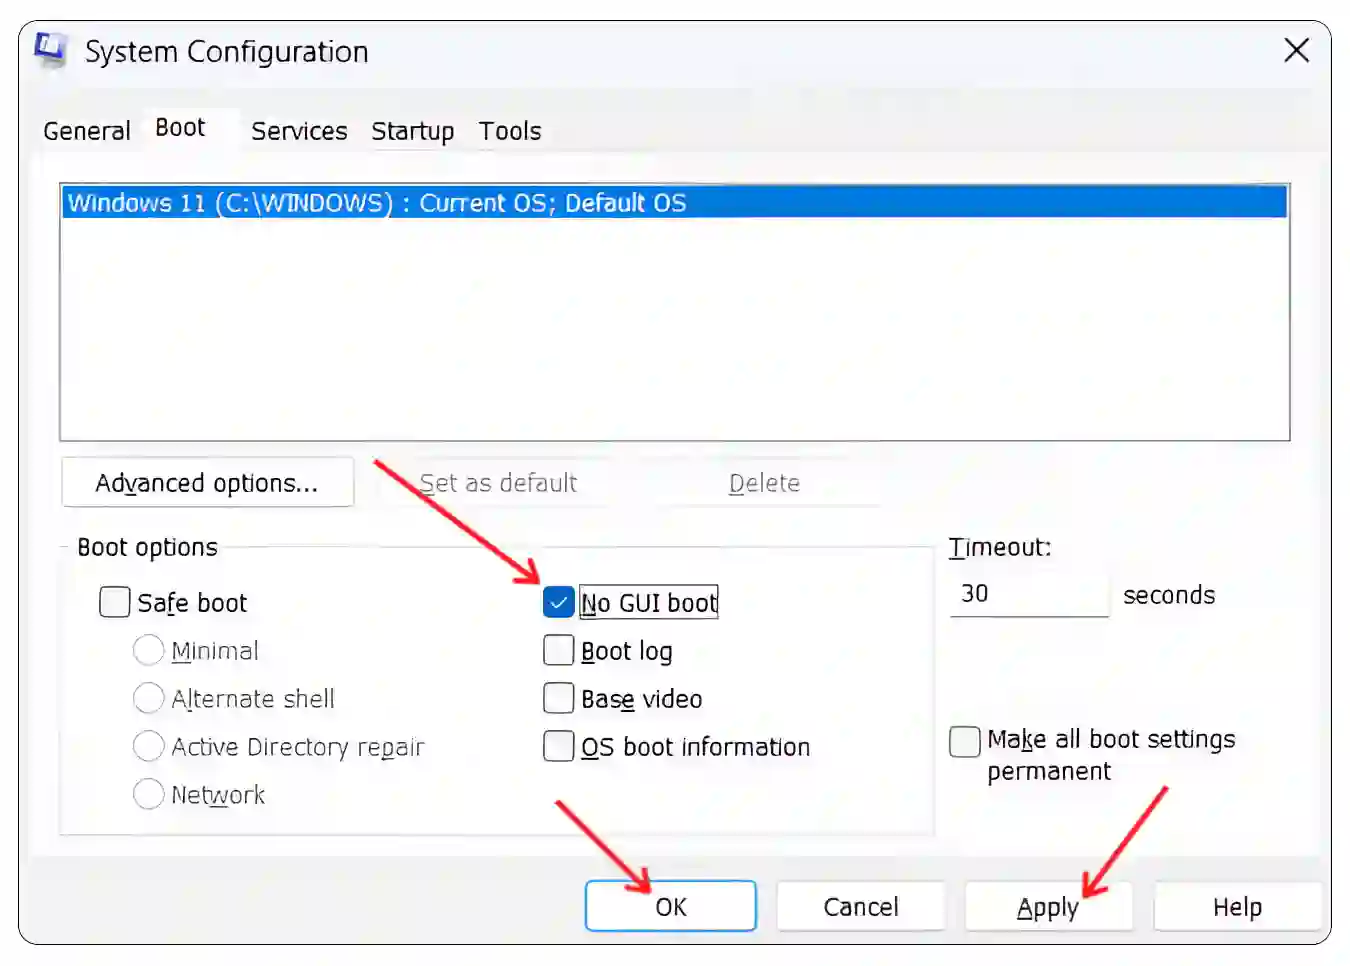
4. Check the Box for “No GUI boot” Under the “Boot options” Section and Click on Apply then OK.
5. Now Restart Your System.
That’s it! Once you complete the above steps and restart your computer, the “No GUI boot” feature will be activated on your system.
How to Disable No GUI Boot in Windows 11
If you want to boot your Windows system with the Windows logo and spinning circle, then you need to disable the “No GUI boot” option. Disabling it is quite simple, and the steps for the same are given below.
Steps to turn off ‘No GUI boot’ on Windows 11 running pc or laptop:
1. Press Windows + R to Open Run Dialog Box.
2. Type msconfig in the Text Box and Hit Enter.

3. Click on Boot Option in System Configuration Window.

4. Uncheck the Box for “No GUI boot” Under the “Boot options” Section and Click on Apply then OK.
5. Now Restart Your System.
That’s it! Now “No GUI boot” has been successfully deactivated on your Windows system. That means now your system will boot as default.
You may also like:
- How to Enable Group Policy Editor (GPEdit.msc) in Windows 11 Home Edition
- 3 Ways to Remove OneDrive Shortcut from File Explorer in Windows 11
- 6 Quick Ways to Open File Explorer in Windows 11
- How to Change Taskbar Color in Windows 11
FAQs
Q 1. Why use ‘No GUI boot’ in Windows System?
Answer – In Windows system, the ‘No GUI boot’ option is used only in some specific scenarios, like troubleshooting and diagnostics, faster boot, fewer distractions, visual debugging, etc.
Q 2. Is “No GUI boot” Safe for Users?
Answer – Yes! “No GUI boot” is completely safe to use, and it does not cause any harm to your Windows system. It is simply an option that changes the way Windows displays the boot process.
I hope you found this article quite helpful and learned how to enable and disable No GUI boot in Windows 11. If you are facing any problem, then let us know by commenting below. Please share this article.

