How to Enable Group Policy Editor (GPEdit.msc) in Windows 11 Home Edition
Group Policy Editor, aka “gpedit.msc” is a powerful management tool that comes preinstalled in the Pro edition of Windows 11. It allows configuring and modifying group policy settings. But unfortunately, the Local Group Policy Editor tool is not available in the Home edition of Windows 11.
When you run the command line “gpedit.msc” to open the Group Policy Editor in Home edition, you will see “Windows cannot find ‘gpedit.msc’ .” error message on the screen. Don’t worry, because now you can easily enable Group Policy Editor in Windows 11’s Home edition.
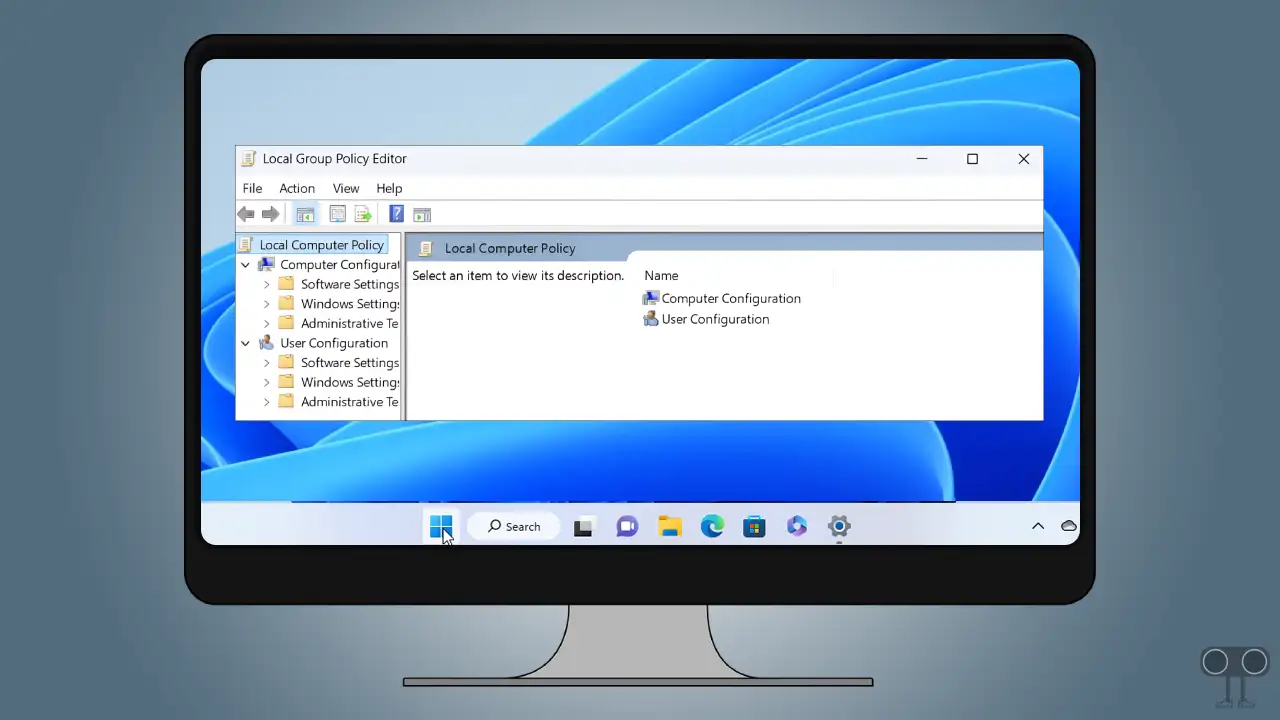
Is it Possible to Install GPEdit.msc on Windows 11 Home Edition?
Yes! Even though the Group Policy Editor is not available in the Windows Home edition. But now you can easily install and use this “gpedit.msc” with the help of a batch file. For this, you have to carefully follow some specific steps given below. And this method will work on computers and laptops that have Windows 11 Home.
Enabling Group Policy Editor in Windows 11 Home Edition
To install gpedit.msc on your Windows 11 Home edition:
1. Open Notepad in Your PC or Laptop.
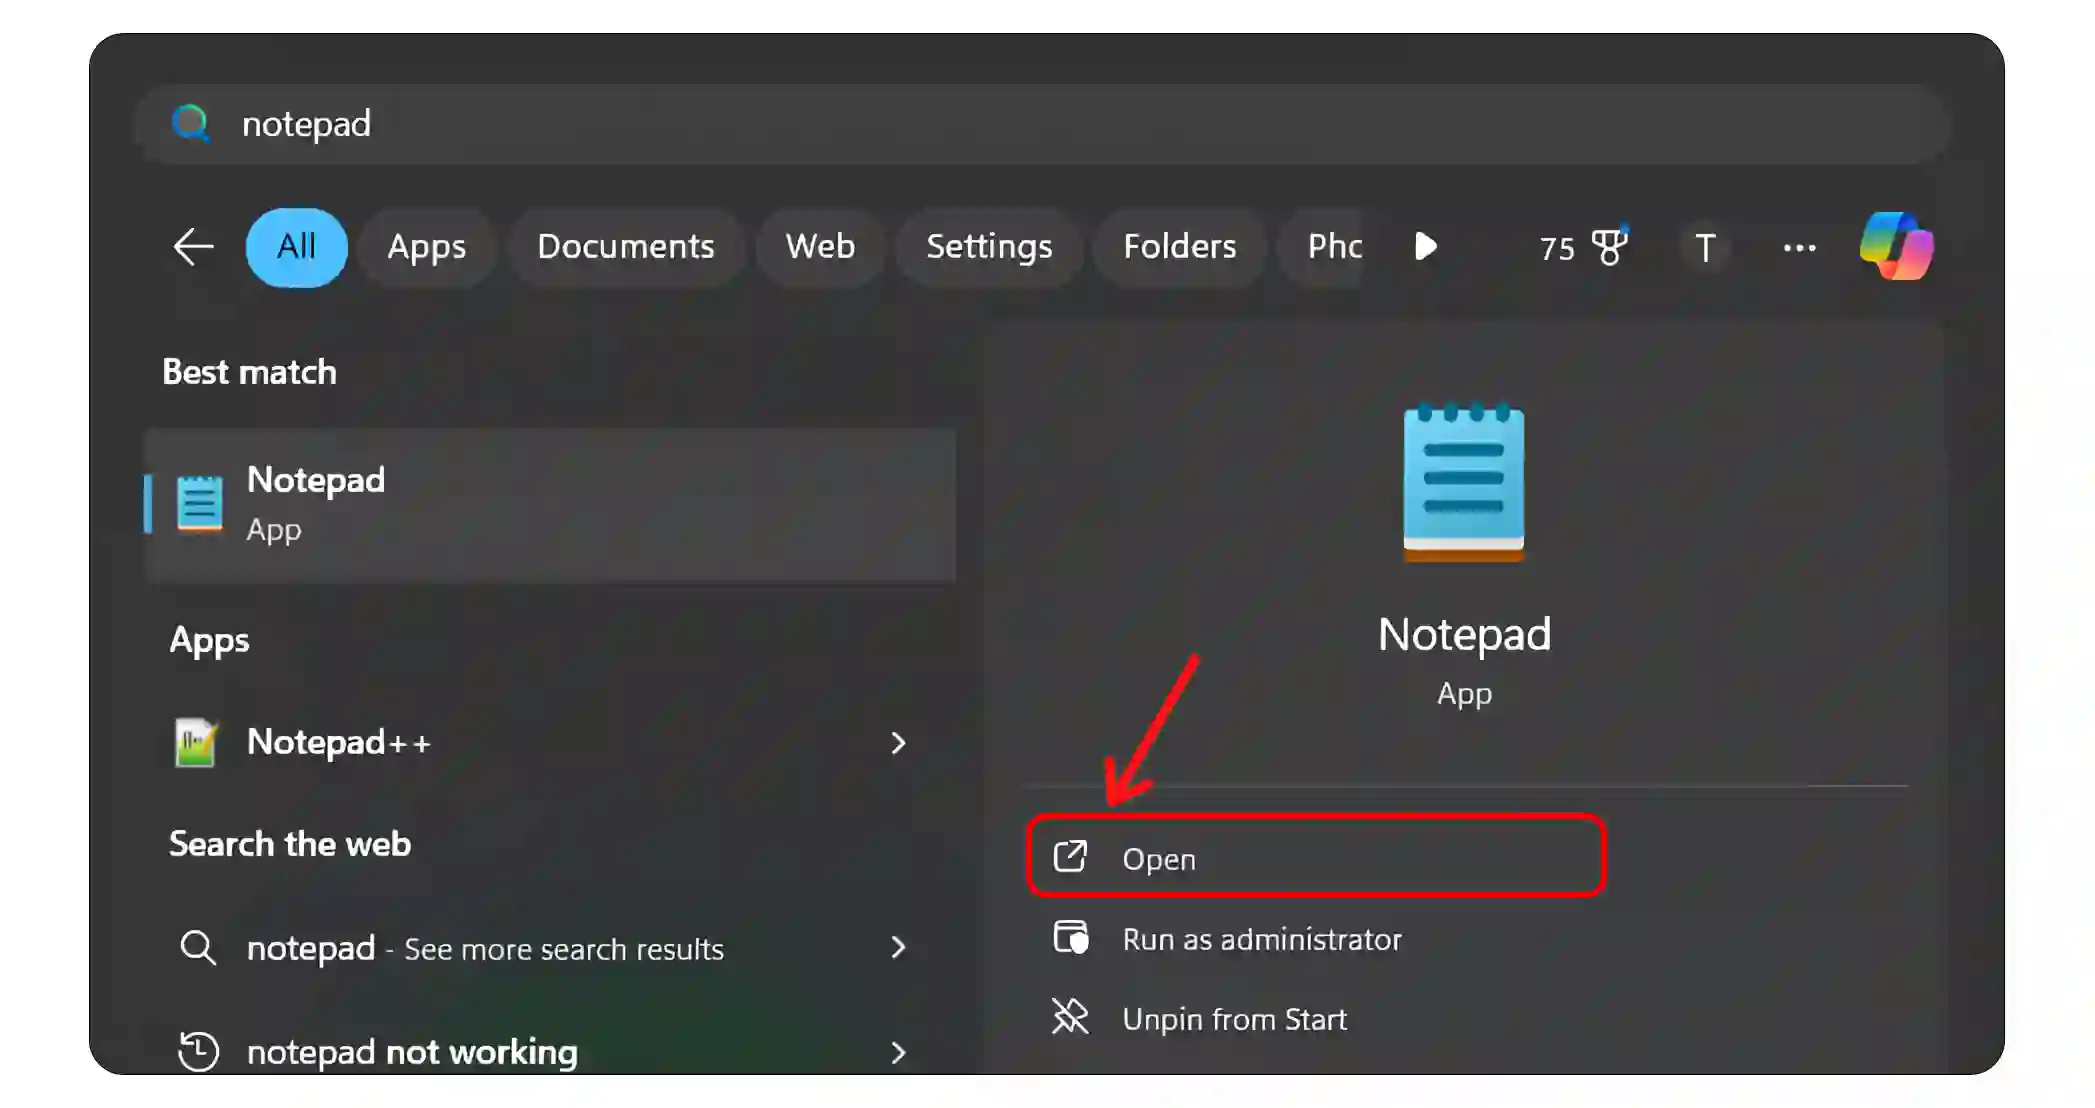
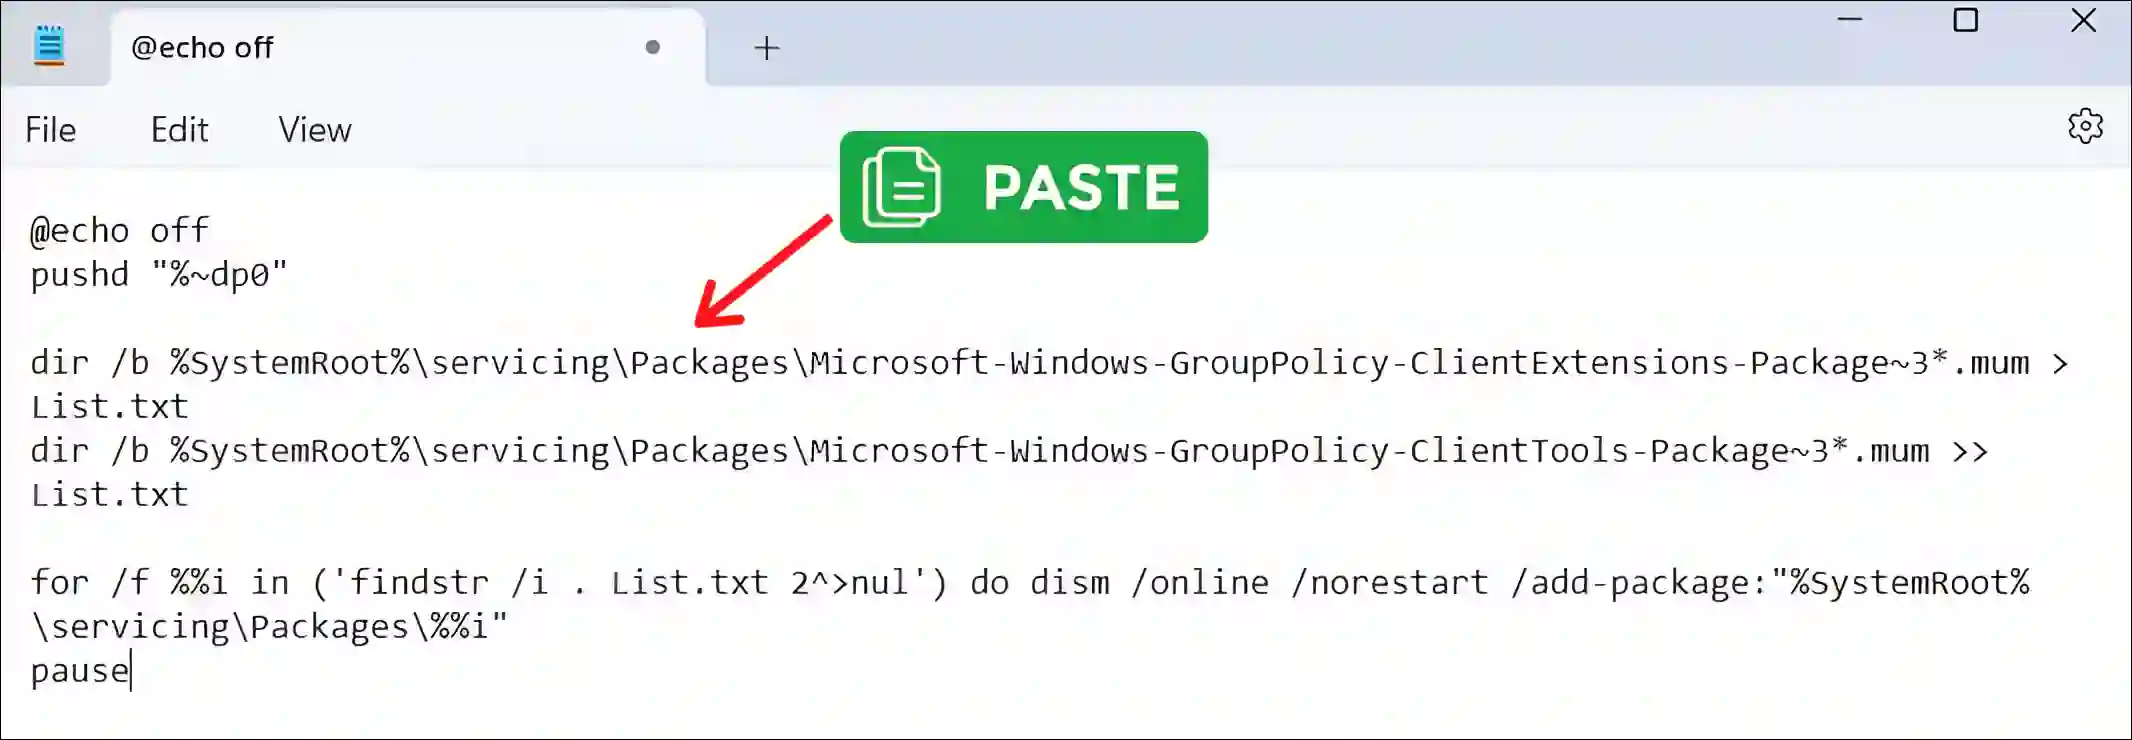
2. Copy the Following Batch File Code and Paste into Notepad.
@echo off
pushd “%~dp0”dir /b %SystemRoot%\servicing\Packages\Microsoft-Windows-GroupPolicy-ClientExtensions-Package~3.mum >List.txt dir /b %SystemRoot%\servicing\Packages\Microsoft-Windows-GroupPolicy-ClientTools-Package~3.mum >>List.txt
for /f %%i in (‘findstr /i . List.txt 2^>nul’) do dism /online /norestart /add-package:”%SystemRoot%\servicing\Packages\%%i”
pause
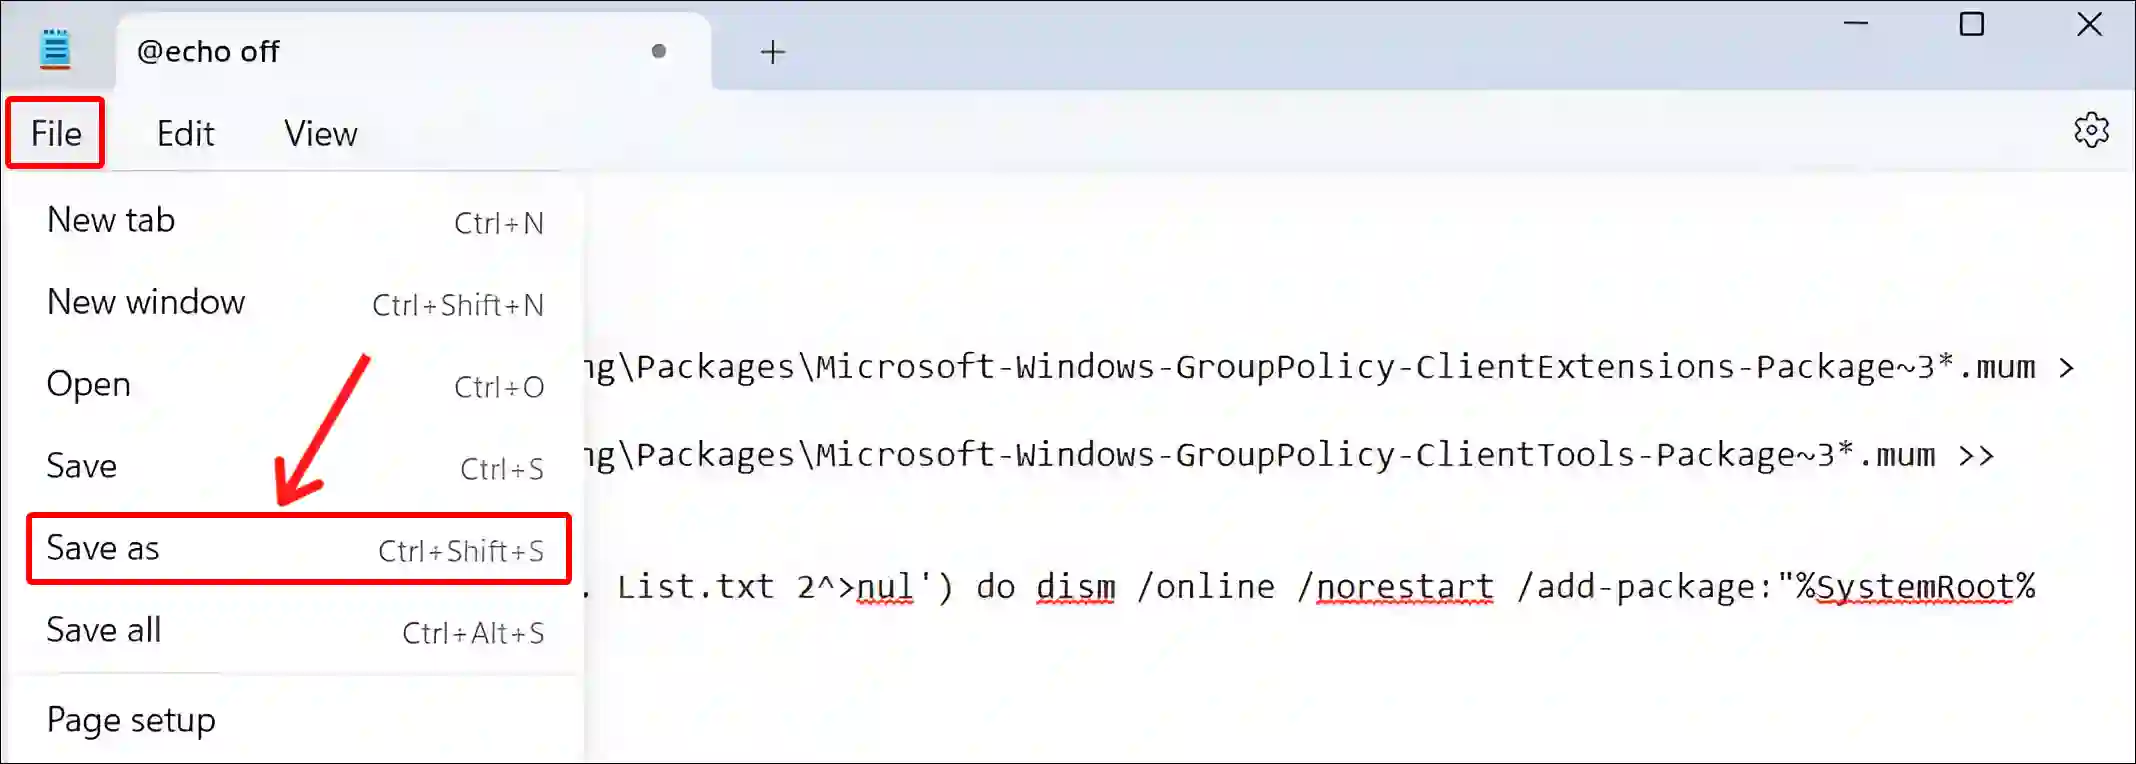
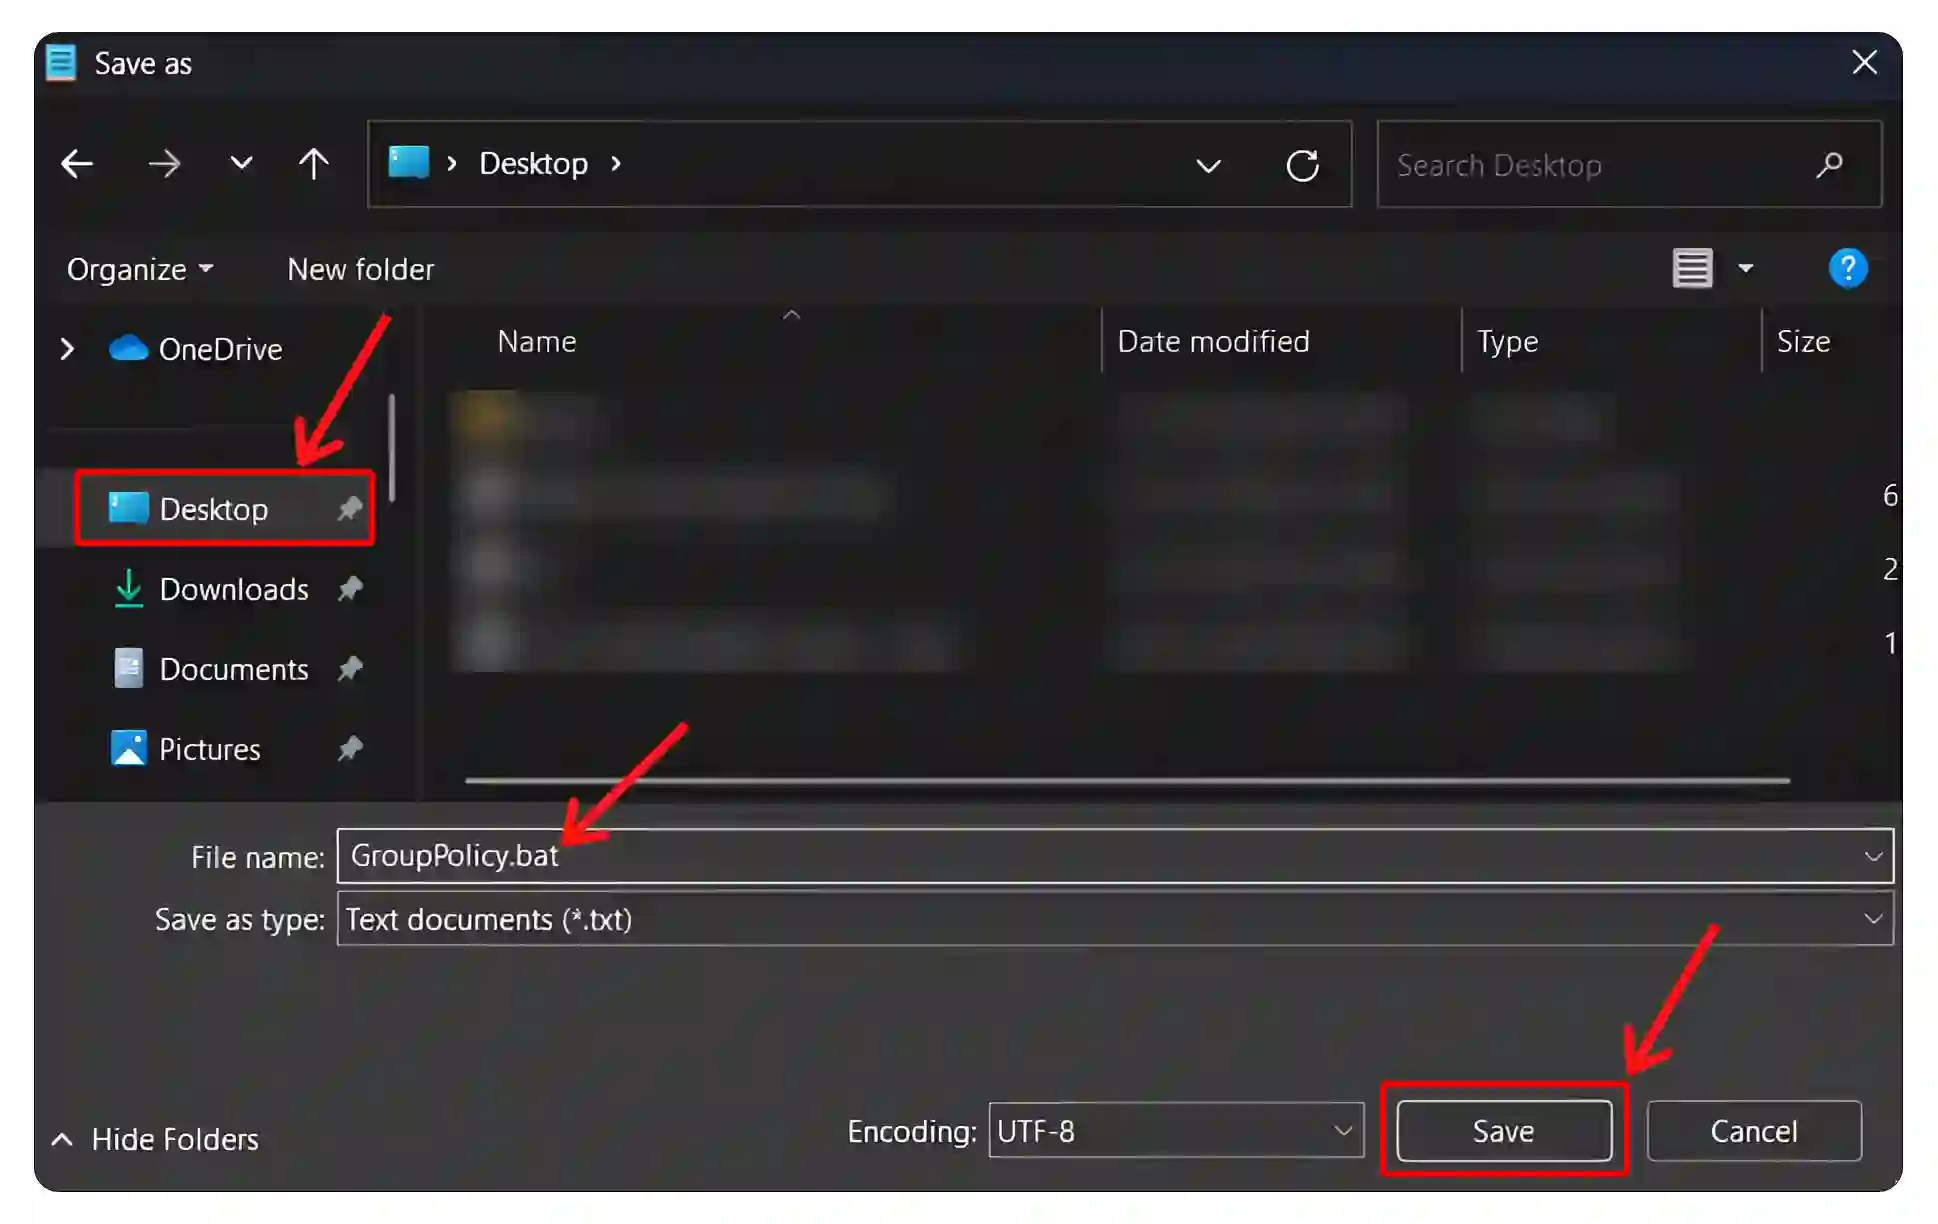
3. Click on File at Top Menu and Select Save As Option.
4. Now Select Desktop and Give This File “GroupPolicy.bat” Name and Click Save.
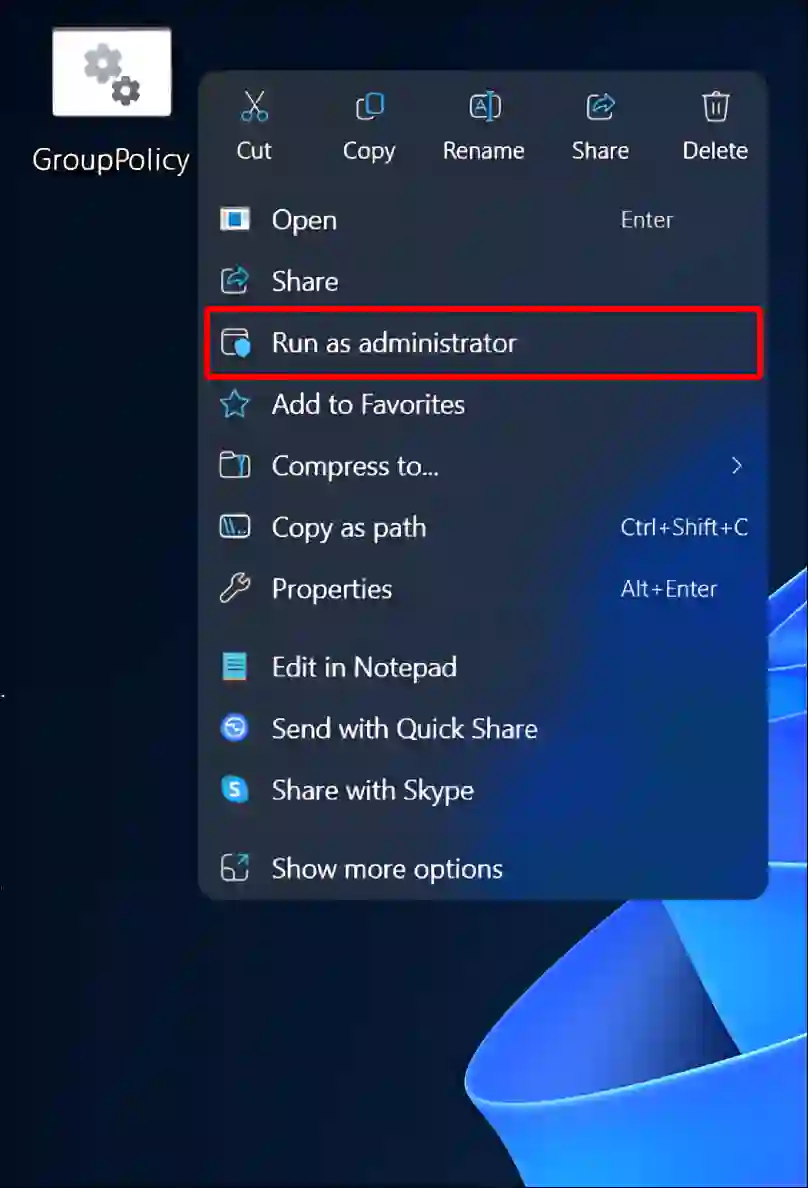
5. Go to Your Desktop and Right-Click on GroupPolicy Batch File and Select Run as Administrator.
6. A User Account Control Prompt will Appear, Click on Yes.
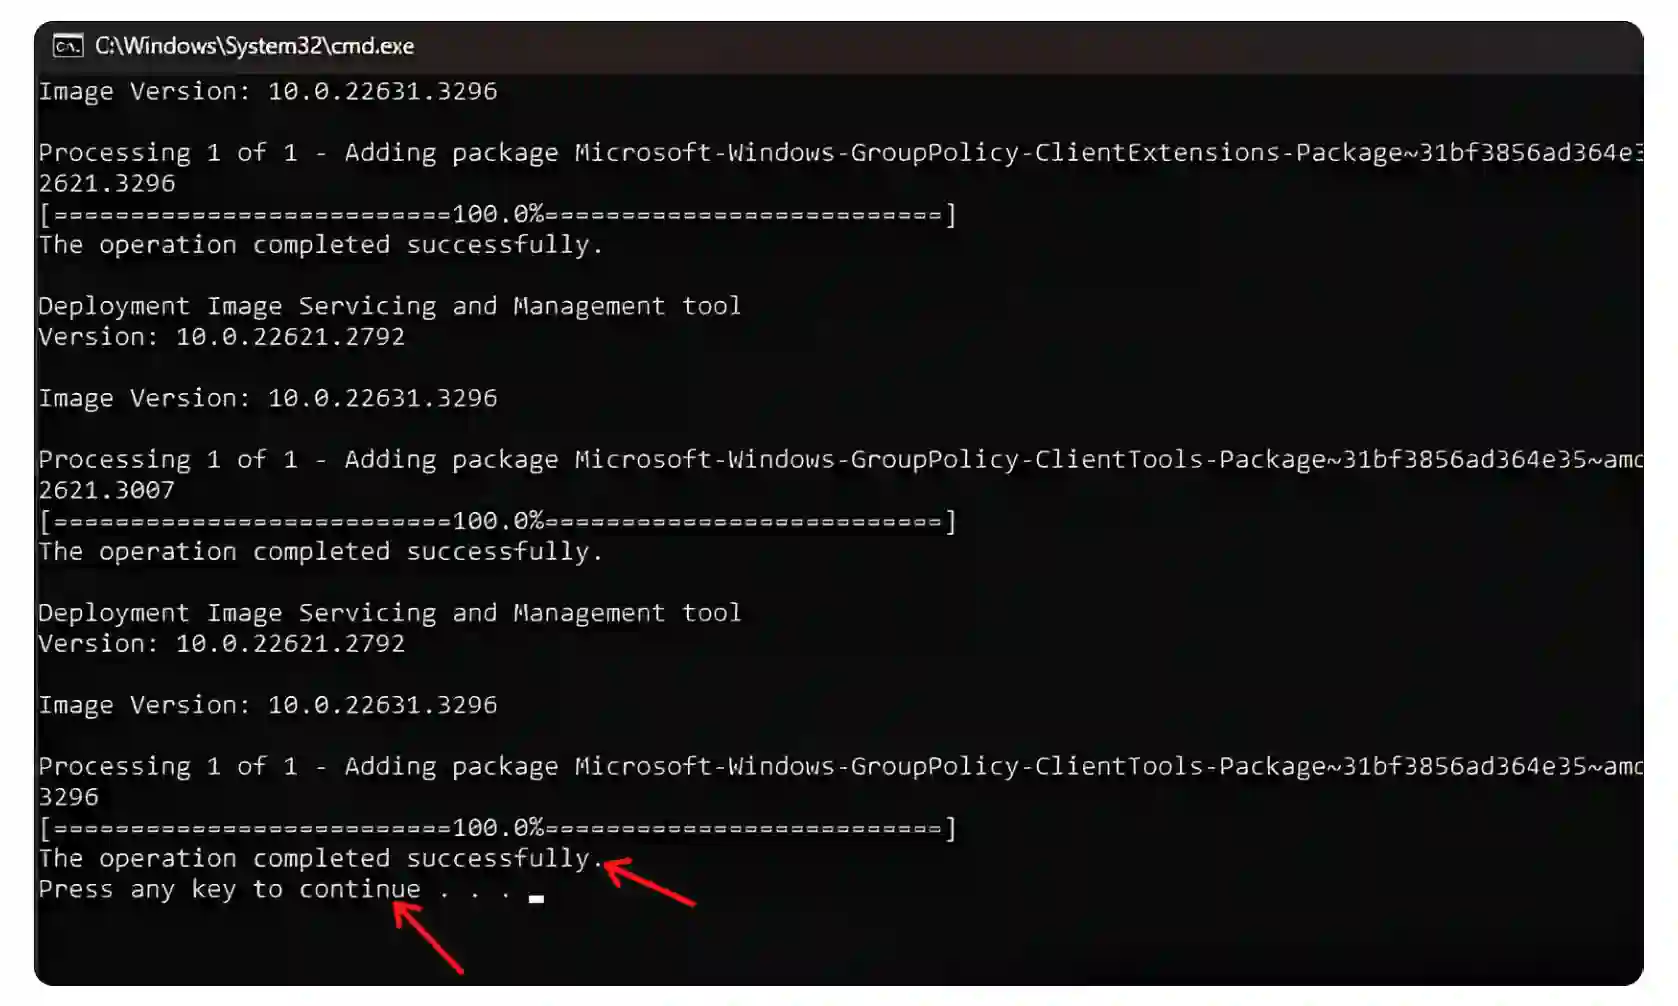
7. Now Command Prompt Window will Open, and It’ll Automatically Execute the DISM Command to Install the Necessary Packages.
8. Wait Until It Says, 100% This operation completed successfully.
9. Now Press Any Key on Your Keyboard to Continue. Now Command Window will Close.
That’s it! Now Group Policy Editor is successfully installed on your Windows 11 Home Edition. And by following the steps given below, you can run or access the Group Policy Editor program on your computer.
To open Local Group Policy Editor in your Windows 11 Home Edition:
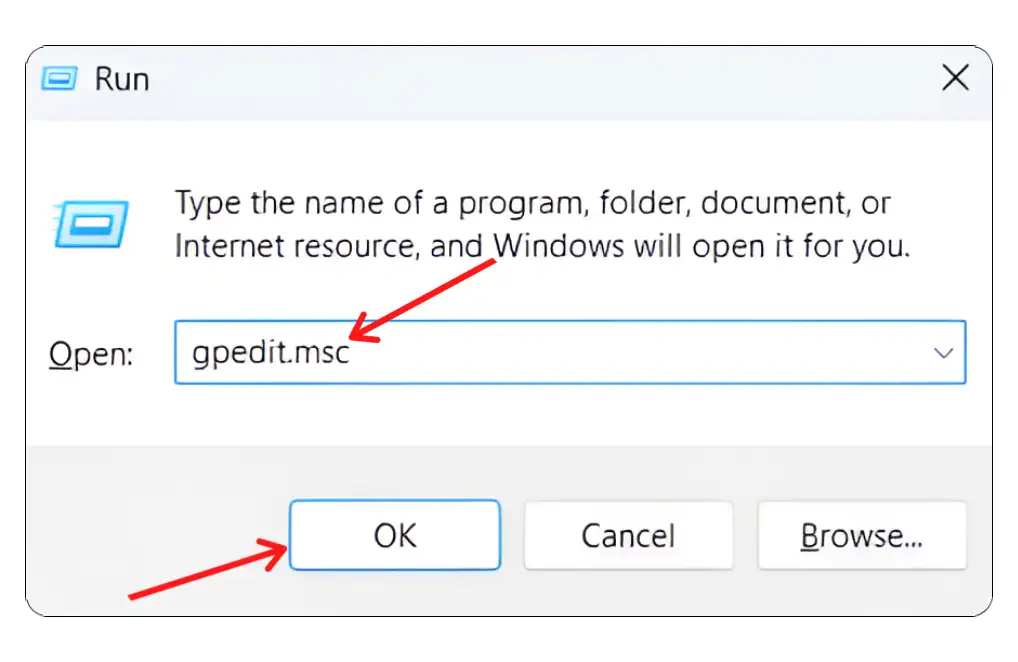
1. Press Windows + R Hotkey to Open the Run Dialog Box.
2. Type gpedit.msc in the Text Box and Click OK or Hit Enter.
3. Now Local Group Policy Editor Window will Open on Your Computer.
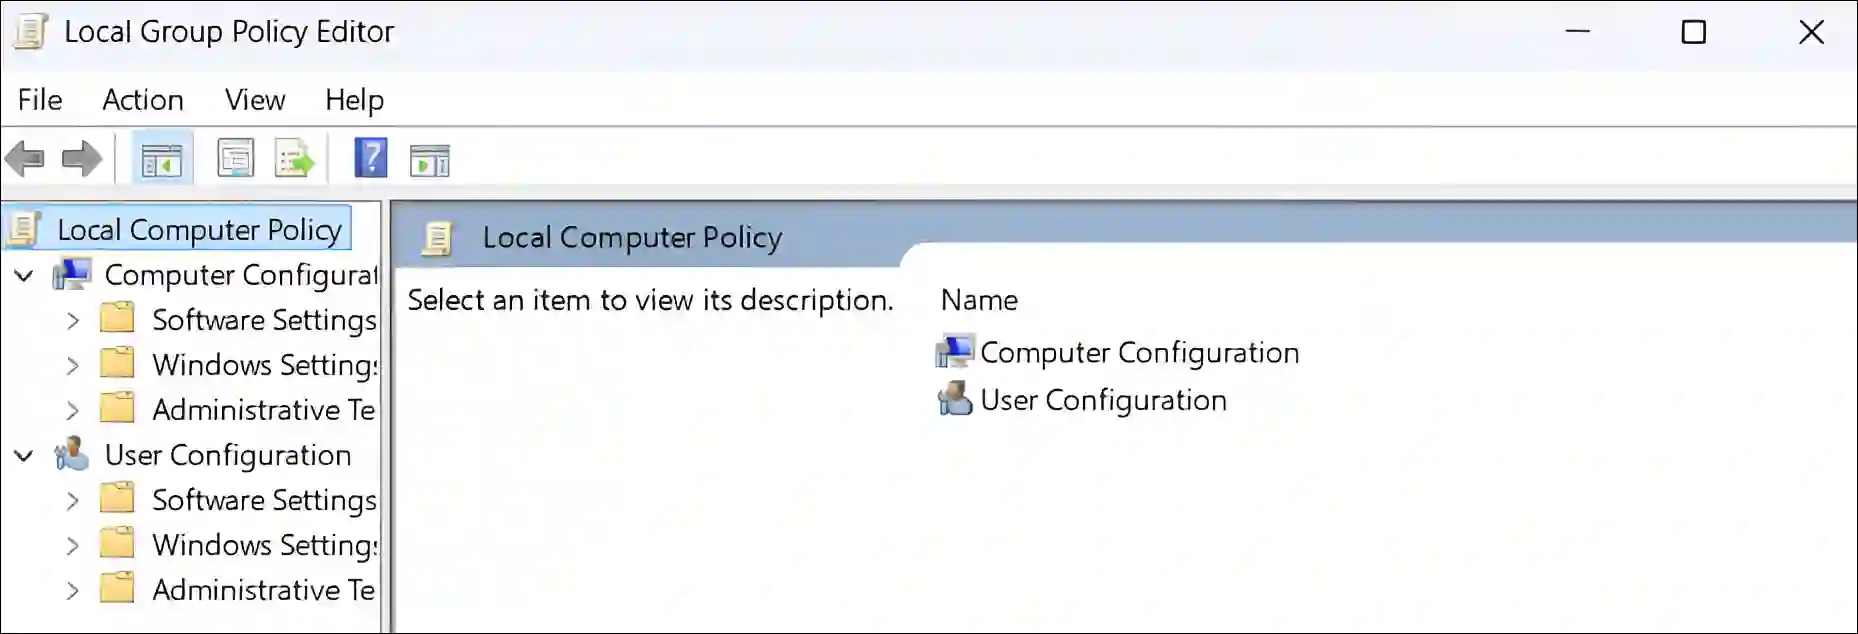
That’s all…
You may also like:
- 3 Ways to Remove OneDrive Shortcut from File Explorer in Windows 11
- 3 Ways to Install ChatGPT App on Windows 11 or 10
- How to Disable Password After Sleep on Windows 11
- Remove Notifications Bell Icon from Taskbar on Windows 11
- 2 Ways to Disable IPv6 on Windows 11
FAQs
Q 1. Why is the Local Group Policy Editor missing from my Windows 11 Home?
Answer – If you are unable to find the Local Group Policy Editor because ‘gpedit.msc’ is not included in Windows 11 Home edition, it is only available in Pro, Enterprise, and Education editions.
Q 2. Can I upgrade to Windows 11 Pro to get access to the Local Group Policy Editor?
Answer – Yes, if you upgrade your Windows 11 Home edition to the Pro edition, the Local Group Policy Editor will be enabled. You can do this by purchasing a Pro upgrade code and entering it in the activation settings.
I hope you found this article quite helpful and learned how you can install Group Policy Editor in Windows 11 Home Edition. If you are facing any problems, then let us know by commenting below. Please share this article.




Method still works on latest, but i’ve found that is does require installation of .Net
majorgeeks.com/files/details/microsoft_net_framework_4_5_final.html