How Do I Hide/Show File Explorer’s Navigation Pane in Windows 11
Windows 11’s File Explorer is a tool for managing files and folders on your computer. But did you know that you can hide or show its navigation pane (the menu visible on the left) as per your need?
Sometimes this navigation pane takes up more space on the screen than necessary, but by hiding it, you can get a clean and minimal interface. In this article, I have shared how you can easily hide or show the navigation pane of File Explorer in Windows 11.
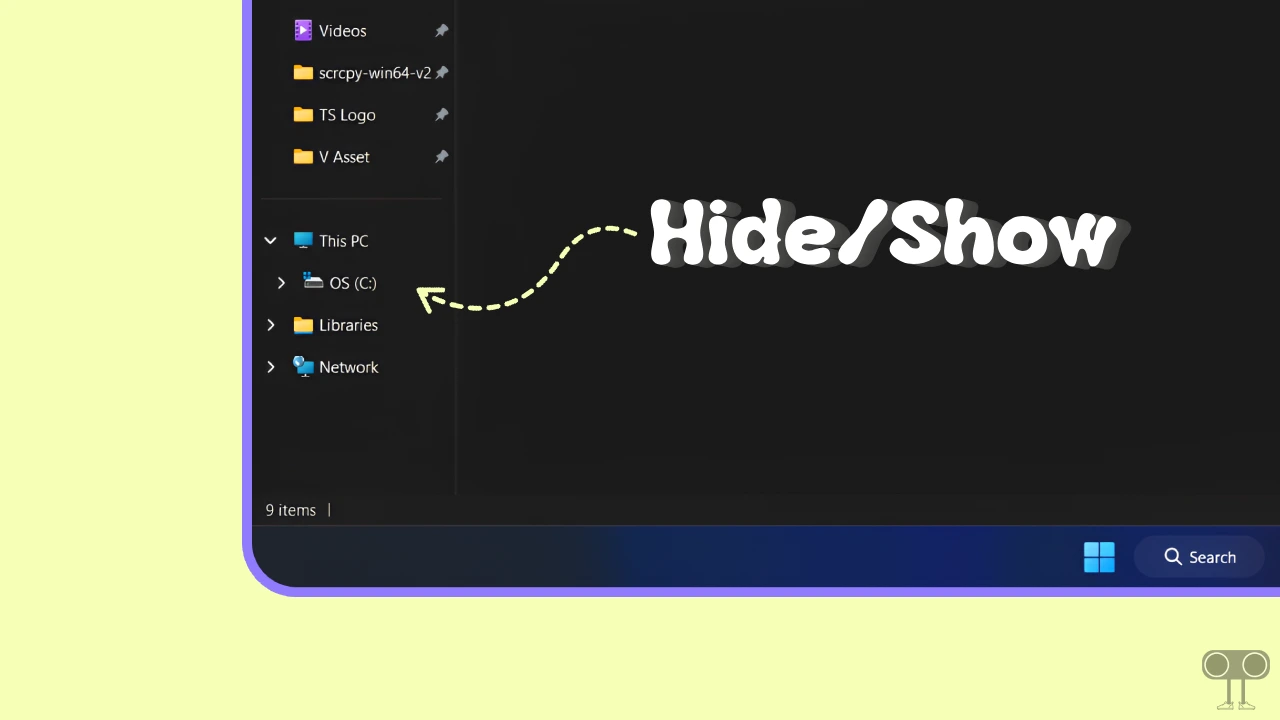
Hide File Explorer’s Navigation Pane in Windows 11
The Navigation Pane is visible by default in Windows File Explorer. But if you want to hide it, it’s very simple.
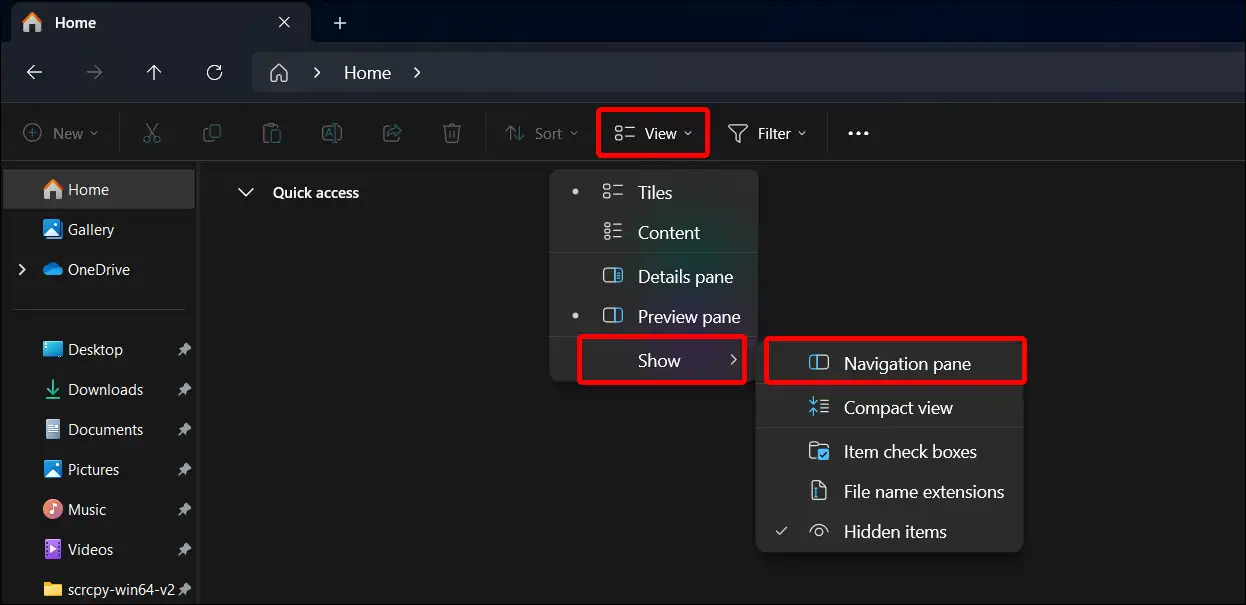
Step 1. Press Windows + E to Quickly Access File Explorer.
Step 2. Click on View > Show.
Step 3. Click on Navigation Pane to Uncheck This Option.
Also read: Enable Group Policy Editor (GPEdit.msc) in Windows 11 Home Edition
Show File Explorer’s Navigation Pane in Windows 11
If you have previously hidden the Navigation Pane in File Explorer but now want to show it again, then follow the steps mentioned below.
Step 1. Press Windows + E to Quickly Access File Explorer.
Step 2. Click on View > Show.
Step 3. Click on Navigation Pane to Check This Option.

That’s all! You’re all done…
Also read: 3 Ways to Show or Hide Empty Drives in File Explorer
FAQs
Q 1. What is the Navigation Pane, and why is it important?
Answer – The Navigation pane is a menu on the left side of File Explorer that gives you quick access to your files, folders, drives, and shortcuts. This makes your work faster and easier.
Q 2. Is there a keyboard shortcut to hide or show the Navigation Pane?
Answer – No! Currently, there is no direct keyboard shortcut available to hide or show the navigation pane in Windows 11. It can only be managed through Settings.
Q 3. Does hiding the Navigation Pane improve system performance?
Answer – No! Hiding or showing the navigation pane has no effect on system performance. It’s just a way to customize the interface.


![Check Last System Boot Date and Time of Windows 11 [CMD, PowerShell, Task Manager, Event Viewer]](https://techysnoop.com/wp-content/uploads/2026/03/last-system-boot-date-time-windows-11-768x432.webp)