3 Ways to Show or Hide Empty Drives in File Explorer on Windows 11
It is easy to show or hide “Empty Drives” in the File Explorer on Windows 11, whether you’re using a laptop or a desktop computer. Empty drives means drives that are completely empty, i.e., which do not contain any files or data. For example, a media card reader connected without an SD card inserted.
In Windows 11, the system hides empty drives by default. This means that if there is a drive on your PC that does not contain any files or data, that drive will be automatically hidden in File Explorer. However, Microsoft allows Windows users to show hidden empty drives.

3 Ways to Show or Hide Empty Drives in File Explorer on Windows 11
This tutorial will show you three easy and effective ways to turn on or off the “Hide Empty Drives” feature for your account in Windows 11.
Method #1. From File Explorer
File Explorer has a Hidden Folder Options setting that allows users to enable and disable the options. Using the file manager’s folder options, you can show or hide empty drives.
To show or hide empty drives from folder options:
- Press 🪟 Windows + E Simultaneously to Open File Explorer.
- Click on Three Dots (•••) Next to Filter and Select Options.
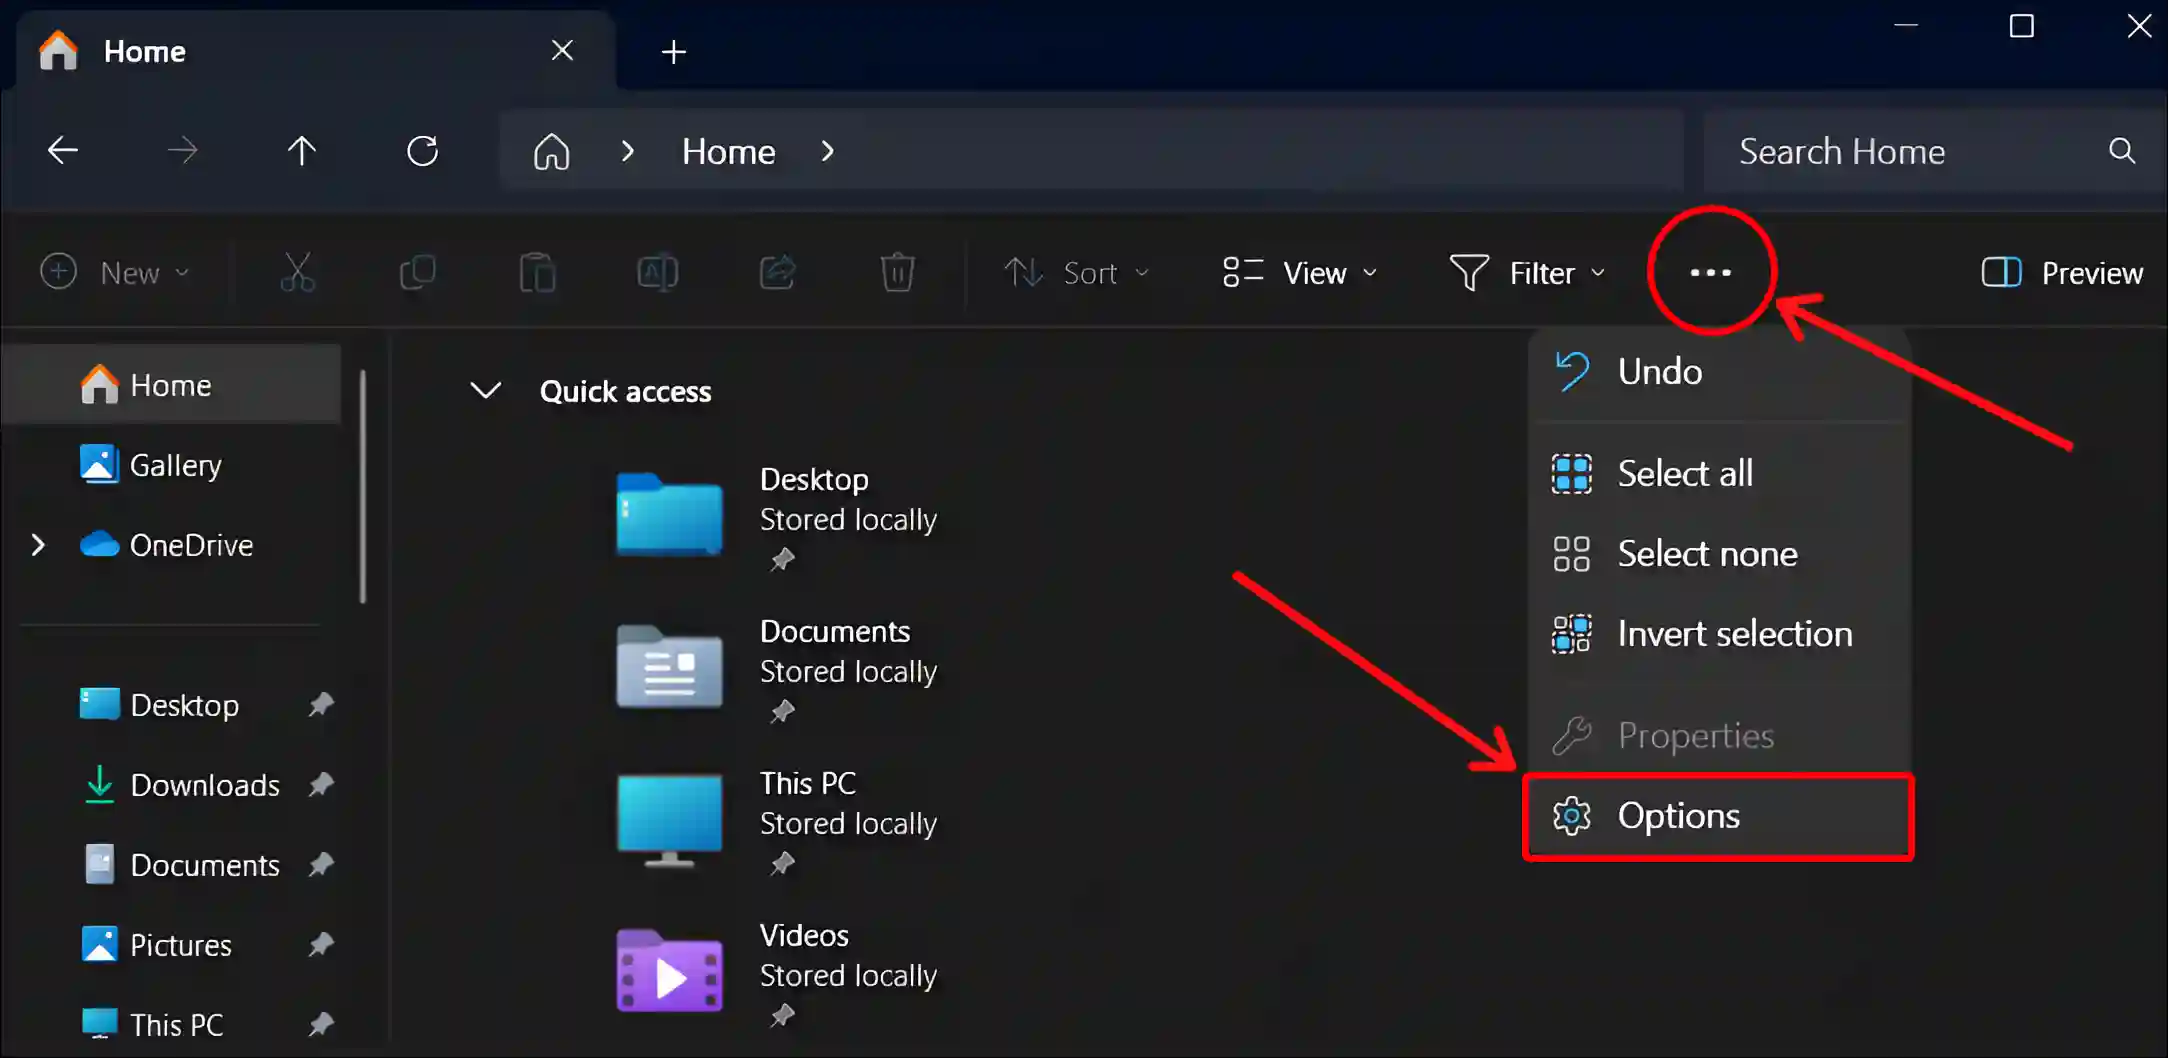
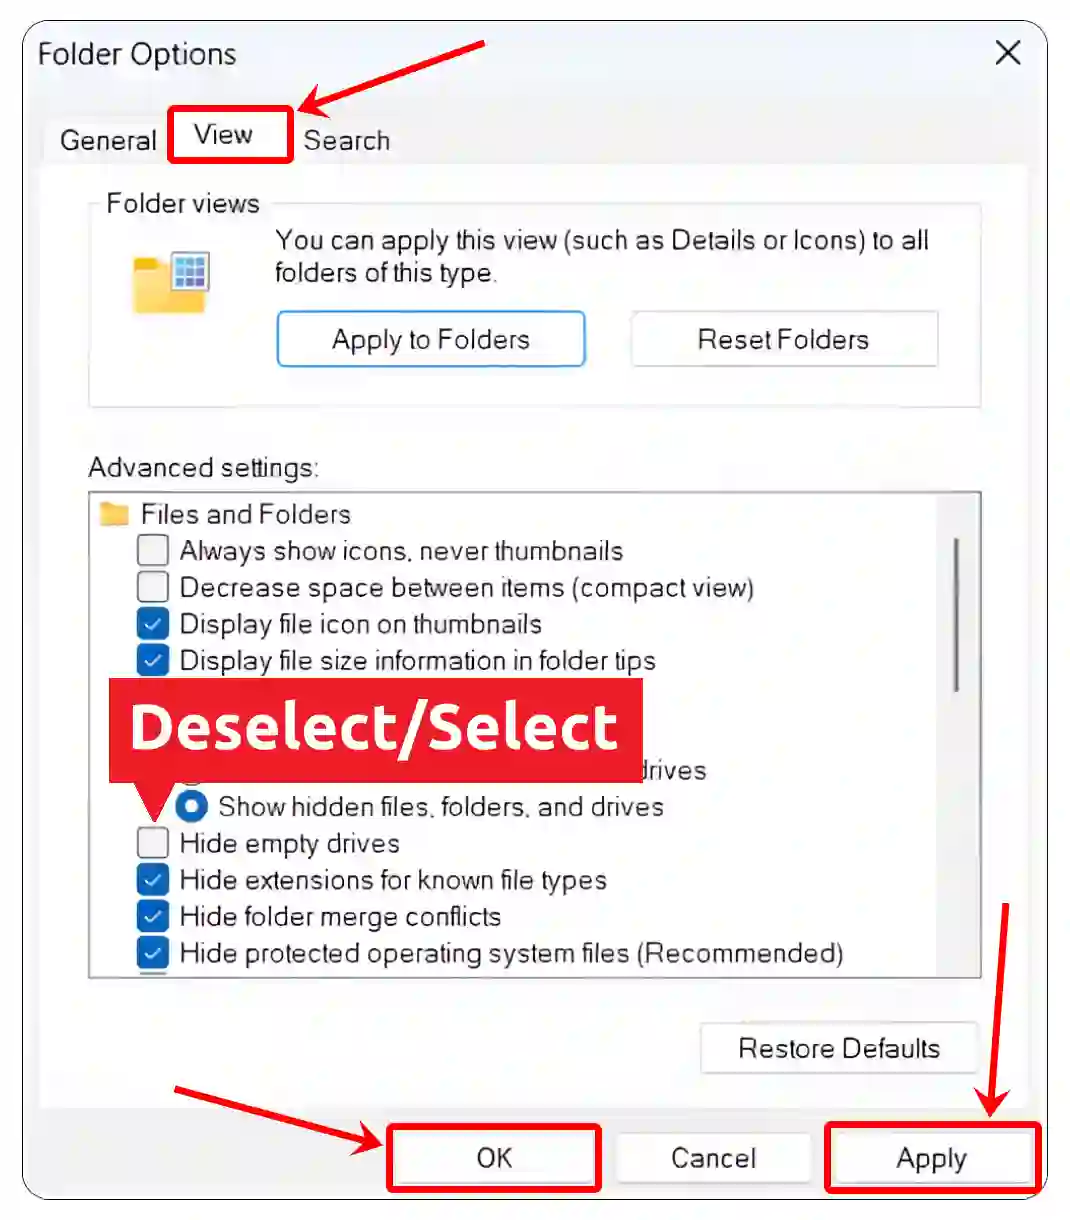
- A Tiny Popup Window will Appear. Just Click on View Section.
- Deselect or Select “Hide Empty Drives” Option, Then Click on Apply and OK.
Method #2. From Windows Settings
You can also make empty drives visible in File Explorer through Windows 11 settings. To do this, go to the “For Developers” section in the settings.
To show or hide empty drives from Windows 11 settings:
- Press 🪟 Windows + I Simultaneously to Open Settings.
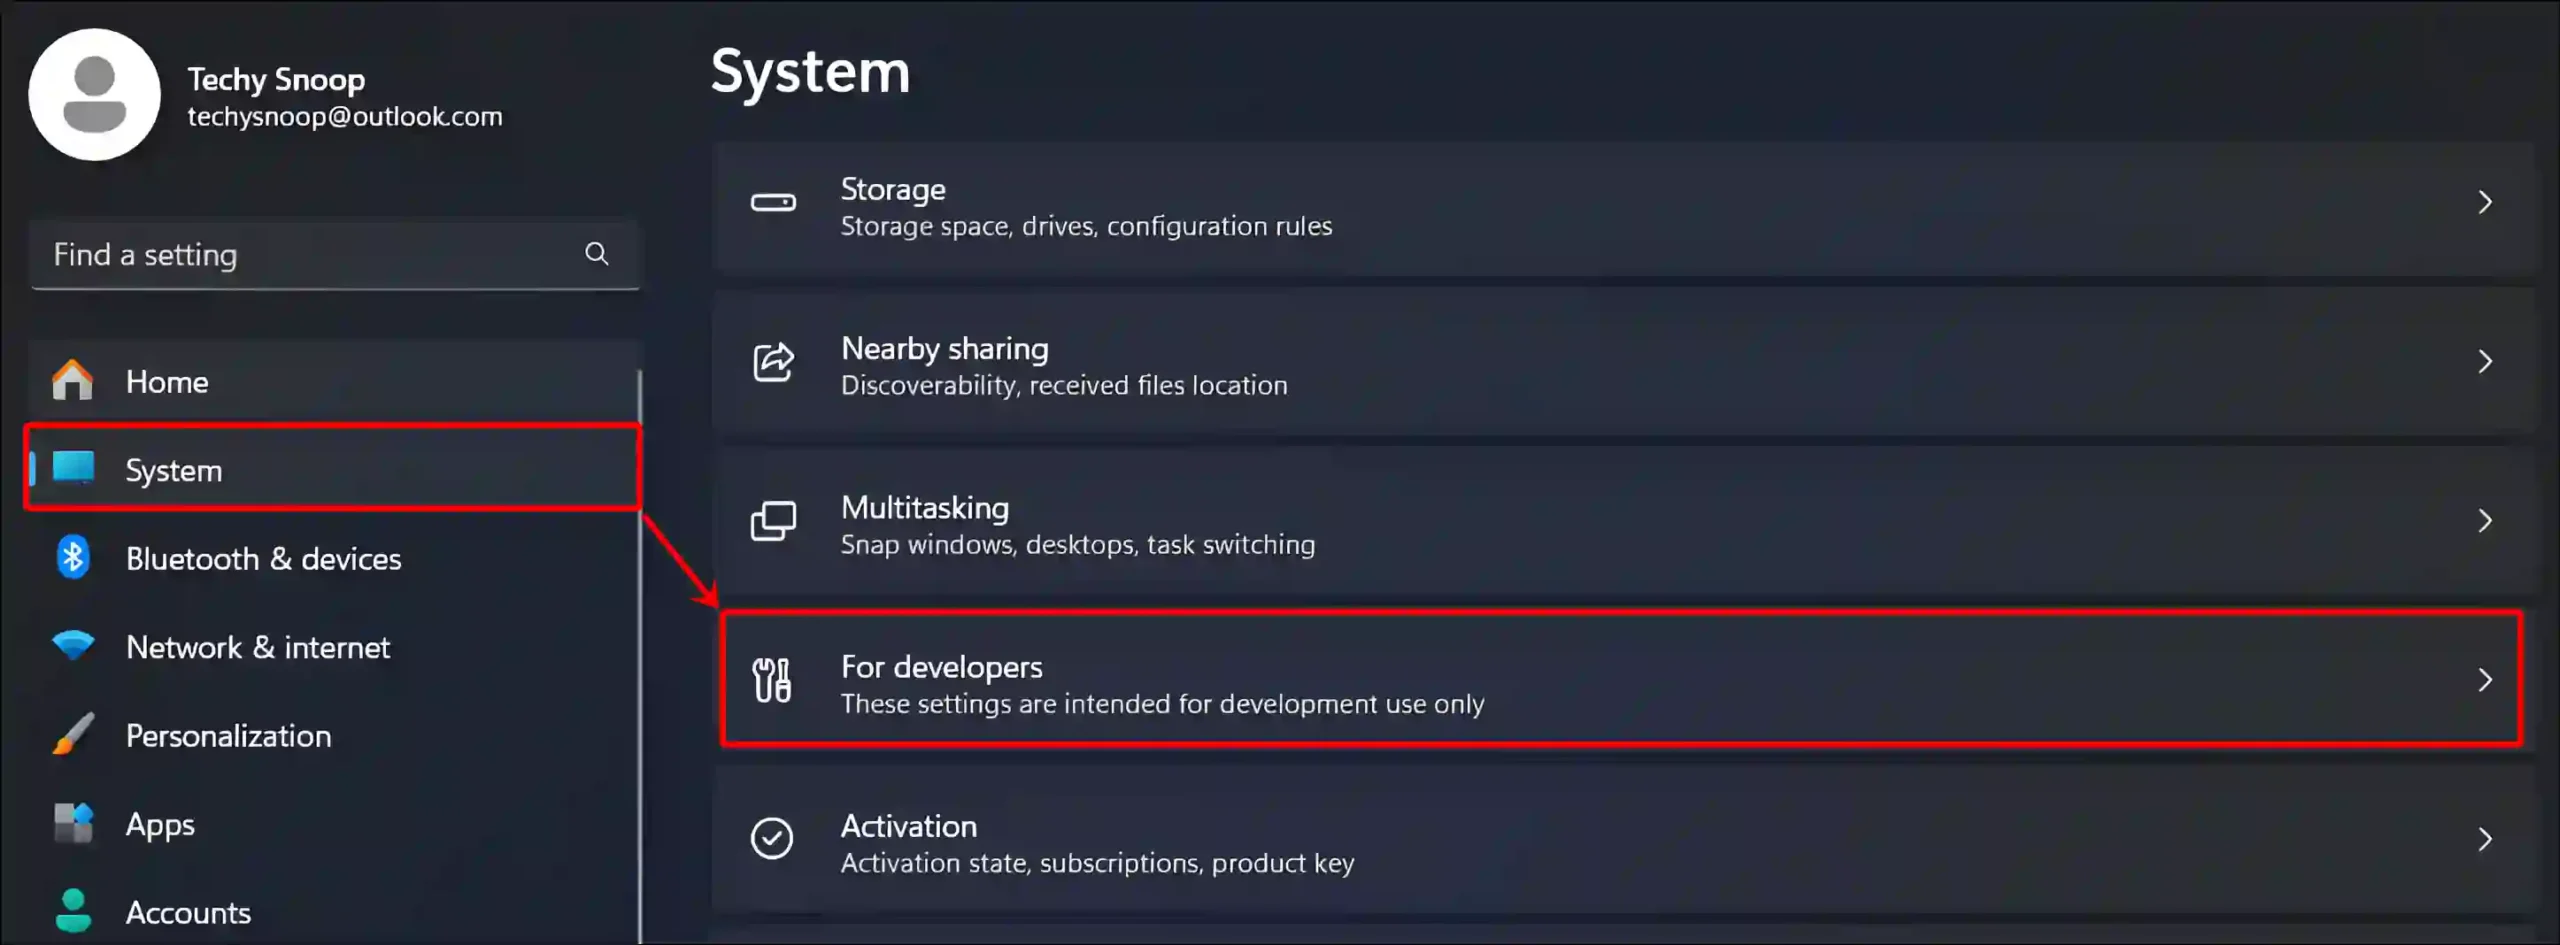
- Click System > For Developers.
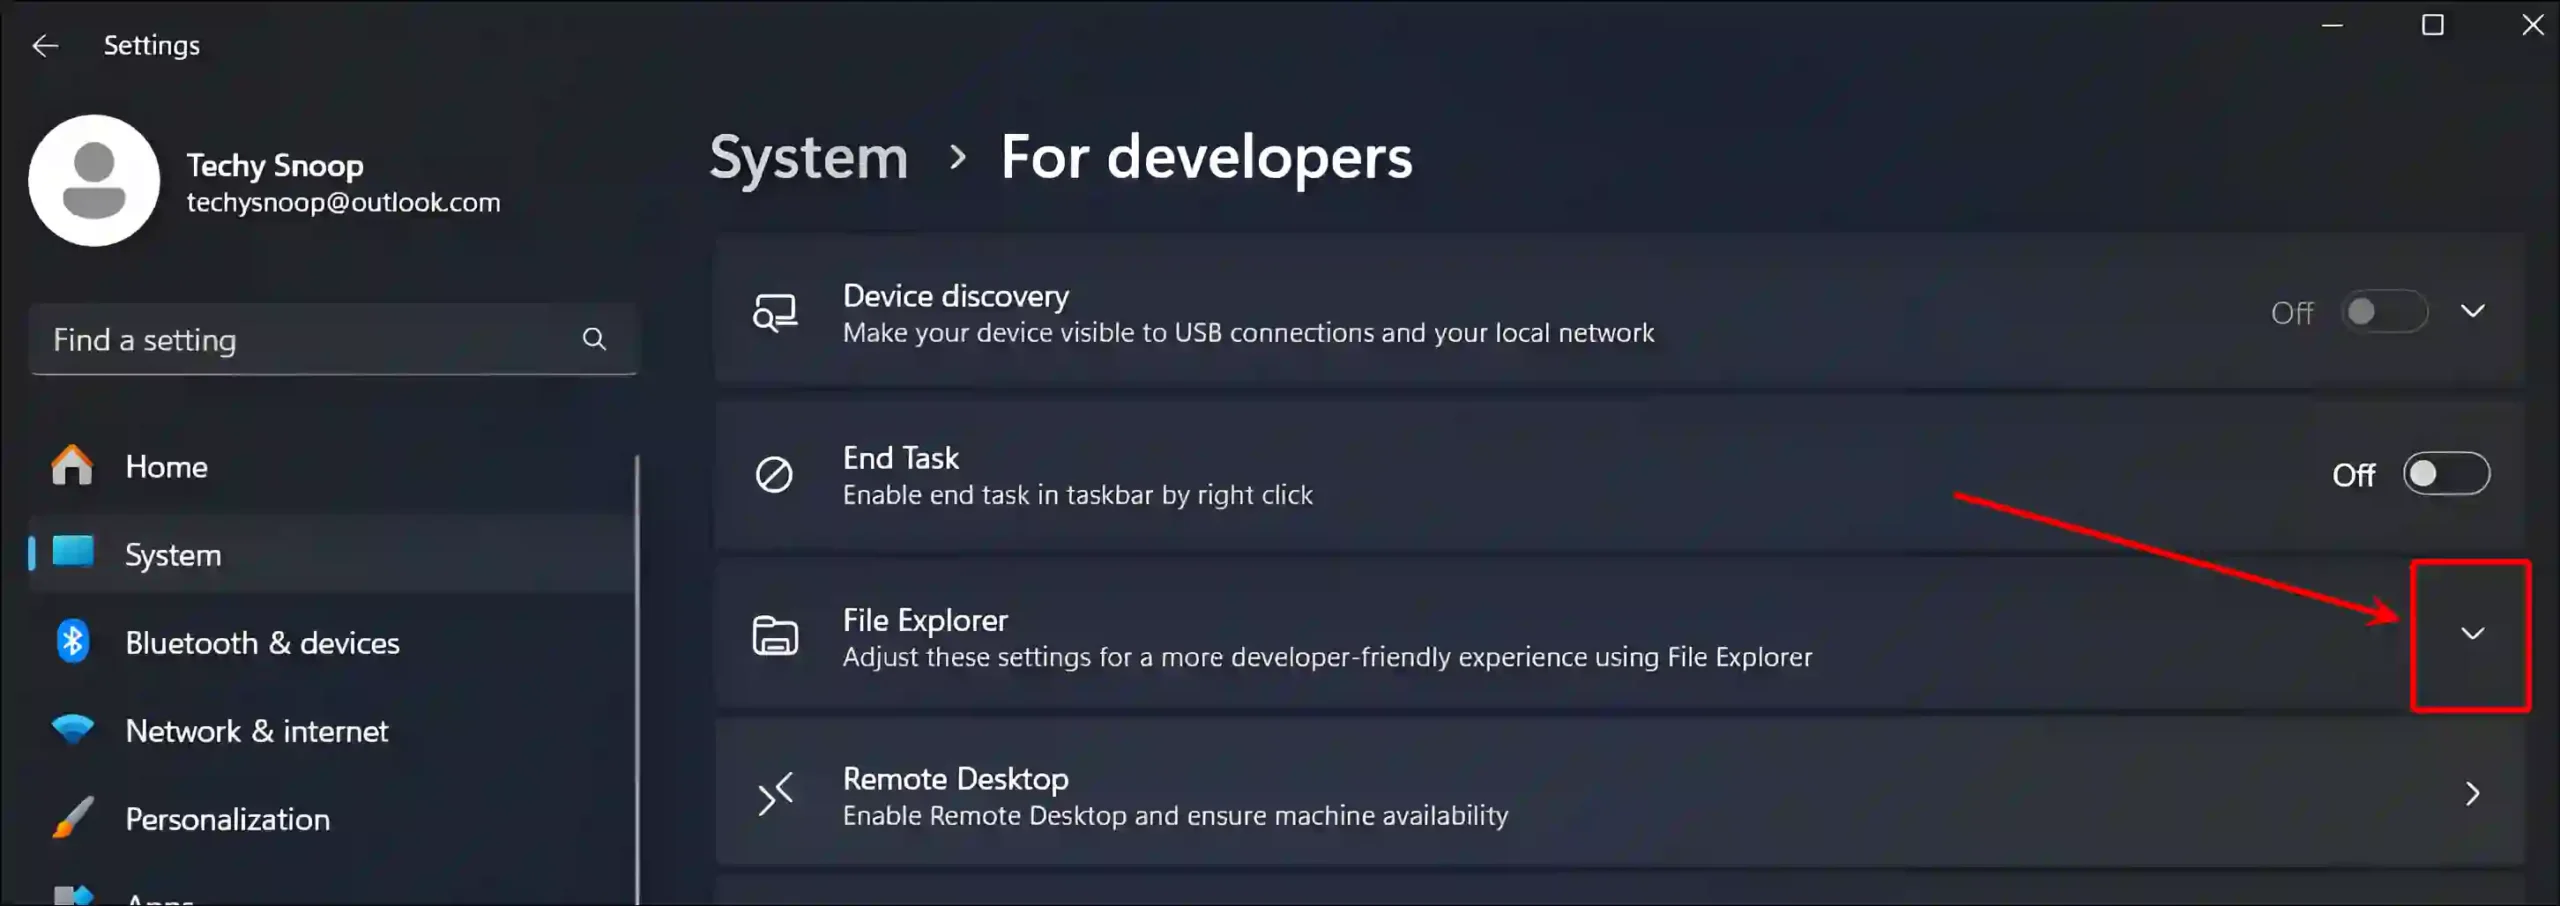
- Click File Explorer Dropdown Arrow ▼.
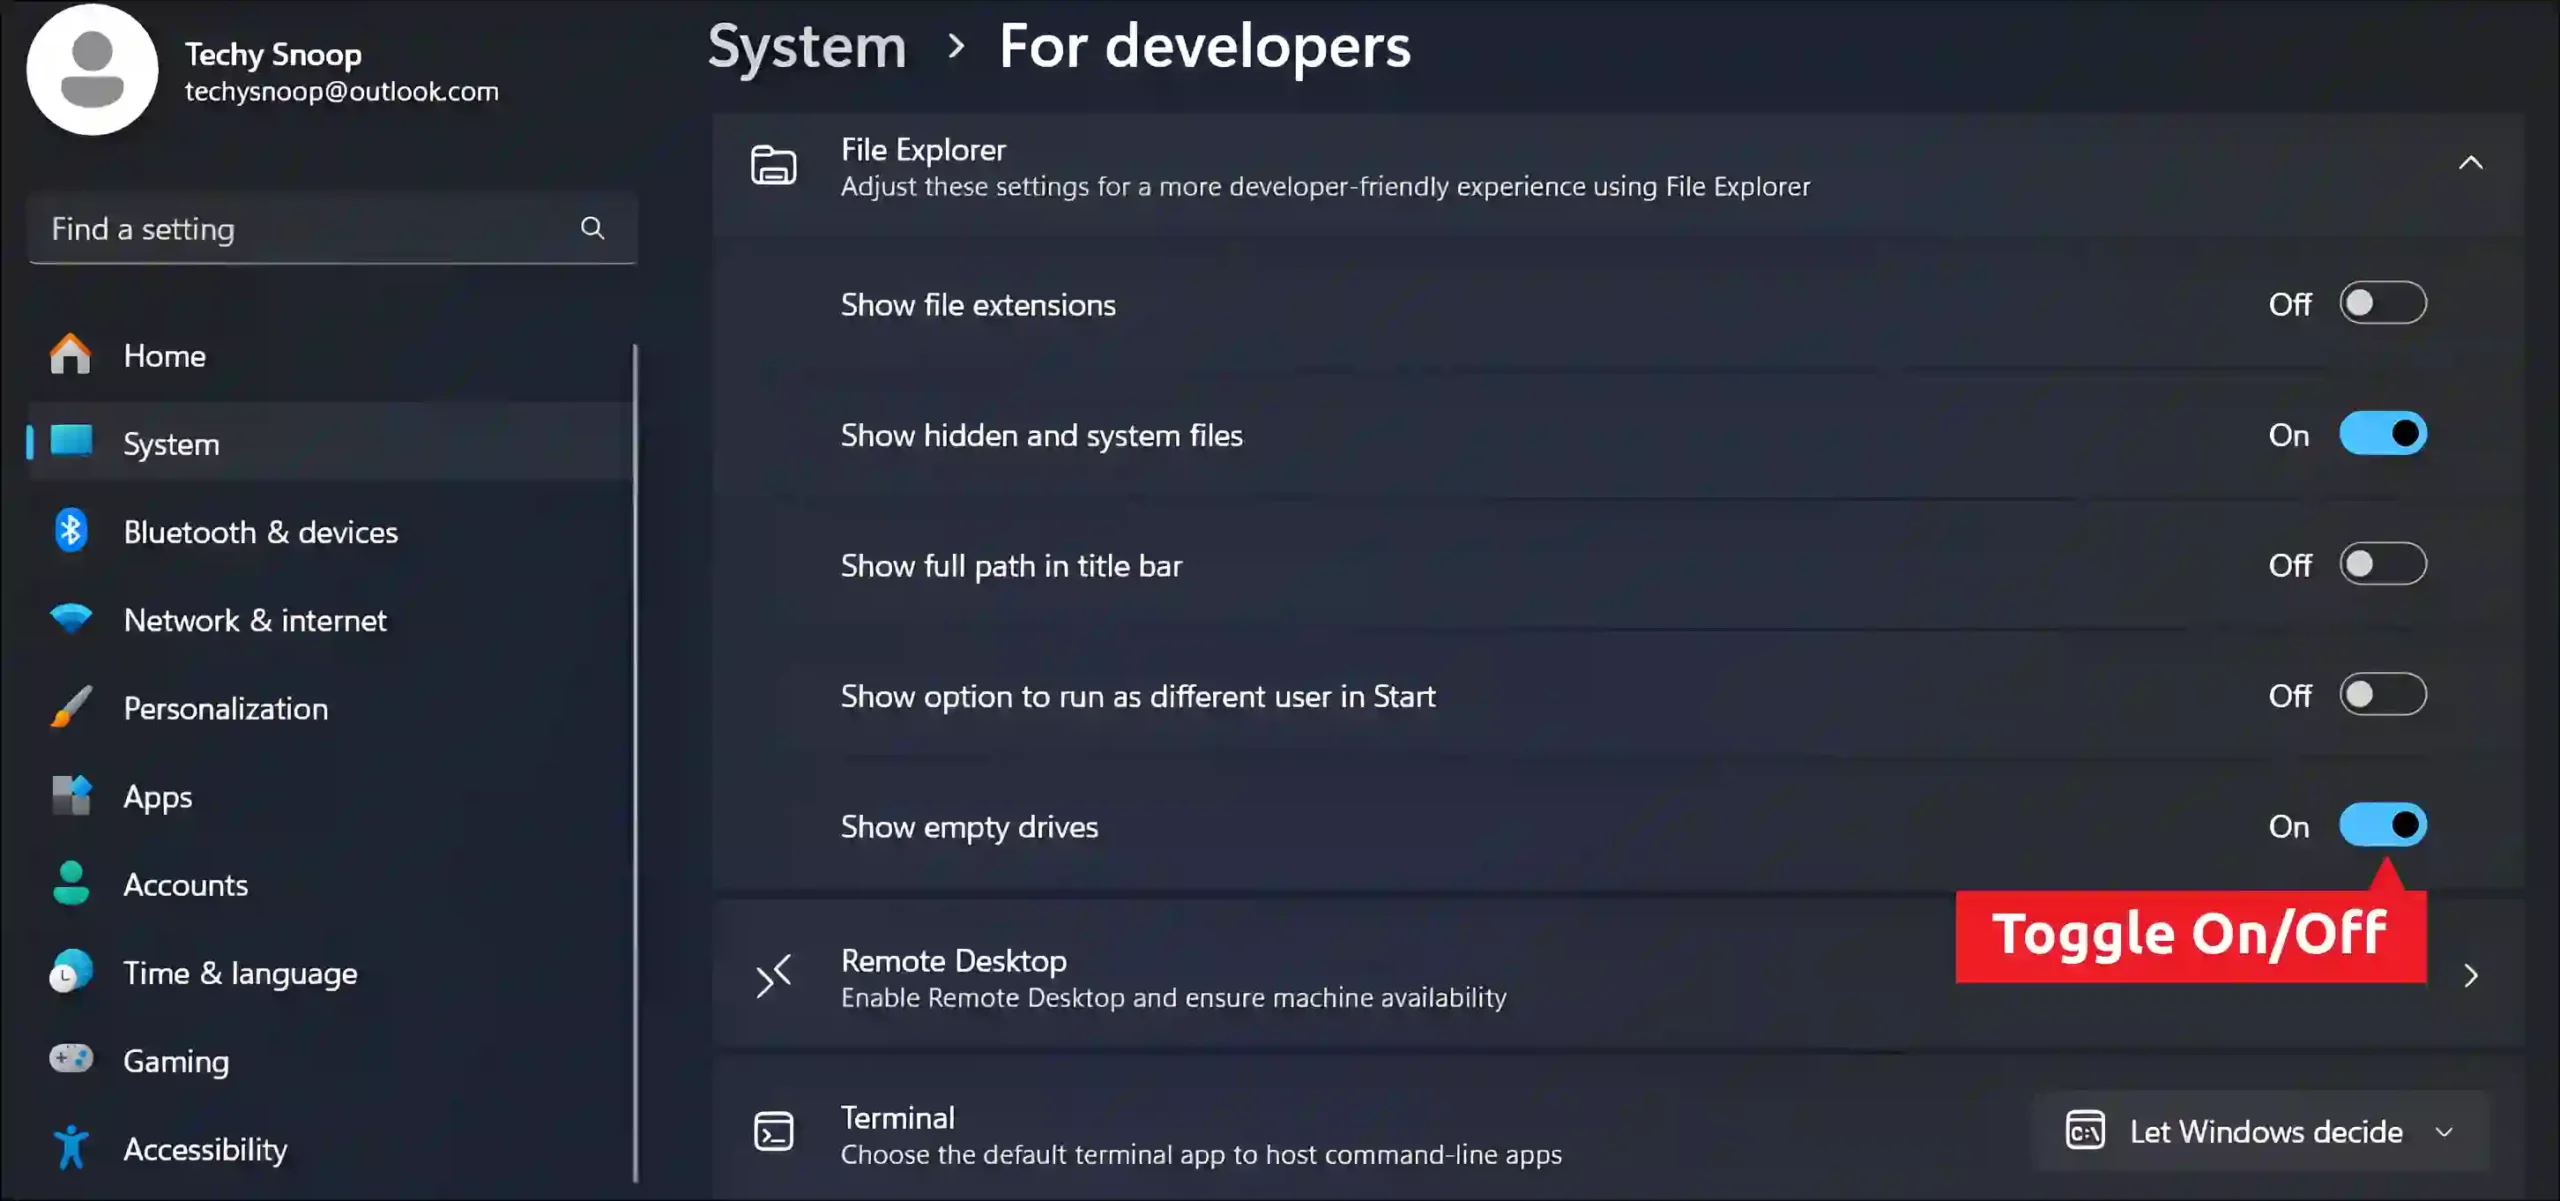
- Turn On-Off Toggle for ‘Show Empty Drives’.
Method #3. Using Registry Editor
The Registry Editor (or Regedit) is a tool that allows you to edit the system’s Windows registry. Using the Registry Editor, you can modify the settings of installed programs.
To show or hide empty drives using the REG file:
- Press 🪟 Windows + R to Open Run Dialog Box.
- Now, Type
regeditin the Text Box and Click on OK.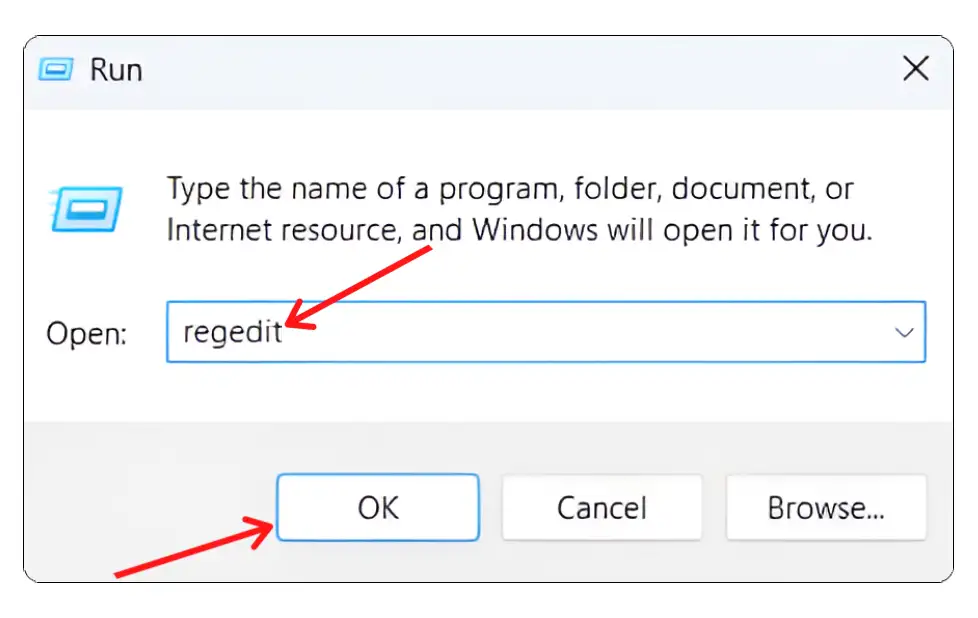
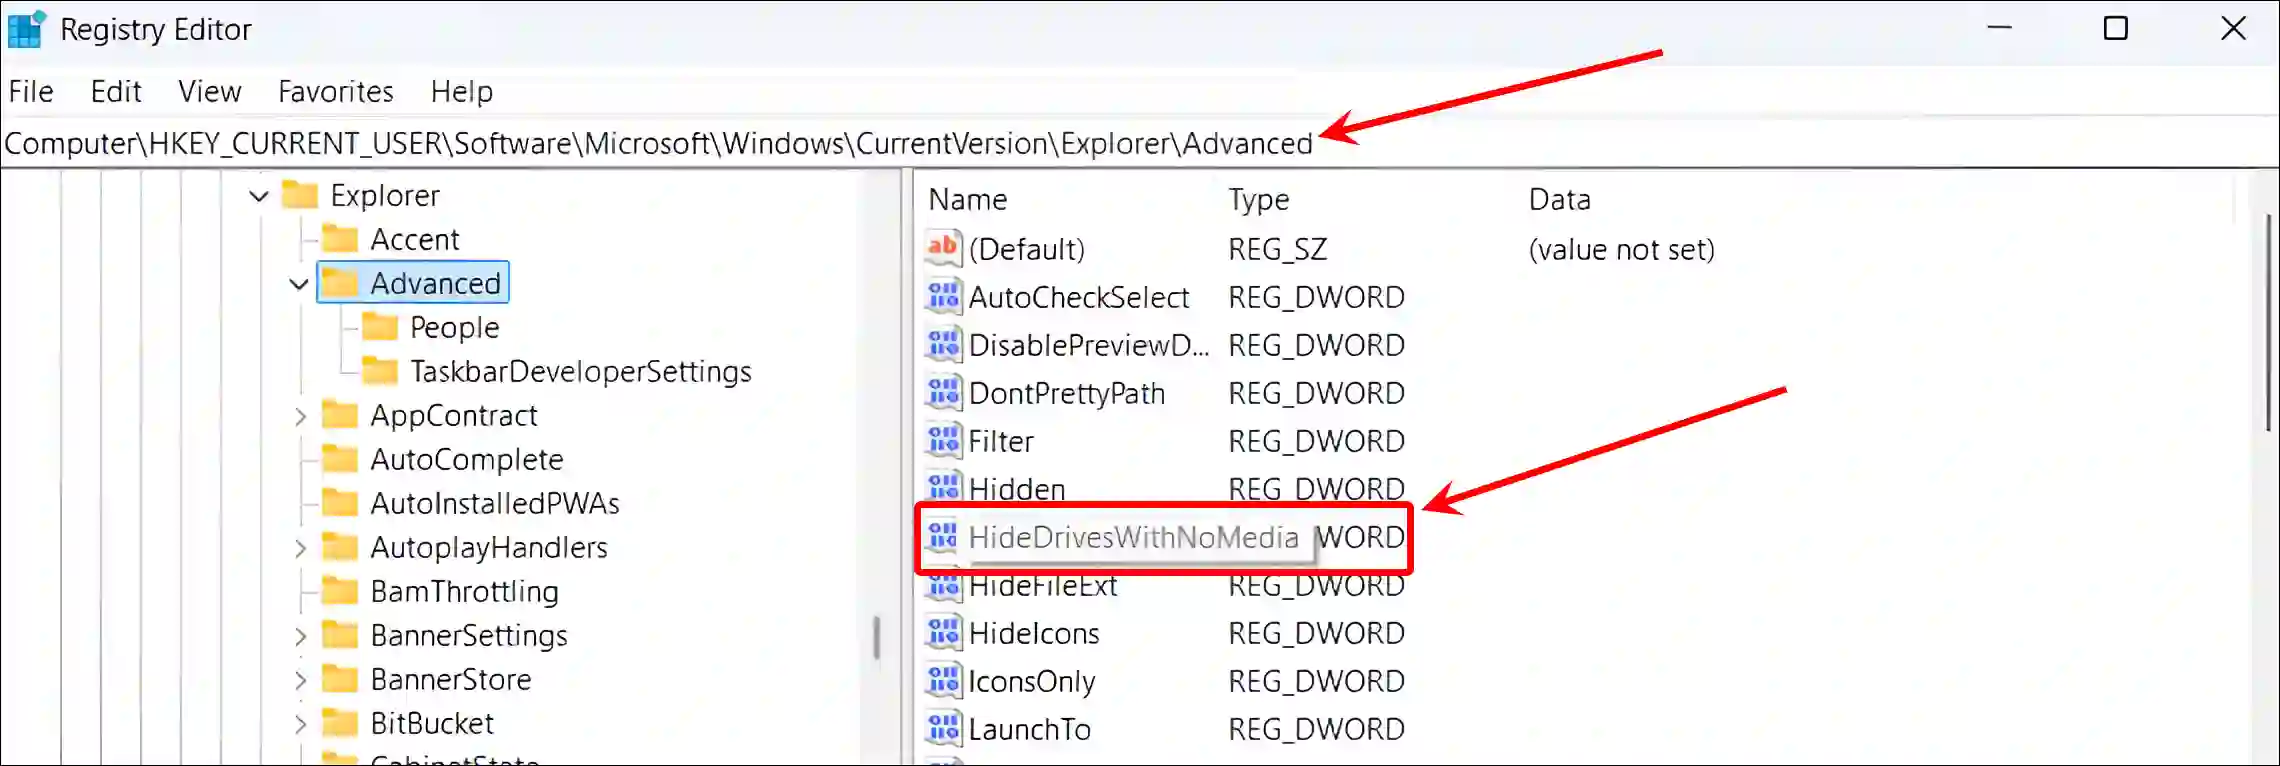
- Now, Navigate to
Computer\HKEY_CURRENT_USER\Software\Microsoft\Windows\CurrentVersion\Explorer\AdvancedPath. - Double-Click on the HideDrivesWithNoMedia.
- Set the Value Data to
0to Show Empty Drives and Click on OK Button.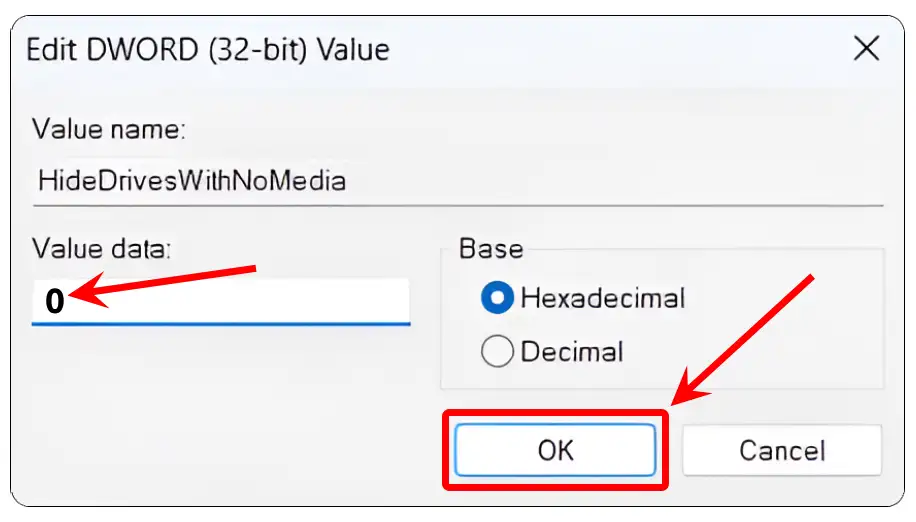
- Set the Value Data to
1to Hide Empty Drives and Click on OK Button.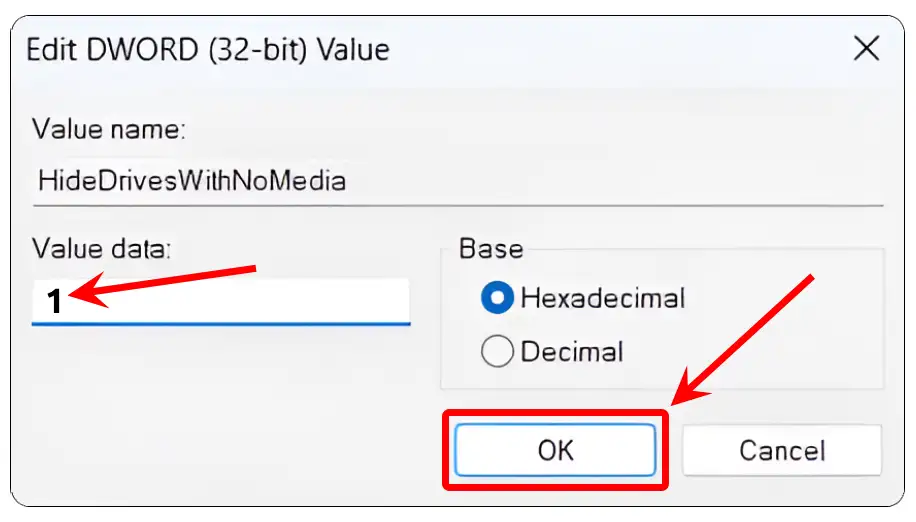
Once you complete any of the three methods above, “Empty Drives” will start appearing and hiding in File Explorer on your PC.
You may also like:
- How to Turn Off Sticky Keys on Windows PC
- Enable or Disable No GUI Boot in Windows 11
- Enable Group Policy Editor (GPEdit.msc) in Windows 11 Home Edition
FAQs
Q 1. Should I hide empty drives in File Explorer?
Answer – If you want to keep File Explorer’s view clean and organized, you can hide empty drives and focus on drives that contain data. This is especially beneficial if you have multiple drives or external storage, but some of them are empty.
Q 2. Why are empty drives not showing up in File Explorer?
Answer – If you can’t see empty drives in File Explorer, the ‘Hide empty drives’ option is probably enabled. To fix this, go to File Explorer > Options > View and uncheck “Hide empty drives”.
Q 3. Is there any way to automatically show empty drives when data is added?
Answer – Yes! As soon as you add data to an empty drive, that drive will automatically appear in File Explorer. You don’t need to change any additional settings for this.
I hope you found this article very helpful and learned how to show or hide empty drives in File Explorer on Windows 11. If you have any problems, then tell us by commenting below. Please share this article.