How to Enable or Disable Battery Saver Mode on Windows 11
Did you know that Windows 11 has a power saving mode? Yes! By enabling it, you can easily increase the battery life of your laptop. If you are also worried about your laptop battery going down quickly, then this Battery saver mode is for you. In this article, you will learn how to enable or disable battery saver mode on a Windows 11 laptop.
When you turn on Battery saver mode on your Windows 11 laptop, the system automatically adjusts all the settings, like screen brightness, background apps, notifications, etc. By adjusting all these settings, your system will reduce power consumption.
How to Enable Battery Saver Mode on Windows 11
Many times users take the laptop out somewhere and they want to increase the battery life, then battery saver mode is a great feature. By following the steps given below, you will be able to turn on battery saver mode on any of your Windows 11 laptops.
1. Turn On Battery Saver Mode from Settings App
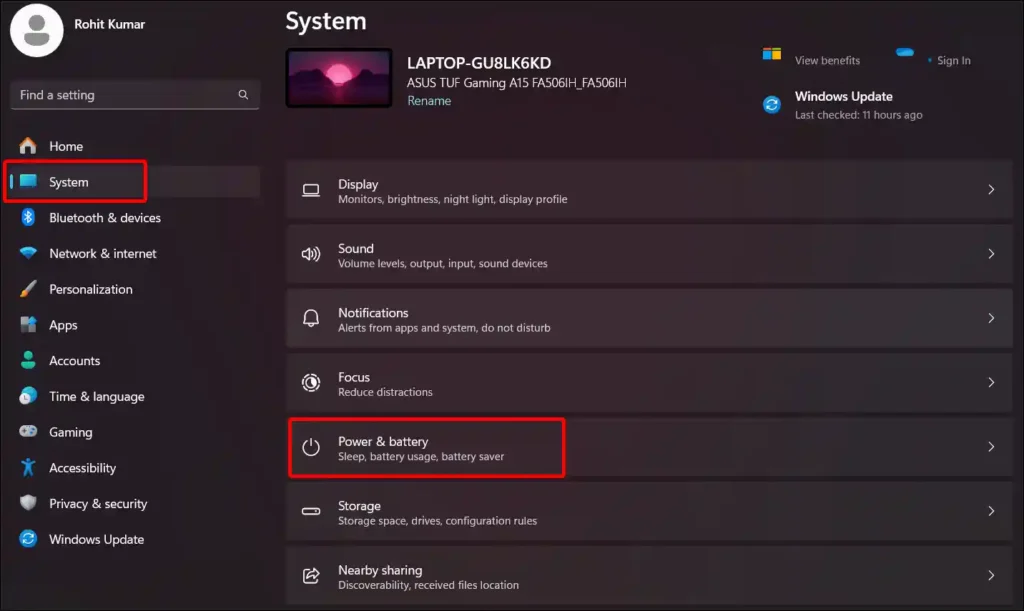
Step 1. Press Windows + I Key to Open Settings Quickly.
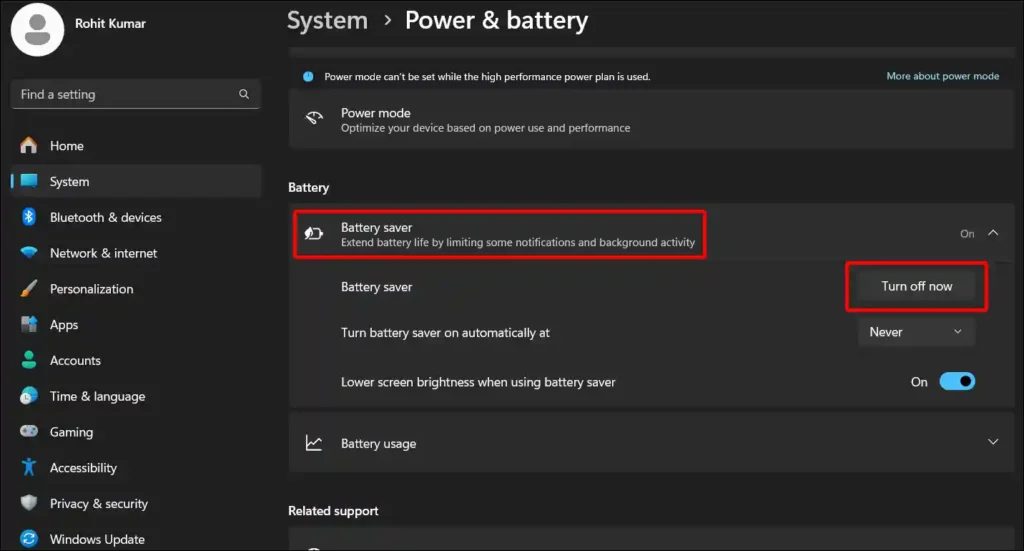
Step 2. Tap on System > Power & Battery.
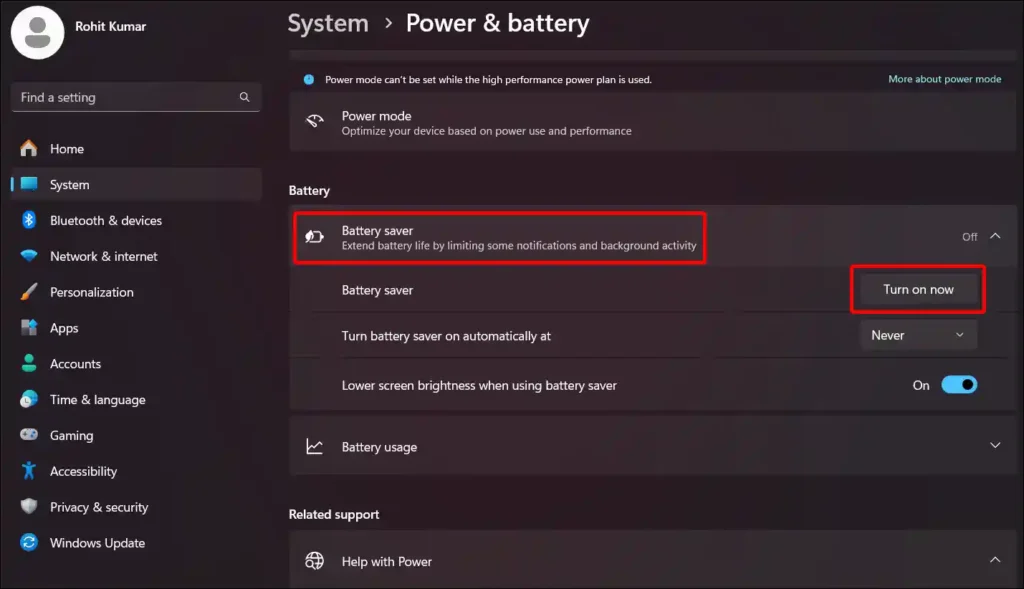
Step 3. Scroll Down and Tap on Battery Saver under the Battery Section.
Step 4. Now Tap on Turn On Now.
That’s It.
Also read: How to Turn On or Off Online Speech Recognition on Windows 11
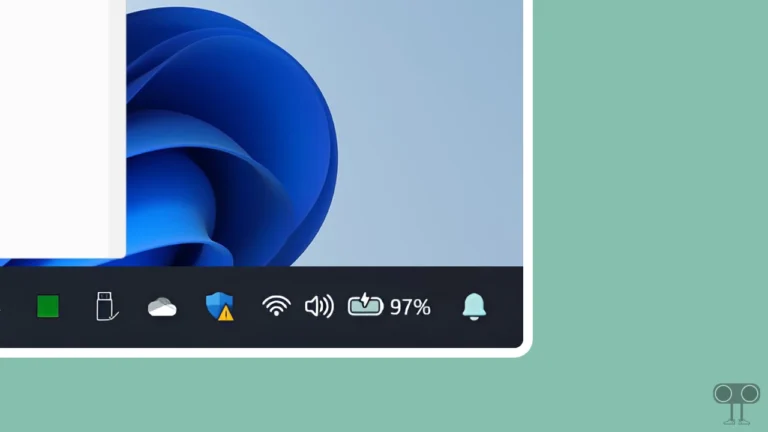
2. Turn On Battery Saver Using Quick Settings
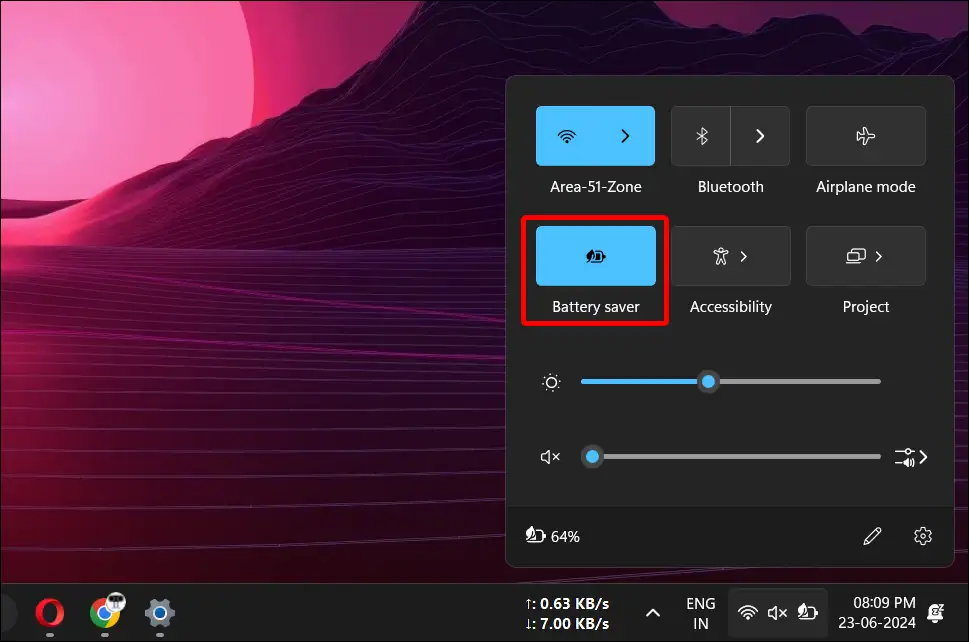
Step 1. Click on Wi-Fi, Battery and Sound Icon at Taskbar at Bottom Right to Open Quick Settings.
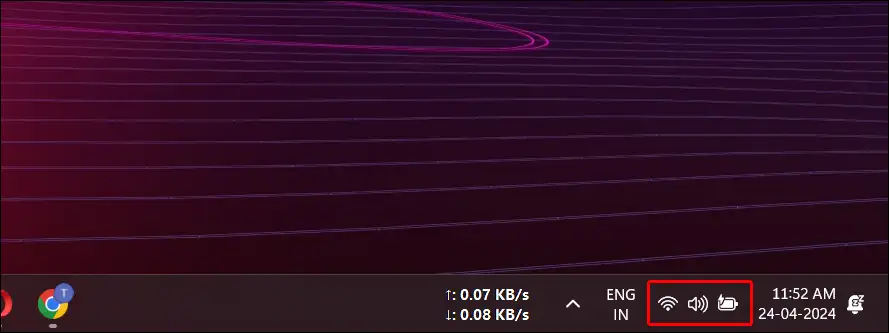
Step 2. Now Tap on Battery Saver Icon to Enable It.

By following either of the above methods, battery saver mode has been successfully activated in your Windows 11 laptop. Now some settings on your device will be adjusted automatically.
Also read: How to Enable or Disable Developer Mode on Windows 11
How to Disable Battery Saver Mode on Windows 11
As I told you above, as soon as you turn on power saving mode, the system turns off its important settings. Due to this, users get upset and want to turn off this battery saving mode on their laptop. By following the steps given below, you can disable Battery saver mode on your Windows 11 laptop.
1. Turn Off Battery Saver Mode from Settings App
Step 1. Press Windows + I Key to Open Settings Quickly.
Step 2. Tap on System > Power & Battery.
Step 3. Scroll Down and Tap on Battery Saver under the Battery Section.
Step 4. Now Tap on Turn Off Now.
That’s It.
Also read: How to Enable or Disable Recall on Windows 11
2. Turn Off Battery Saver Using Quick Settings
Step 1. Click on Wi-Fi, Battery and Sound Icon at Taskbar at Bottom Right to Access Quick Settings.
Step 2. Now Tap on Battery Saver Icon to Disable It.
By following either of the above two methods, the battery saver mode in your Windows 11 laptop has been successfully turned off. Now all the settings on your device will be set to normal as before.
I hope you found this article helpful and learned from it how to enable or disable battery saver mode on Windows 11. If you are facing any problems, then let us know by commenting below. Please share this post on social media.