How to Enable or Disable Recall on Windows 11
Recently, Microsoft launched the ‘Windows 11 24H2 version’. And this version is quite special because it comes with the Recall feature, which is enabled by default for compatible devices. Microsoft has added the Recall feature to the Copilot+ line of Windows 11-powered PCs. Let know what it is and how to enable and disable the Recall feature in Windows 11.
What is Recall Feature on Windows 11?
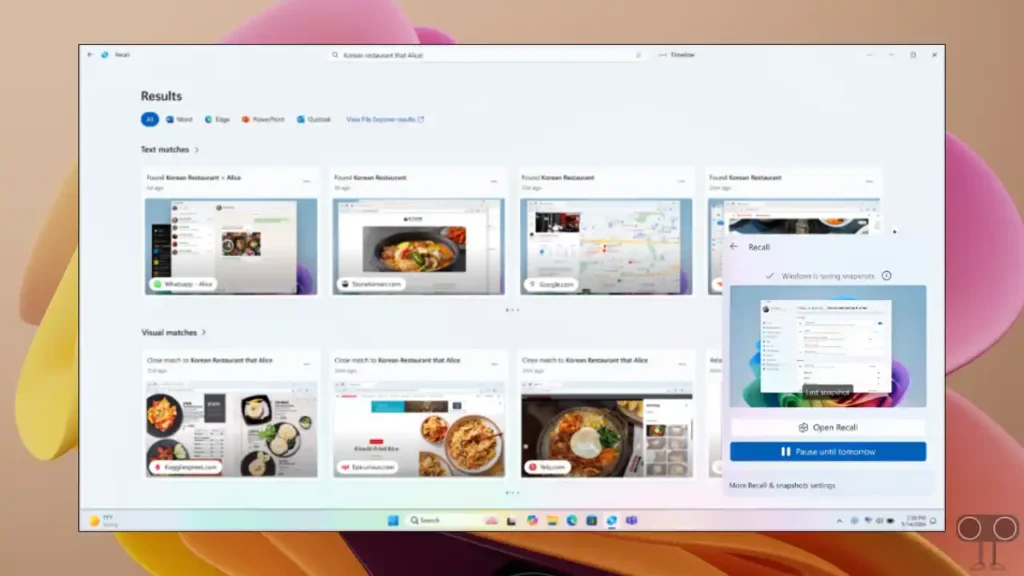
Recall is an AI (artificial intelligence) feature in latest Windows 11 version. Recall uses AI to remember and retrieve almost everything a user has seen and done on their computer. The technology used in this process can also be called photographic memory technology.
However, the Recall feature currently only works on Copilot+ PCs that come with Snapdragon X ARM processors. But according to Microsoft, the company is working with Intel and AMD. The Recall feature will soon be seen in PCs with Intel and AMD processors.
How to Enable Recall on Windows 11
As I told you, the Recall feature will be enabled by default in Windows 11 24H2 version PCs, but the Recall option will not be visible in the taskbar. However, you can manually enable this Recall feature and set it on the desktop taskbar. For this, read and follow all the steps given below carefully.
To turn on Recall on Windows 11 PCs:
Step 1. Open Windows 11 Settings by Pressing Windows + I Shortcut Keys.
Step 2. Tap on Privacy & Security from Left Menu Panel.
Step 3. Select the Recall & Snapshots Option.
Step 4. Turn On the Toggle Switch Next to the Save Snapshots.
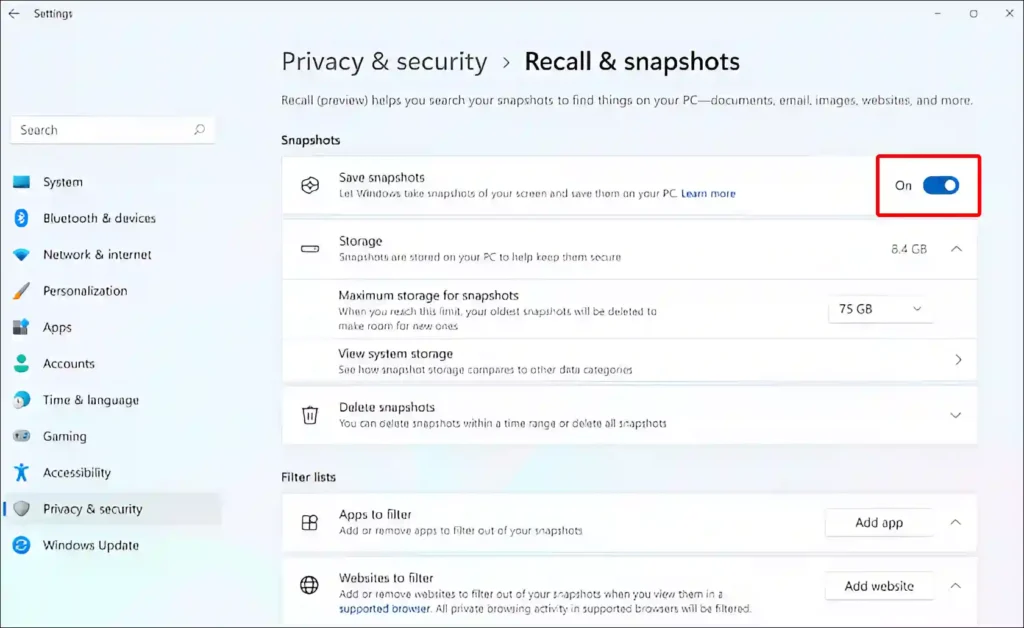
Once you enable the Save Snapshots toggle by following the above steps, it will appear in your taskbar. Let me tell you that this feature will run in the background of your PC and will track your activity, which will later convert your activity into searchable mode.
Also read: How to Enable or Disable Variable Refresh Rate on Windows 11
How to Disable Recall on Windows 11
If you have already enabled the Recall feature on your PC, but now you want to turn off this Recall option on your PC, then by following the steps given below, you can easily disable the Recall on your Windows 11 PC or laptop.
To turn off Recall on Windows 11 PCs:
1. Open Settings on Your Windows 11 PC.
2. Click on Privacy & Security.
3. Click on Recall & Snapshots.
4. Turn Off the Toggle Switch Next to the Save Snapshots.
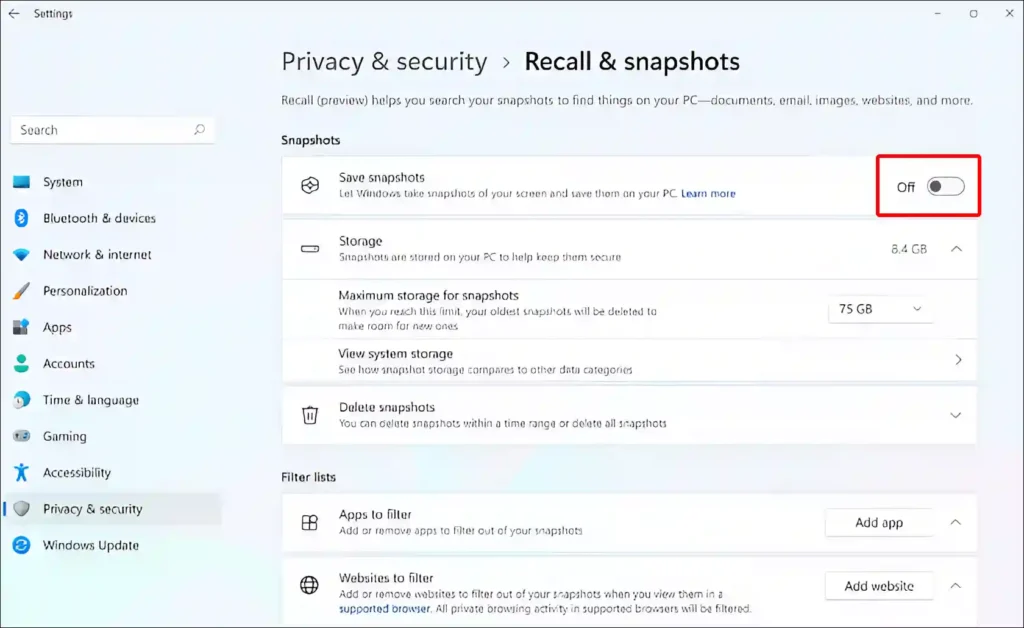
As soon as you turn off the Save Snapshots toggle switch, the Recall icon will disappear from your PC taskbar.
Also read: How to Disable Snipping Tool on Windows 11
If the Recall feature does not appear on your PC or laptop, then your PC is probably not running on the latest version of Windows 11. This Recall feature is currently only available in version 24H2 or higher.
I hope you liked this article. And with the help of this article, you have learned how to turn on and off the Recall feature in Windows 11. If you have any kind of question in mind, please tell us by commenting below. And do share this post.