Chrome Not Opening/Keeps Stopping on Windows 11

In this article, I have explained step-by-step how you can fix the problem of Chrome not opening or crashing repeatedly in Windows 11. You’re not alone; many Windows users are complaining on Reddit and Twitter that when they launch the Chrome browser on their computers and laptops, it keeps closing instead of opening.
Chrome browser crashing on startup is a common problem on PC, and it can be very frustrating for users. However, the good news is that you can easily fix this issue with a few simple methods. Some specific causes of this problem can include:
- Software Conflict
- Corrupted User Profile
- Outdated Chrome or Windows
- Corrupted Chrome Installation
- Insufficient System Resources (RAM/CPU)
- Graphics Driver Issues
- Windows System File Corruption
Fix Chrome Browser Not Opening/Keeps Stopping Problem on Windows 11
1. Force Close Chrome
If the Chrome browser gets stuck when opening or keeps stopping after opening, force closing Chrome is a good solution. This will completely close your browser on the system, allowing the application to be reopened correctly. This can be easily done using Task Manager in Windows 11.
- Press CTRL + SHIFT + ESC to Quickly Access Task Manager.
- Select Google Chrome and Click on End Task at Top Bar.
Alternatively, Right Click on Google Chrome and Select End Task.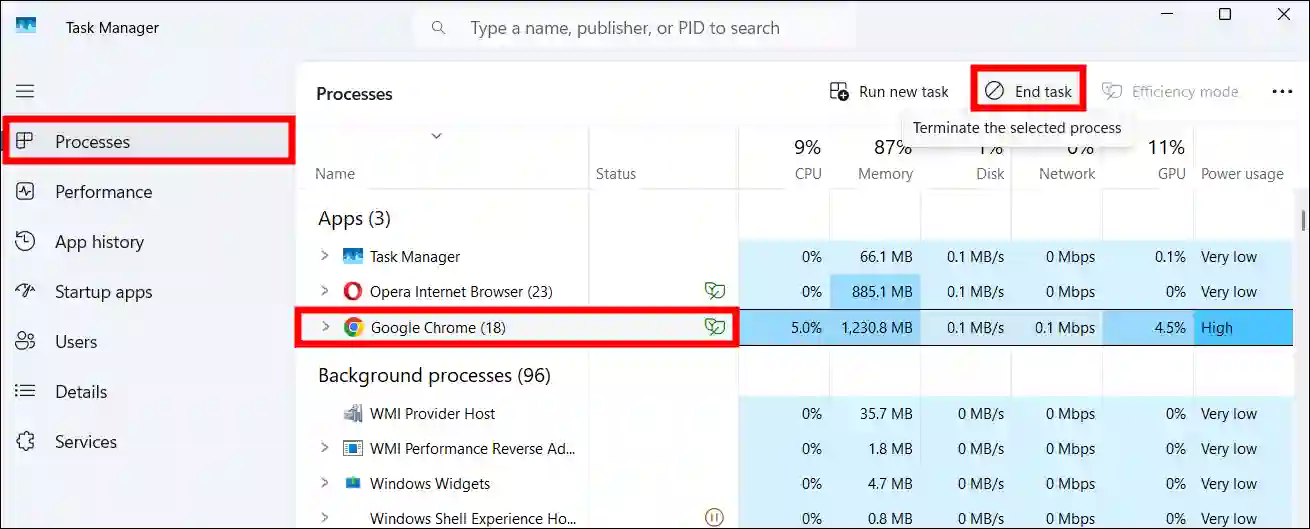
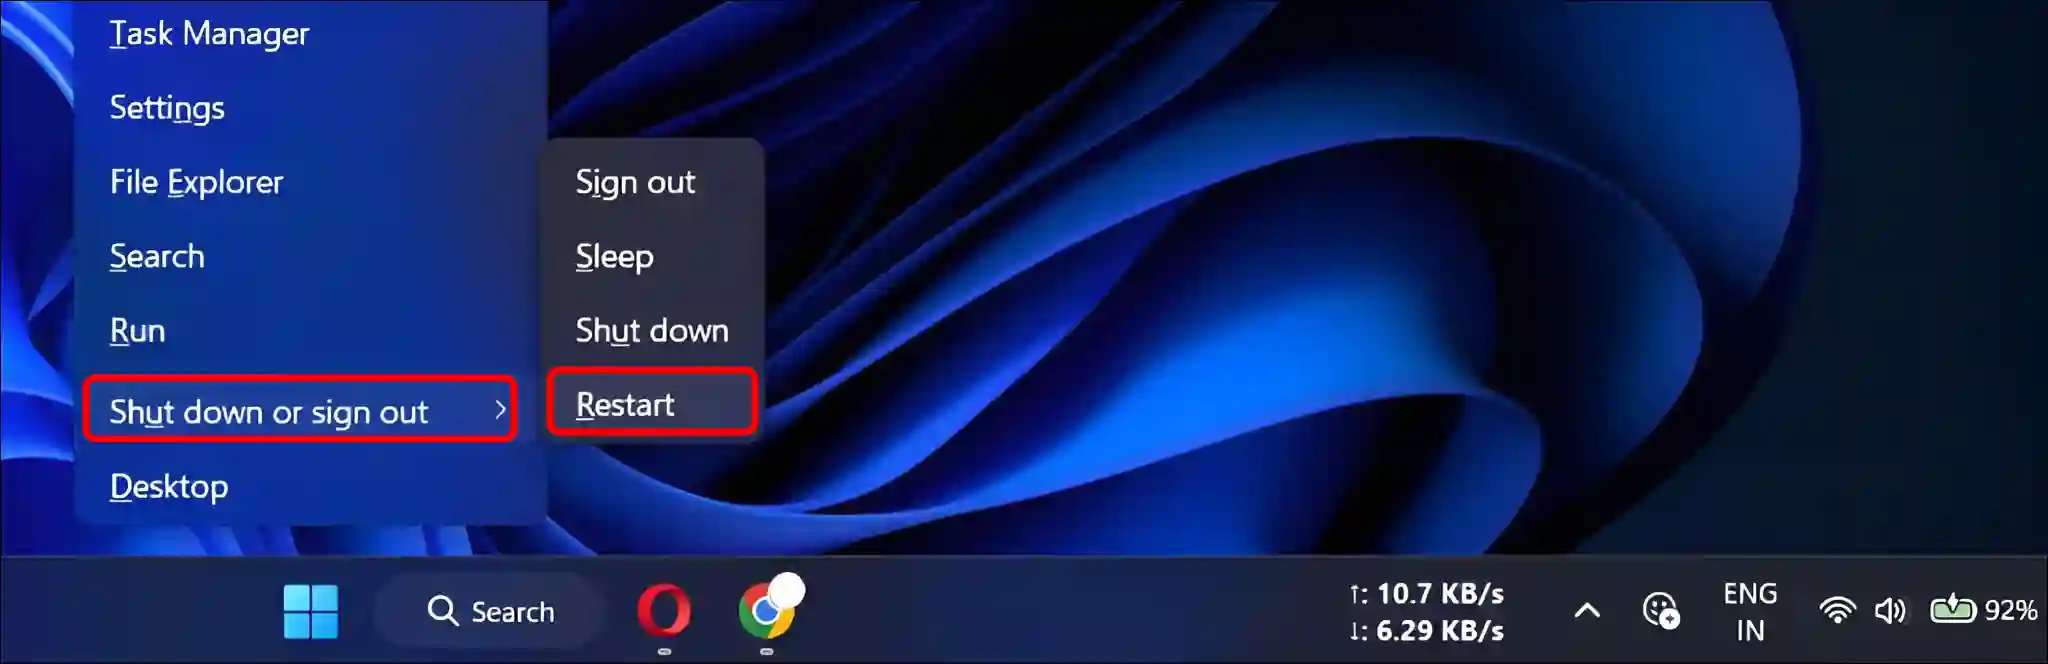
2. Restart Your PC/Laptop
Once you have force-closed Chrome, you now need to restart your computer. Restarting the system resolves temporary issues related to the application. To restart the system, press the Windows + X keys simultaneously, then click on “Shut down or sign out”, and then select “Restart”.
Read: Chrome Says “Site Wants to Look for and Connect to Any Device on Your Local Network”
3. Check for System Resources (RAM/CPU)
If your system is running low on memory or experiencing high CPU usage, Chrome or other applications may crash when you try to open them. You can view your system resources in Task Manager. To do this, press CTRL + SHIFT + ESC, then go to the Performance tab. You will find all the details there.
4. Scan and Repair System Files
There’s a hidden way to scan and repair corrupt system files in Windows. However, you have to do this by entering a command line in the Command Prompt (CMD). It will scan all the files on your system and automatically repair any corrupted files it finds.
- Press Windows + S and Search “CMD” and then Run as Administrator.
- Click YES As Soon As User Account Control (UAC) Popup Appears.
- Copy-Paste
sfc /scannowCommand and Hit Enter.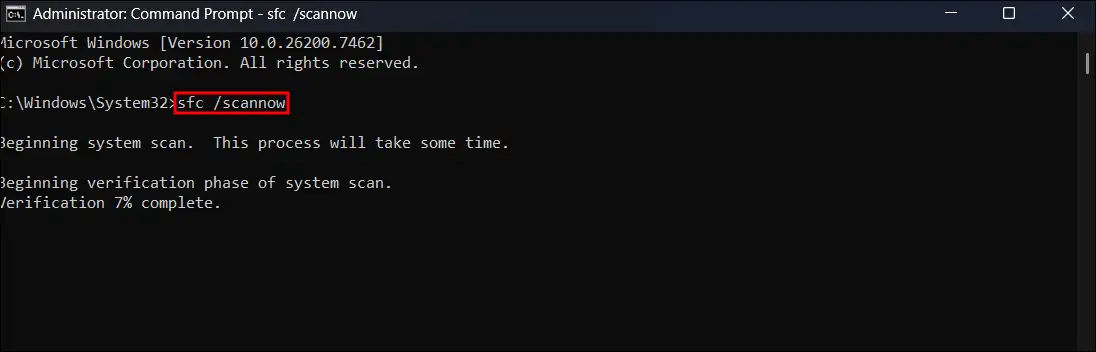
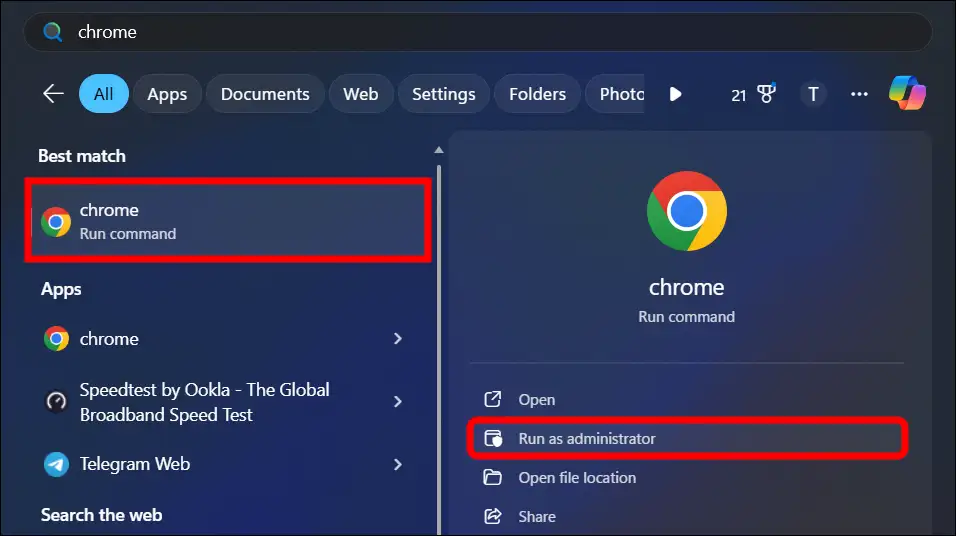
5. Run Chrome as Administrator
Try opening the Chrome browser on your computer by selecting “Run as administrator”. This process easily bypasses temporary problems and helps open Chrome without any issues. To do this, press Windows and S keys, then type Chrome and click “Run as administrator”.
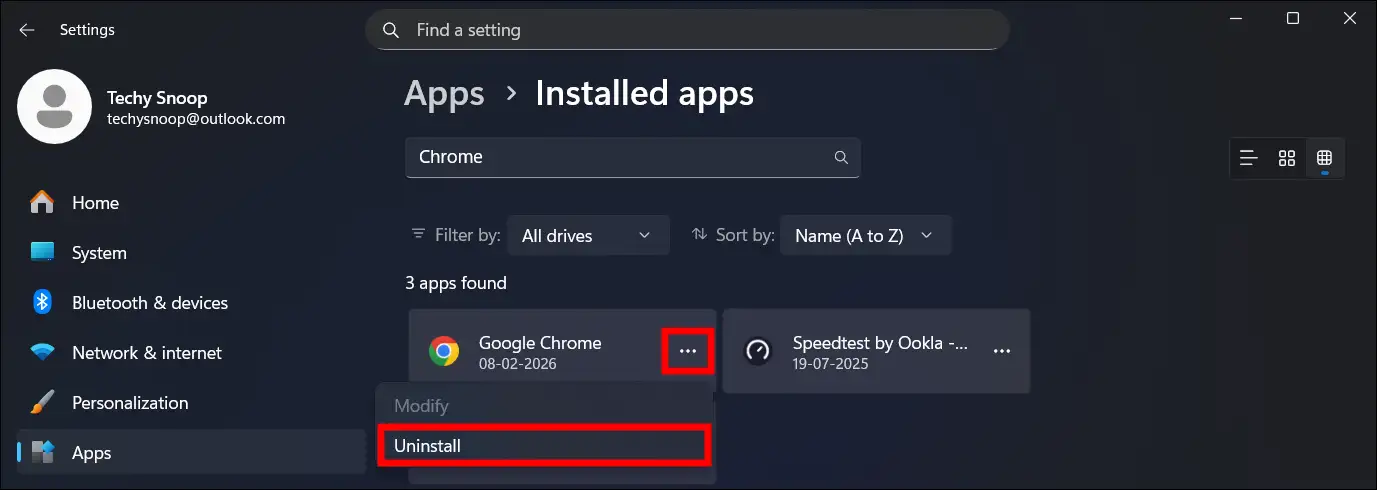
6. Uninstall and Reinstall Chrome
If none of the above four methods work for you, then you need to reinstall the Chrome browser. In this process, you must completely uninstall the Chrome browser from your computer, then download it from the official website and reinstall it.
To reinstall the Google Chrome browser in Windows 11:
- Press Windows + I to Open Settings.
- Go to Apps > Installed Apps > Google Chrome.
- Click on Three ••• Dots Next to Chrome and then Uninstall.
Read: How to Disable QUIC Protocol in Chrome, Edge and Firefox
I hope you found this article helpful and that you’ve fixed Chrome keeps closing on its own on your Windows 11. If you have any problems or questions related to Windows 11, please let us know in the comments below. Don’t forget to share this article with your friends on social media.


![Check Last System Boot Date and Time of Windows 11 [CMD, PowerShell, Task Manager, Event Viewer]](https://techysnoop.com/wp-content/uploads/2026/03/last-system-boot-date-time-windows-11-768x432.webp)