How to Check USB Speed on Windows 11: Quick 3 Ways
In this article, I have shared 3 step-by-step methods that will teach you how to check USB speed in Windows 11. You can easily test the real-time speed of connected USB drives like flash drives, external SSDs, or HDDs on your Windows computer or laptop by entering the built-in command line tool “Winsat“.
There is some third-party software available, such as USBDeview (for Windows) and Blackmagic Disk Speed Test (for Mac), that can easily monitor the speed of USB drives connected to your system. Below, I’ve described how to do this on Windows without third-party software.

3 Ways to Check USB Speed on Windows 11 PC or Laptop
Every USB flash drive manufacturer promises high-speed data transfer. But do they keep their promises? You can easily check the speed by connecting the USB flash drive to your computer.
1. Winsat Command on CMD
The Winsat command in Windows is a built-in command-line utility that is often used to benchmark and test the performance of computer hardware, including the CPU, RAM, disk, and graphics. To check these, you simply need to type the Winsat command in CMD and press Enter.
To test USB drive speed on PC using command prompt:
Step 1. Press Windows + S and Search “CMD” and then Run as Administrator.
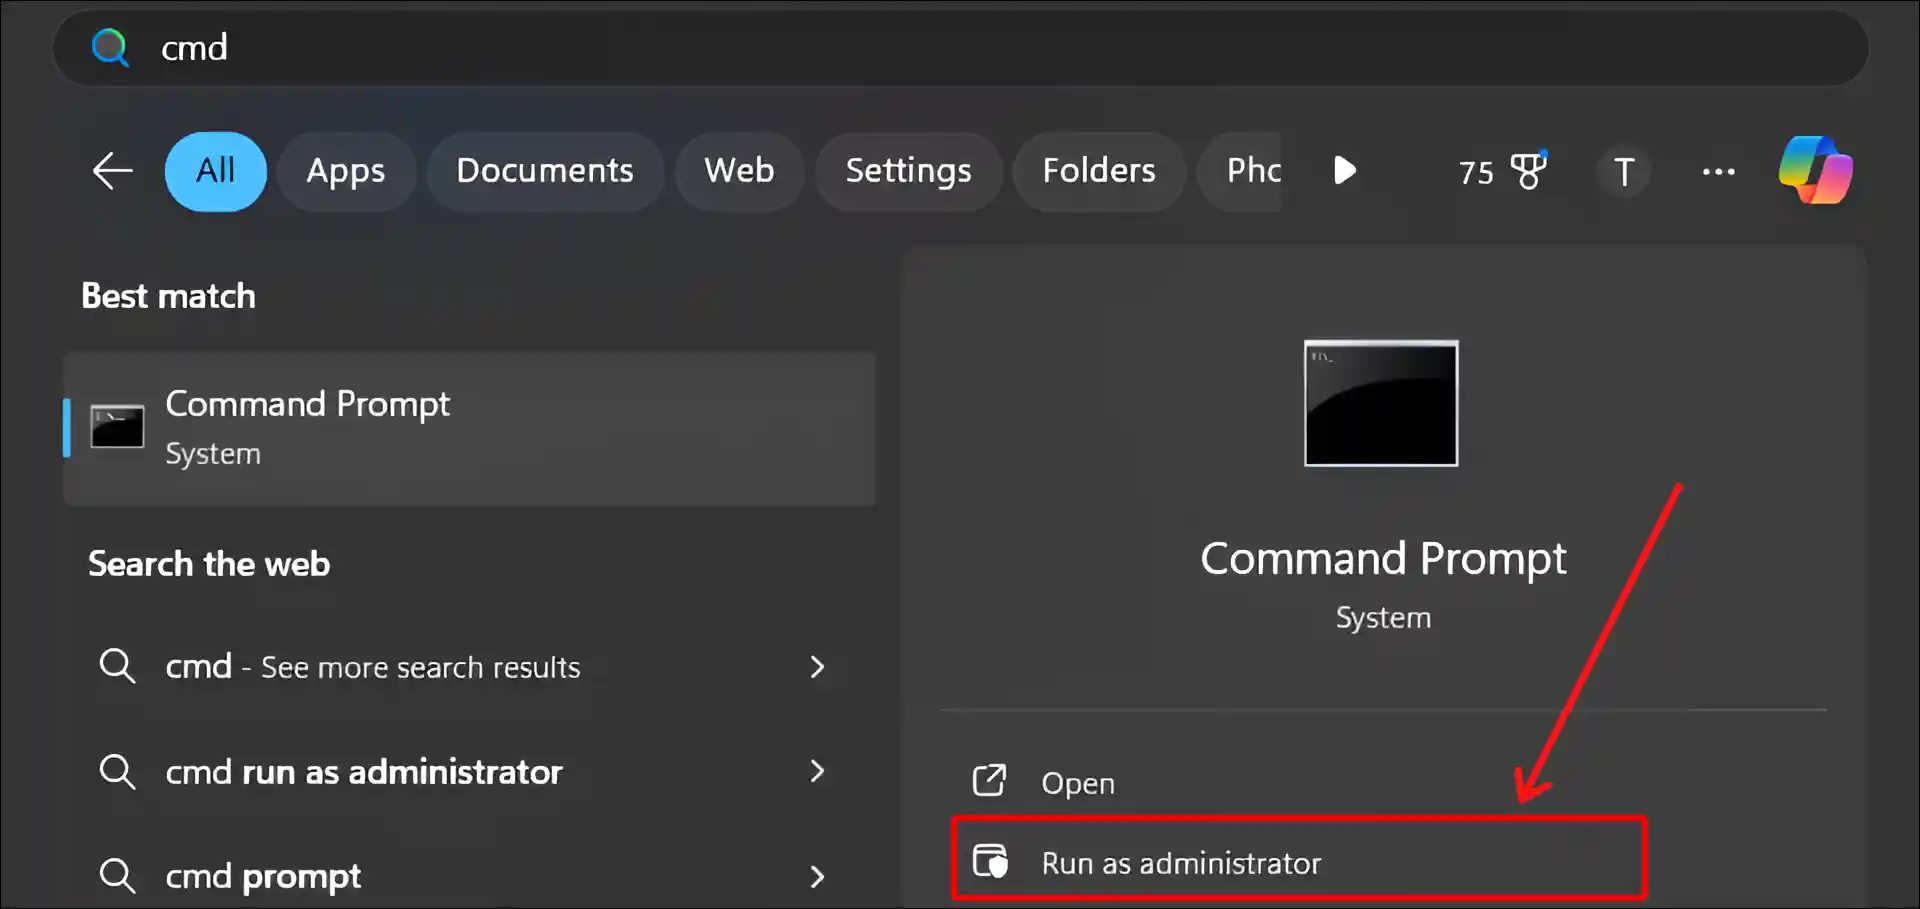
Step 2. Click Yes on User Account Control (UAC) Popup.
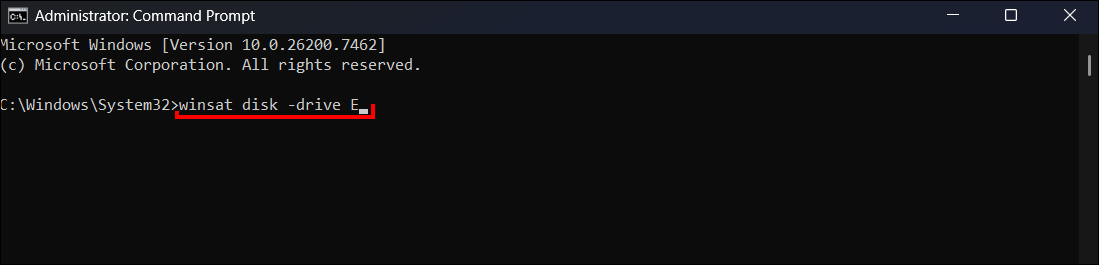
Step 3. Now, Enter winsat disk -drive [YourDriveLetter] Command and Hit Enter.
For example, if your USB drive is your D drive, you’d use the command
.winsat disk -drive E
Step 4. Now, At the Bottom of the Report, You Can See USB Drive Speeds.
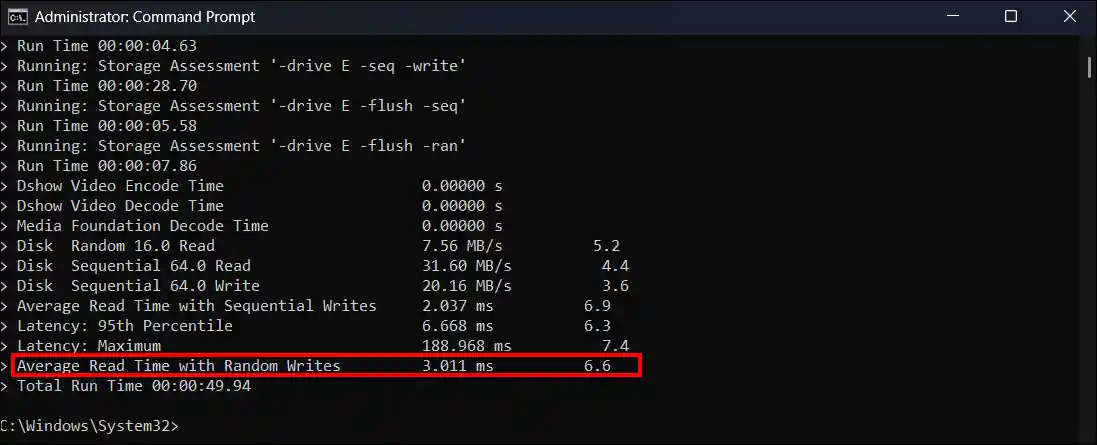
Note: The winsat report lists the read and write speeds in MB/s, the average read time in ms, the latency in ms, and the average read and write times in ms.
2. Winsat Command on PowerShell
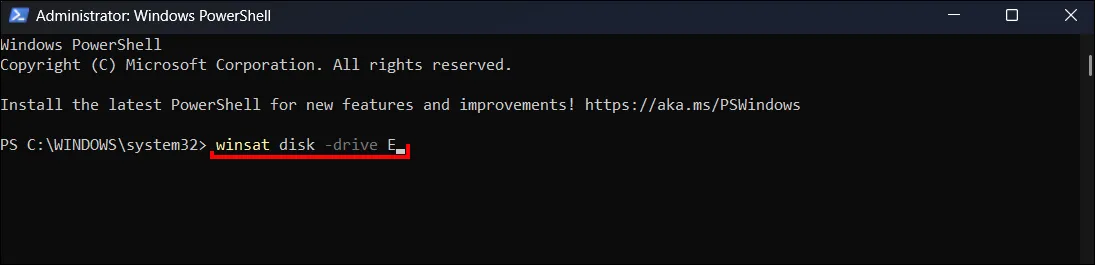
The winsat command works not only in Command Prompt but also in PowerShell. Simply launch PowerShell on your computer, then enter the winsat command along with the name of your USB drive, and hit Enter.
To test USB drive speed on PC using PowerShell:
Step 1. Press Windows + S and Search “PowerShell” and then Run as Administrator.
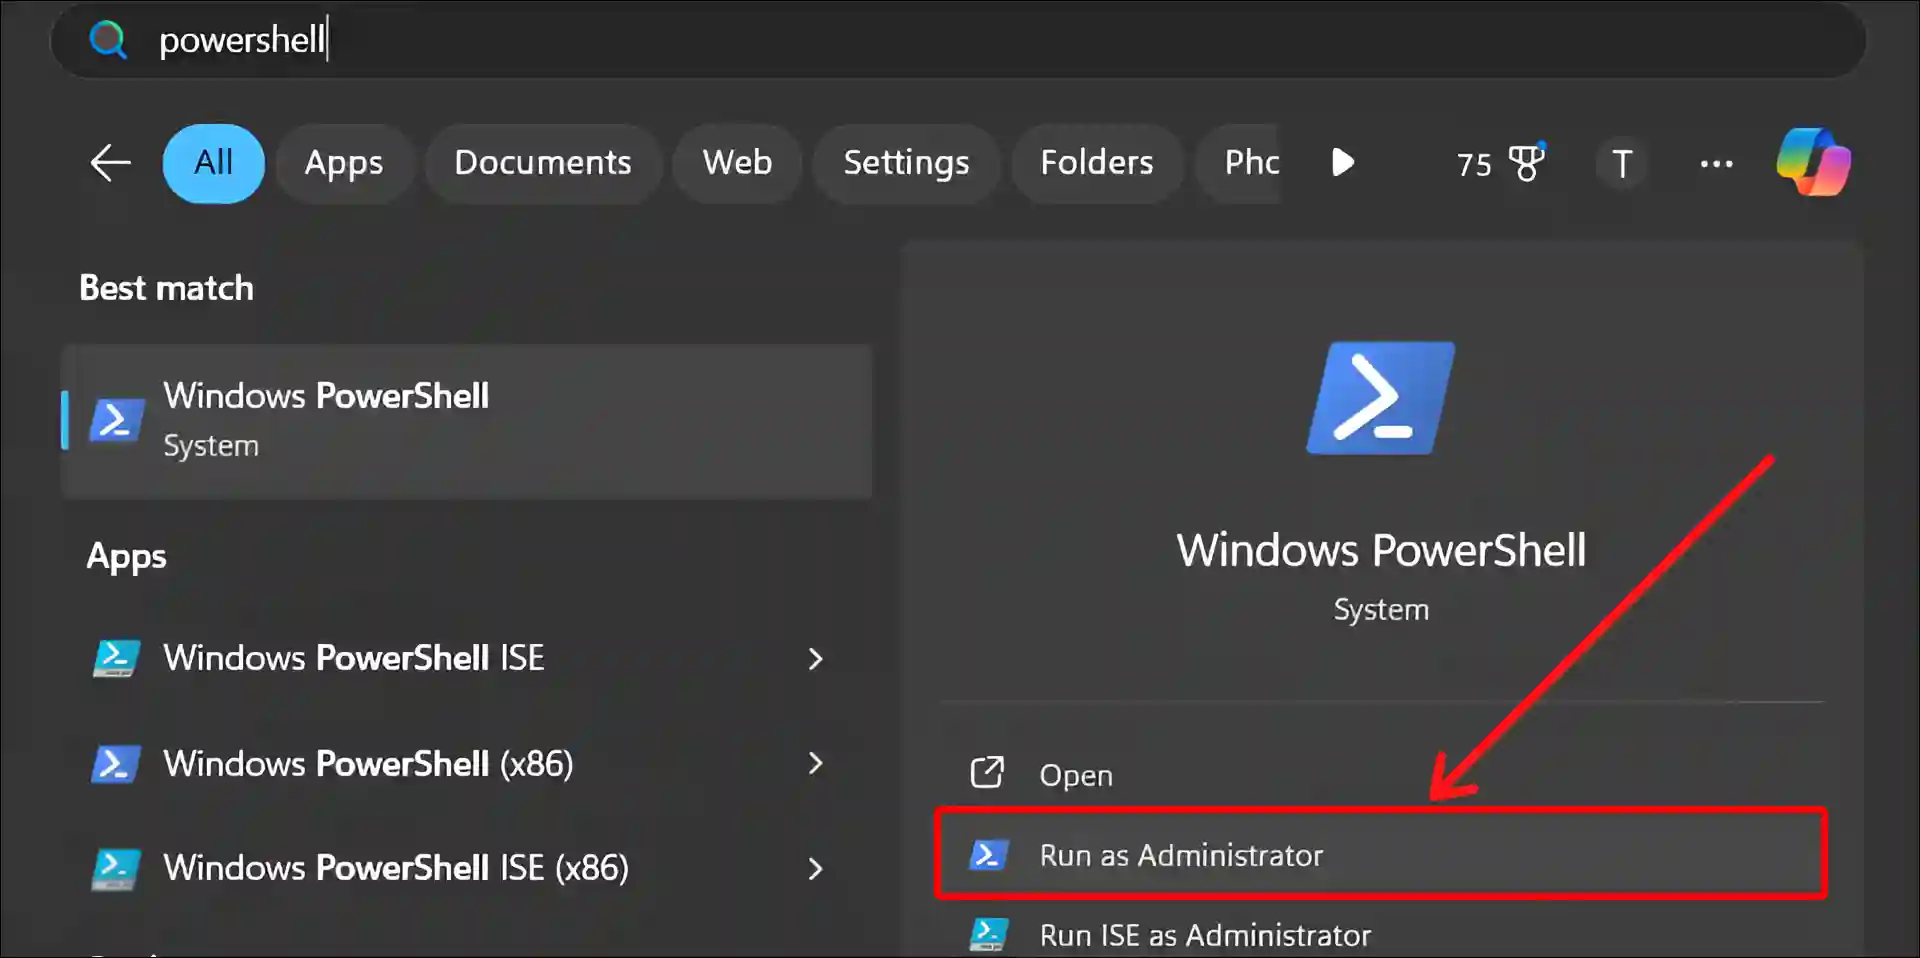
Step 2. Click Yes on User Account Control (UAC) Popup.
Step 3. Now, Enter winsat disk -drive [YourDriveLetter] Command and Hit Enter.
For example, if your USB drive is your D drive, you’d use the command
winsat disk -drive E.
Step 4. Now, At the Bottom of the Report, You Can See USB Drive Speeds.
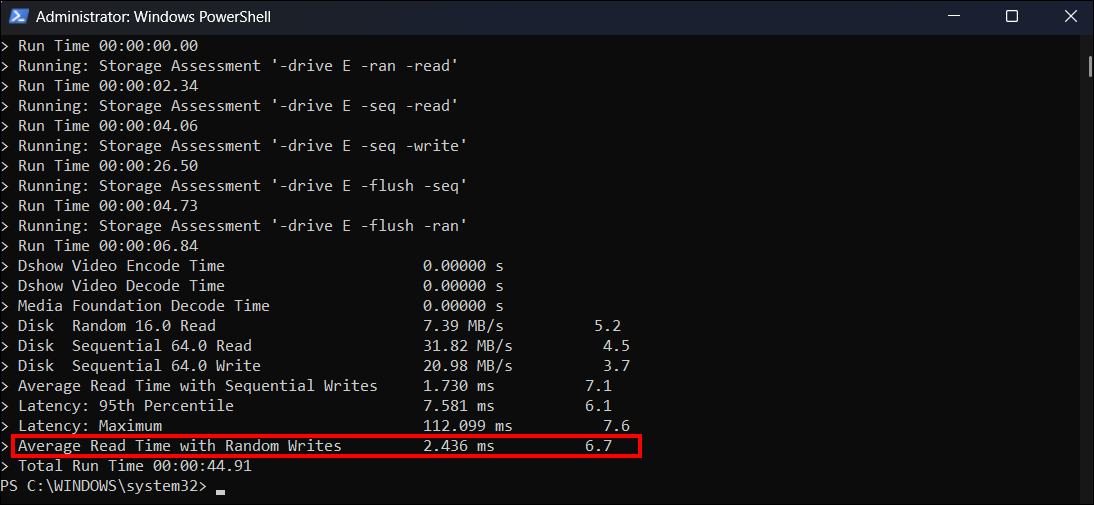
Note: The winsat report lists the read and write speeds in MB/s, the average read time in ms, the latency in ms, and the average read and write times in ms.
3. From Task Manager
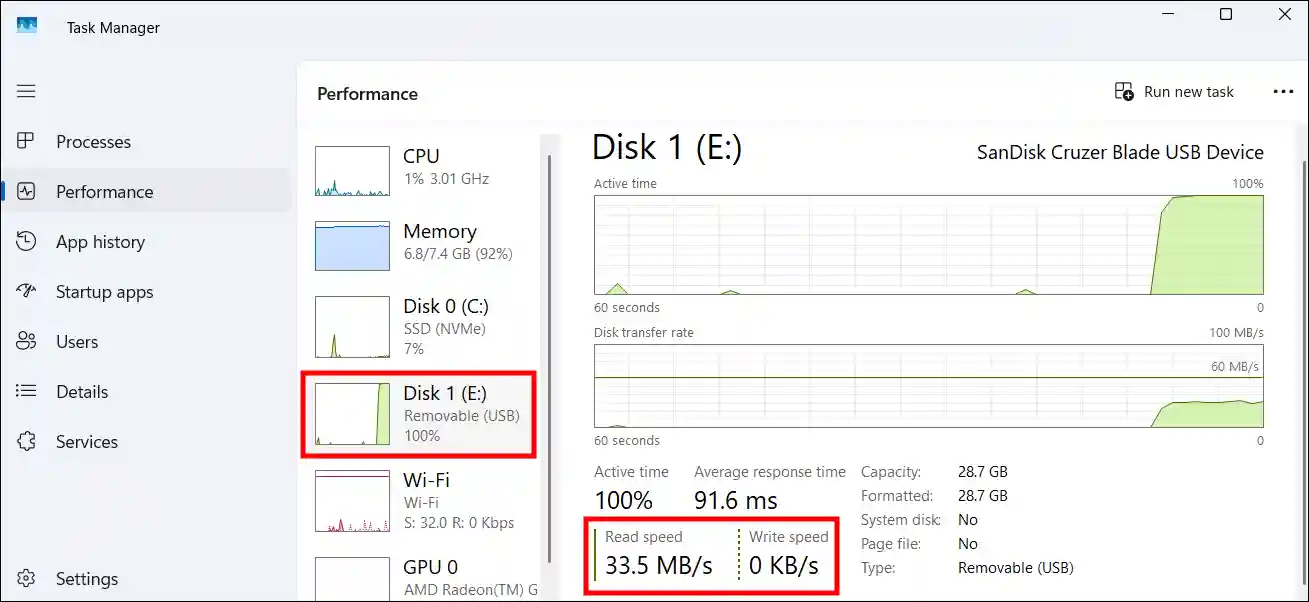
The Task Manager in Windows is a built-in utility tool that helps monitor system performance in real-time, manage running applications, and control processes. The steps are mentioned below.
To test USB drive speed on PC from the task manager:
Step 1. Press CTRL + SHIFT + ESC to Quickly Open Task Manager.
Step 2. Go to Performance Tab and Select Your USB Drive.
Step 3. Here You Can See Real-time Read and Write Speed of Selected Drive.
That’s it! You’re all done…
More Windows’ Posts:
- Find Current Computer Name of Your Windows 11 Device
- Create Invisible/Hidden Folder on Desktop in Windows 11
- Find Default Gateway IP Address on Windows
I hope you found this article helpful and that you’ve learned how to check USB speed on Windows 11. If you have any problems or questions related to Windows 11, please let us know in the comments below. Don’t forget to share this article with your friends.